
DIY BEDSIDE TABLE RESTORATION
Just a quick blog and video to show you how I’ve breathed new life into a pair of old bedside tables which were destined for the scrap heap. You could say it’s a bit niche, but I think there are some interesting ideas and techniques in this blog and the video below, that you could use for your own projects.
You might have been following the gradual refurb of our bedroom through my vids over the last couple of years, and with the floor down, walls painted and fitted wardrobe built and bed made from scratch, we turned our minds to the bedside tables. We were keen to replace these two, I’m guessing indonesian teak bedside tables bought about 20 years ago, with sides falling off, ill fitting door, dodgy hinge rebating, unmatching hinges, and generally poor build quality. But during lockdown we literally couldn’t find anything suitable online, so I decided instead to see if I could refurbish the old tables we had.
Today's Toolkit
Shokunin Japanese Crosscut Saws 240mm and Dovetail Saws 240mm
Treatex Colour Tone Ebony
Treatex Colour Tone Dark Oak
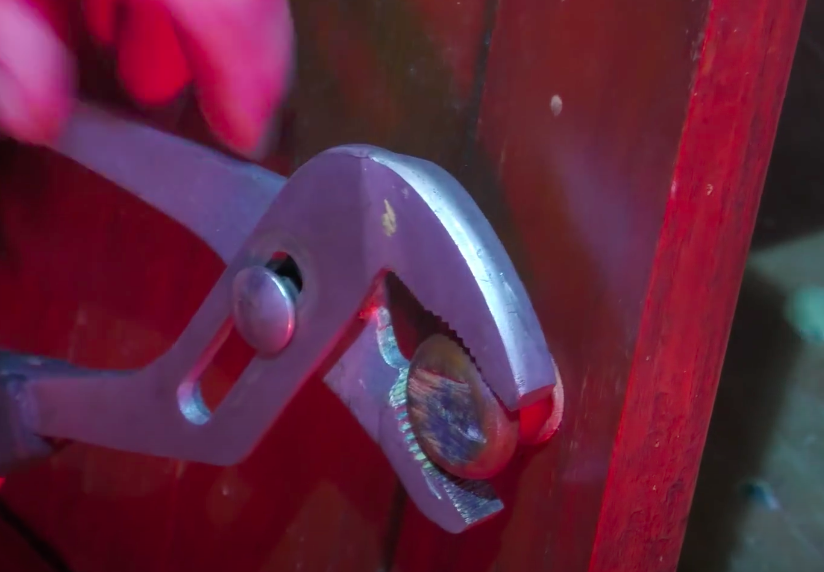
Removing the Hinges
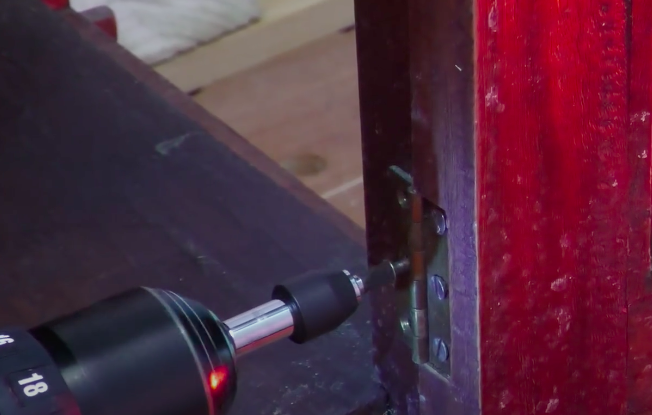
The first job was to remove the hinges, which is painstaking when you’ve got slot headed screws like this with little purchase on them, and in the case of this one a screw that just snapped when I tried to remove it.
The bedside tables had these novelty details on the joints (essentially fake tenons - some of which had completely fallen off) so I decided to remove the remainder to give the table a cleaner, smarter, less busy appearance. To cut them off I used my japanese kataba cross cut saw, which I discuss in a previous video that you can find here. Unlike western saws they cut on the upstroke rather than downstroke, have super fine sharp blades and can achieve amazing flush cuts like you see here. You can achieve a similar job with something like an Irwin floorboard saw, but these two japanese saws prove their worth time and again.

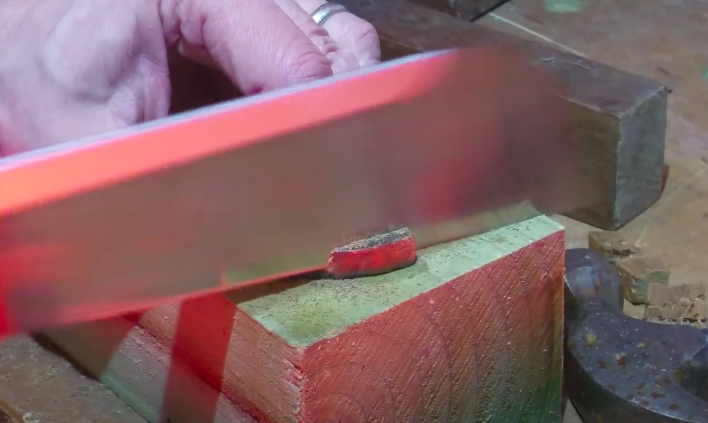
Removing the fake tenons
I then took my japanese tatebiki dovetail saw and cut down one of the tenons I’d just removed, giving it a quick sand on my random orbit sander, and after applying a bit of pva glue, then hammered it into one of the empty holes left by the tenon that had fallen out, and repeated this process for the other holes. I also hammered in a small piece into a gap, although this could also be achieved with some coloured filler, more on this shortly.
I should have also used these saws to cut the knob off, as in twisting it free I’ve made a mess that I’ll also have to repair later.
Stubborn stain removal

The cupboard had some glue or other residue inside, and I used a bit of Multisolve spray to remove this. Here is a link to my video on YouTube showing the benefits of this stuff. Well worth having a can of this in the house for removing sticky label residues and other stubborn stains.
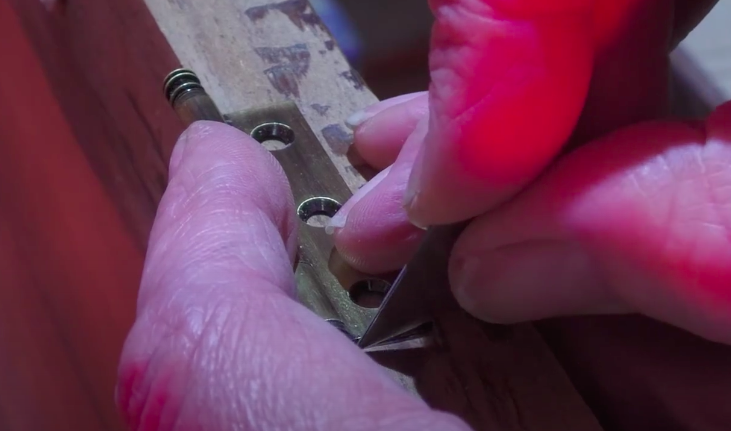
screw removal trick
In removing the old roller catch from the door the slot on one of the screws was just too shallow for the screwdriver to get any purchase on, so I made it deeper with a junior hacksaw - just a little trick for you to keep in mind if you ever encounter a similar problem.

The next job was to sort out a problem whereby the floor of the cupboard projected too far forward for the door to shut. I then scored a line on the floor of the cupboard with my bradawl, hastily sharpened a rather blunt chisel, and trimmed the base back, not with complete precision, but I’d tidy that up with sandpaper in a bit.

And back to the door, it was onto the hinges. So at this point I decided to fill the ridiculously deep rebate, rotate the doors 180 degrees so I could cut a fresh rebate on the other side and make a feature of the repair - as in any event we wanted the doors to open from the other side for easier access from the bed.
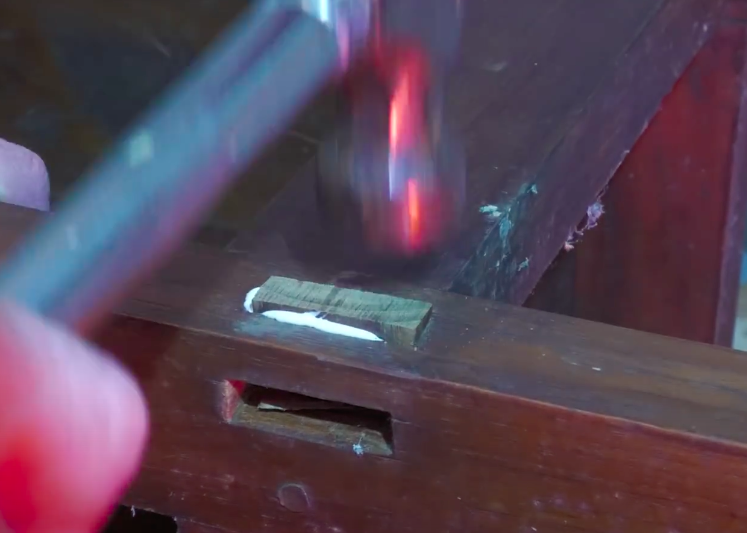
I had this drawer left over from when I converted an old victorian side board into a double pedestal wash unit. It’s oak so not a complete match but I thought it would do the job. So I cut a piece off the drawer, gave it a quick sand and gently tapped it into position also with some pva wood glue. The second one needed a bit more sanding with my belt sander - it’s a great tool this for fine tuning stuff like this, and once in place I clamped them both and brought them inside to set overnight.

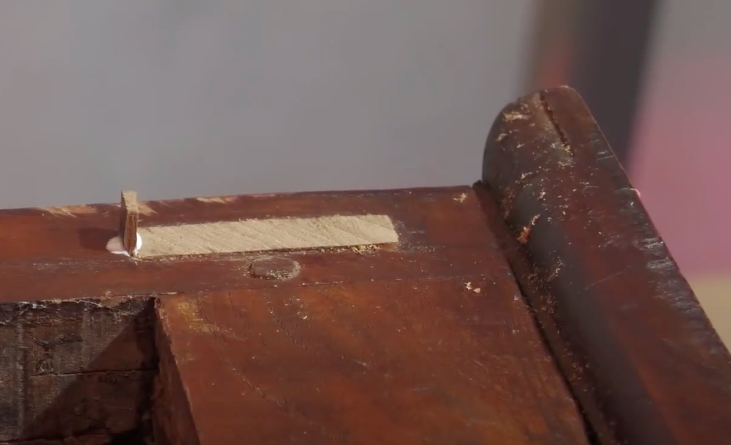
And then it was out with one of my favourite old tools - this Stanley vintage block plane (£20 from eBay!), to plane the inlaid pieces down flush. Watch my video here all about the benefits of a block plane.
With that done, I could sand the door with my random orbit sander - a tool I’ve been using for about a year now and which I couldn’t now manage without - if you’re thinking of getting one, I can’t recommend it highly enough. I’m using a 180 grit sand paper consistently across the whole table - because if I don’t do this, the stain won’t take consistently (as I found out to my cost when staining my bedroom floor).

You might have seen my How to Make a Cyclonic Dust Extractor video, but simply connecting the sander up to a vacuum or the cyclone if you’ve got one is enormously effective at eradicating almost all wood dust. To get into the corners, I used a triangular bit on my multi tool to get into the corners, again using the same 180 grit sand paper - which I trimmed off a circular sheet to ensure I was using exactly the same sand paper everywhere.

And then it was onto the rest of the table, planing off the bulk of the tenon off cuts with my block plane and finishing them off with the random orbit sander. I also used a block of wood with some 180 grit wrapped around it, to get a consistent sand into the 90 degree corners and on the lip of the table top.
Back to the door and it was time to repair the hole left by that twisted out knob, so I drilled out the hole with a 10mm lip and spur bit, cut off another small wedge of wood from the old drawer, and then shaped it into a circular plug, by eye, using my belt sander. With that done, again, a bit more pva glue and the plug could be hammered into place. The next day, with the glue dried, I chipped off the bulk of the plug with a sharp chisel, and then planed down the remainder. Wood workers would be critical of the planing on the surrounding surface, which could be reduced or eliminated by sharpening the blade with a barrel shaped camber roller like this but I don’t want to put a camber on my block plane blade and anyway, this was quickly removed with the random orbit sander.
hOW TO REBATE A HINGE
So, time to show the original makers of this table how to properly rebate a butt hinge. I used to rebate butt hinges the traditional way with a chisel, but since getting my trim router I find it so much easier to cut the hinge recess with this tool, and again, I recently did a video showing this in operation, check it out here.
Remember, I’d flipped over the door so I had fresh wood to work with, and I laid out the new hinges, bought from Ironmongery Direct, on the door, and marked out the edge of the hinge first with a pencil so I could see this through the guard of the router, but also with a razor blade as this gives you a much more accurate line to work to with the chisel.
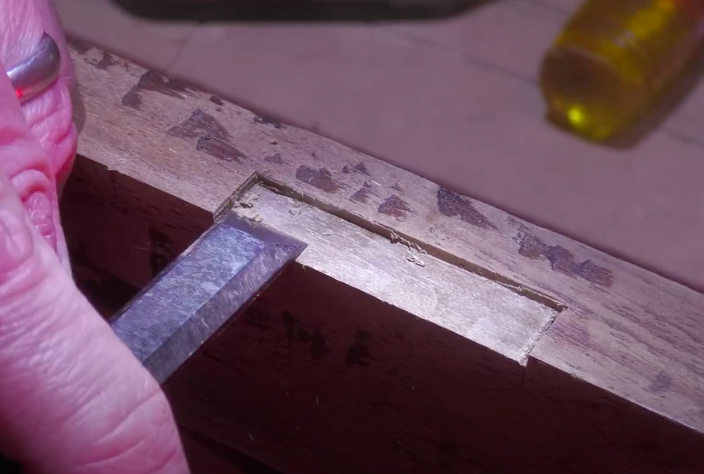
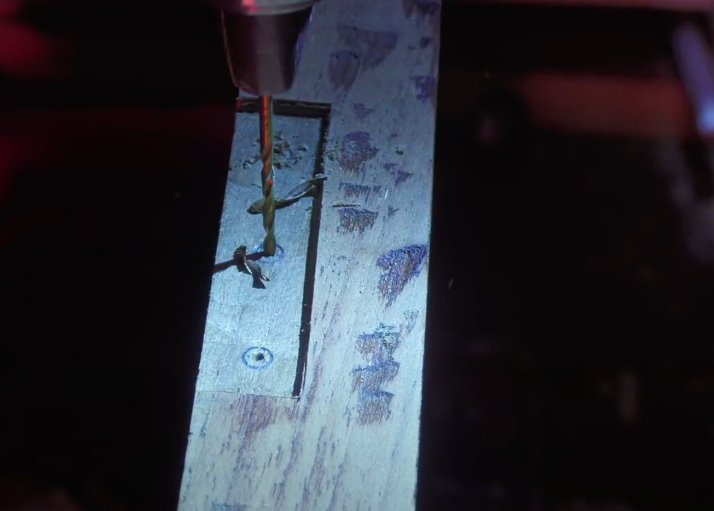
I clamped a sacrificial strip of timber to the edge of the door to give a larger surface for the router to prevent it rocking and then removed the majority of the rebate with the router and then the remainder with a chisel. With the rebate complete and the hinge fitting snugly I could mark the holes for the screws with a pencil, and then bradawl, and then drill a pilot hole. Even with this method you can get the holes a mm or two out, and so it’s about time I bought a hinge drill bit which self centres the screw holes. The eagle eyed amongst you will also notice I’m using a PZ2 bit here where I should have been using a PH2 bit. The time for me to get glasses has arrived!
I used a glazing packer to put a space under the door, which in hindsight could have been the next size up for a slightly wider gap, but the gap we ended with was sufficient. With the door in position I could mark the hinges on the door frame, and then rebate them in the same way as I had for the doors, this time without the extra piece of wood clamped on as the door frame was sufficiently wide for the router base not to rock.

We were nearly there. I used some dark oak two part wood filler from Morrells to fill some gaps in the door frame and a few other minor imperfections. Once set, I sanded the excess filler with my random orbit sander.
Fitting the roller catches
I had some new roller catches, again from IronMongery direct, which required a new piece screwed to the inside of the door frame to mount them on, and I fashioned this from another old shelf unit I had lying around. This is why carpenters find it so hard not to hoard wood!
Once this was drilled and screwed in place, I could mark the position of the roller catch, made infinitely easier by the side of the bedside table still being off but this didn’t stop me getting it in the wrong position first time round! The doors had never shut properly or engaged with the door catches and it was so satisfying to see them now shutting and engaging so beautifully.
So it was finally time to glue the side of the table into place, which again I did with the PVA. And the penultimate job - drilling and fixing in position the new door knob, again sourced from Ironmongery Direct.
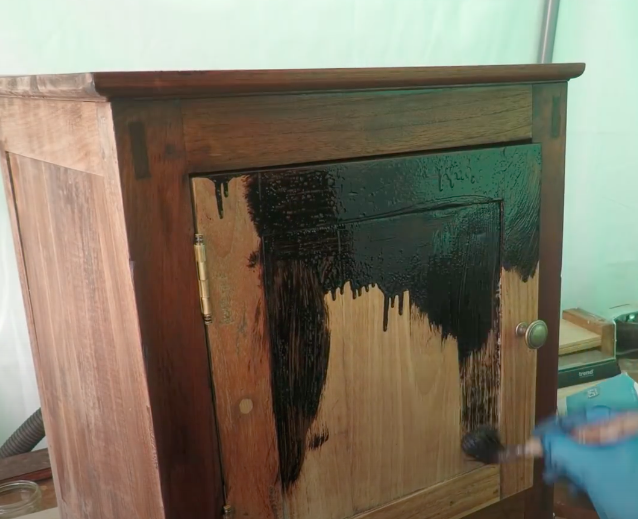
Staining with treatex colour tone

The final job was to stain and seal the table. I’d considered using a dark Briwax for this, but in the end decided that, as our bedroom floor had been stained with the brilliant Treatex, I’d use the same stain on the bedside tables in the hope they’d match the floor. As with the floor, I mixed a bespoke colour ⅓ ebony ⅔ dark oak to obtain the colour I’d used previously - which conveniently matches the only original feature of our old victorian cottage - the oak hallway.
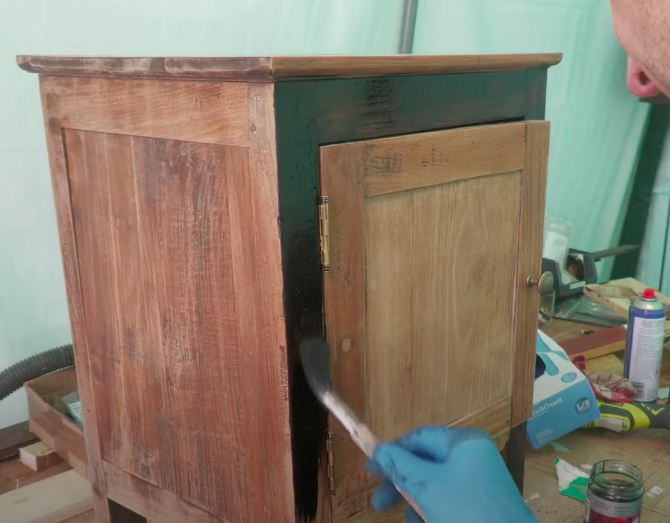
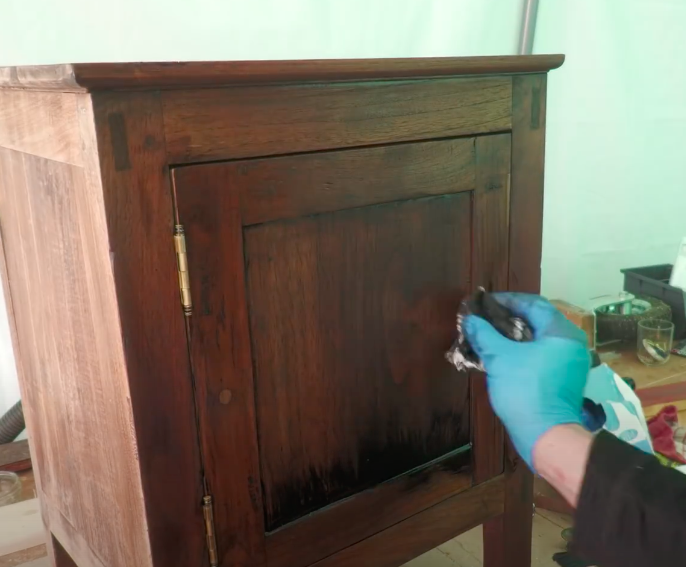
The Treatex is a joy to work with and has a wonderful beeswax smell to it. You roller or paint it on and then wipe away all the residue which reveals the natural grains of the wood. I knew as soon as I started wiping off the excess that I’d made the right decision using the Treatex. 24 hours later, it was time to apply the matt finish oil, to seal the table and complete the job.
You’re probaby thinking why haven’t I taken the hinges off? I should have done really. But it’s very easy to damage the heads on the screws being quite a soft metal, so thought I would try to leave them in.
Then I wiped off the residue leaving the grain of the wood below.
And after a quick stir with my excellent paint mixer, it was on with the hard wax oil in a matte finish using my paintbrush and roller.

So that’s it for today, job done!
I hope you’ve found this useful. As I said at the start, it’s a slightly niche video, but with any luck this has maybe inspired you for a project with something you were thinking about throwing away. Gain satisfaction, save money, and breath new life into old furniture.
See you soon! Once again, massive thank you for reading and watching. Feel free to leave a comment below and let me know how you get on with your own project.
Oh, and if you’re new to my YouTube channel, click on the link here to subscribe!
As usual, I’m always looking for ways to make this sustainable now I’m doing it full time, so if you like my content and to help me keep providing it here on this channel for free, I would be so grateful if you could visit my Patreon page, to support me. For just £5 per month, you have daily contact with me through my Discord member forum behind the scenes videos and automatic entry to my free monthly giveaways. Please click here.
* The Amazon links above are affiliate links. It doesn't cost you anything to click on them but I do earn a small commission if you do.
And here's the legal bit I have to state: As an Amazon Associate I earn from qualifying purchases.