
Dishwasher Float/Flood Switch replacement
18 months ago, I did a video showing how I replaced the drain pump and door seal on my 11 year old dishwasher (which you can watch here).
A couple of months later, the drain pump switch overheated. I replaced it, choosing not to do a video on it at the time.
It’s just failed again, and so I want to talk about the replacement, but with that I’m going to pose a big question to you all - just when is a machine too old to repair?
IDENTIFYING THE LEAKS
So the problem when I last replaced the switch was that I didn’t think to question why it had failed or in fact whether it had failed. I simply replaced it and put the machine back together. The switch activates for one of two reasons - when water in the bottom of the machine rises to a certain height, the float is raised automatically triggering the switch and therefore the drain pump.
However there’s also a polystyrene float that sits on the tray underneath the machine. If anything is leaking in the machine, chances are water will end up pooling on the tray, and bingo the float rises, and triggers the pump. There’s no drain on the tray so the pump doesn’t switch off. That’s when you know you have a problem.
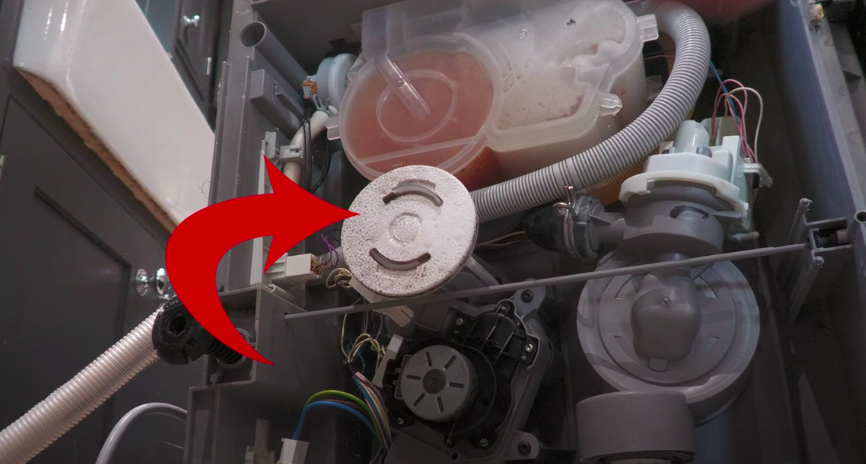
And leaks I certainly had - two in fact. I identified these by jacking the machine up on wooden blocks and watching it during a short cycle. No need to put the bottom tray back in because the polystyrene float is redundant with the tray off. One leak came from the housing on the side of the machine that circulates water around the machine and the other from the seal that connects the circulation pump to the dishwasher sump. When I tipped up the machine, there was a lot of water in the tray, and also deposits left on the tray. I didn’t focus on this in my last video but there was some early evidence of leaking .
And at this point I started to question whether it was worth repairing the machine again, particularly given that the leak on the O-ring in the circulation housing was going to be difficult to fix.
When should you replace your machine?
I found a website that runs through when to replace your machine (click here to read), and they outline 5 steps to consider:
When the control board is no longer responding
When the spray arms are no longer turning
Ineffective wash - if the machine is consistently not washing dishes well despite detergent, rinse aid etc being correct and the salt topped up
If the machine stops mid-cycle
If the machine is more than 10 years old
If the cost of repairs exceed 50% of the cost of a new dishwasher
So I’m fine on points 1-3 but I’m on shaky ground with points 4 and 5. My machine is now 11 years old, and taking into account costs included to date, including a new switch -

So with the new drain switch and circulation motor seal, I’m on £167 for repairs so far, and if I spend £46 on a new upper door seal which is getting close to the end of its working life, we’ll be at £213 - very close to the 50% threshold because whilst I can’t remember exactly what I paid for the machine, it was between £450 and £500. You could also argue that the water inlet, the source of one of those leaks, is partly clogged up and could also do with replacing. We’d need to add another £32 plus postage for that!
The Repair
But anyway, I decided to order a new switch and hose seal, and I came up with a plan for the leaking connector on the water inlet. For full details on how to remove an integrated dishwasher check out my first video, a link to which is here.
Suffice to say, once you’ve isolated the mains water feed and disconnected the electrics, it’s really not a difficult job, and when you’ve done it 4 times like I have now, it really becomes very straightforward.
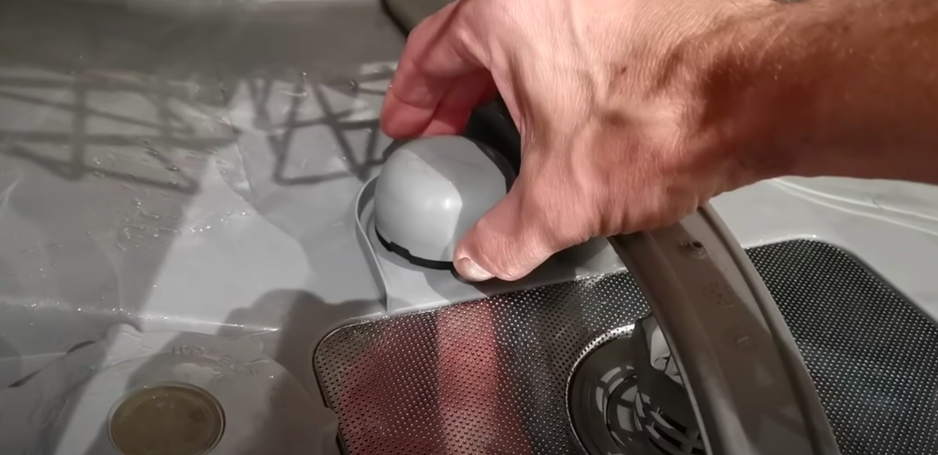
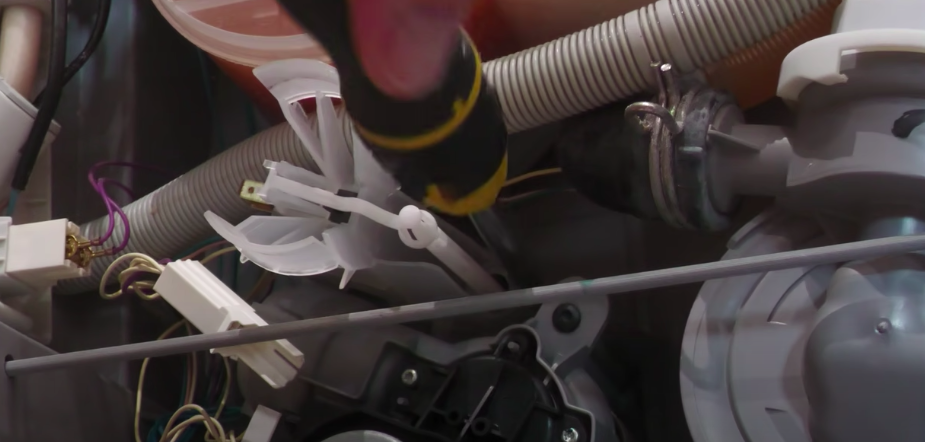
For the drain pump, or float switch, you need to remove a screw that attaches the switch housing to the base of the machine. You then need to disengage the float itself from the microswitch lever, after which you can then remove the float switch housing, and should you need to replace it, the entire float can be at this point removed from inside the machine.

Stupidly, I’ve never thought to check the switch was actually burnt out after removing the polystyrene float. You can certainly see evidence of overheating on this terminal for the original switch and also for the first replacement. So maybe check yours before ordering a new switch, by running it on a cycle with the polystyrene float removed, and the machine on blocks.

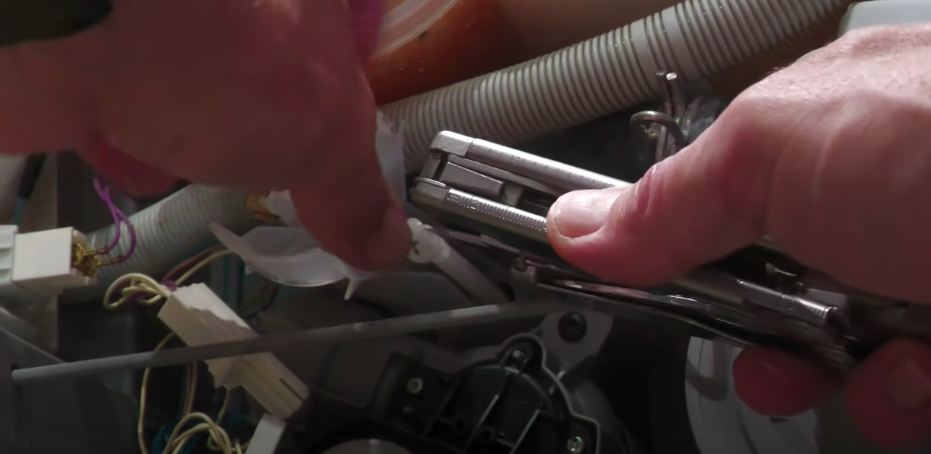
Float switch replacement
The new switch is simply slotted in, in place of the old, and the assembly can then be screwed back in place and the microswitch lever restored to the housing.
Water inlet leak fix
I then fixed the leak in the water inlet housing by piping CT1 around the entire connector. I chose CT1 because it can be used on wet surfaces and adheres to pretty much any material.

And I used a Cramer rotating silicone nozzle to get behind the connector, diverting or funneling the sealant into the connector with my finger.
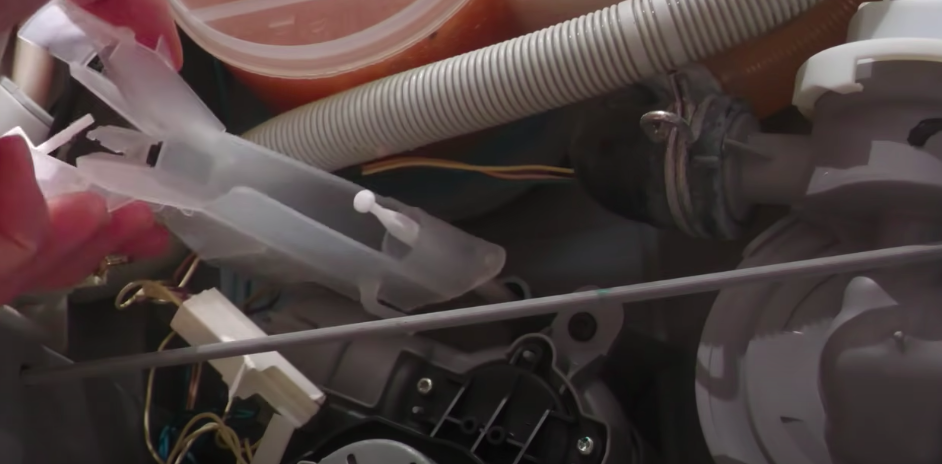
Circulation Pump Hose seal replacement
The circulation pump hose seal was a straightforward replacement. There are two rubber straps holding it to the body of the machine that are a bit of an effort to remove. But with that done, the circulation pump was free enough to be slipped out of the seal and then the seal could be removed, with the replacement Dishwasher Pump Motor to Hose Seal having arrived from E-spares.

And actually when you compare how easily the pump slipped out of the old seal, compared with what a tight fit it was in the new one, I felt fully justified replacing this part.
With the rubber retaining clips reattached to the circulation pump, it was time to run the dishwasher on a full 1.5 hour cycle (I usually put it on a quick 30 minute wash which is more than adequate for cleaning most of our stuff) to check for leaks. No leaks and that’s it, the machine fixed for another 6 months to who knows when.
If you have a drain pump switch that’s playing up, hopefully I’ve given you a bit of an insight into what might have caused it, and also a few things to consider if you’re wondering if it’s worth fixing your dishwasher this time round.
See you soon! Once again, massive thank you for reading and watching. Feel free to leave a comment below and let me know how you get on with your own project.
Oh, and if you’re new to my YouTube channel, click on the link here to subscribe!
I’m always looking for ways to make this sustainable now I’m doing it full time, so if you like my content and to help me keep providing it here on this channel for free, I would be so grateful if you could visit my Patreon page, to support me. For just £5 per month, you have daily contact with me through my Discord member forum behind the scenes videos and automatic entry to my free monthly giveaways. Please click here.
Note: the parts linked are for my Bosch SGV46M13GB/10. You will need to check compatibility for your machine.
* The Amazon links above (if any) are affiliate links. It doesn't cost you anything to click on them but I do earn a small commission if you do.
And here's the legal bit I have to state: As an Amazon Associate I earn from qualifying purchases.