
How to Board Your Loft
Recently I boarded our garage loft, and so in this blog I’m going to outline the steps I’ve taken, the tools I’ve used, and as usual, the mistakes I’ve made, to transform this space from a mouse-infested, chaotic jumble of rubbish, into this.
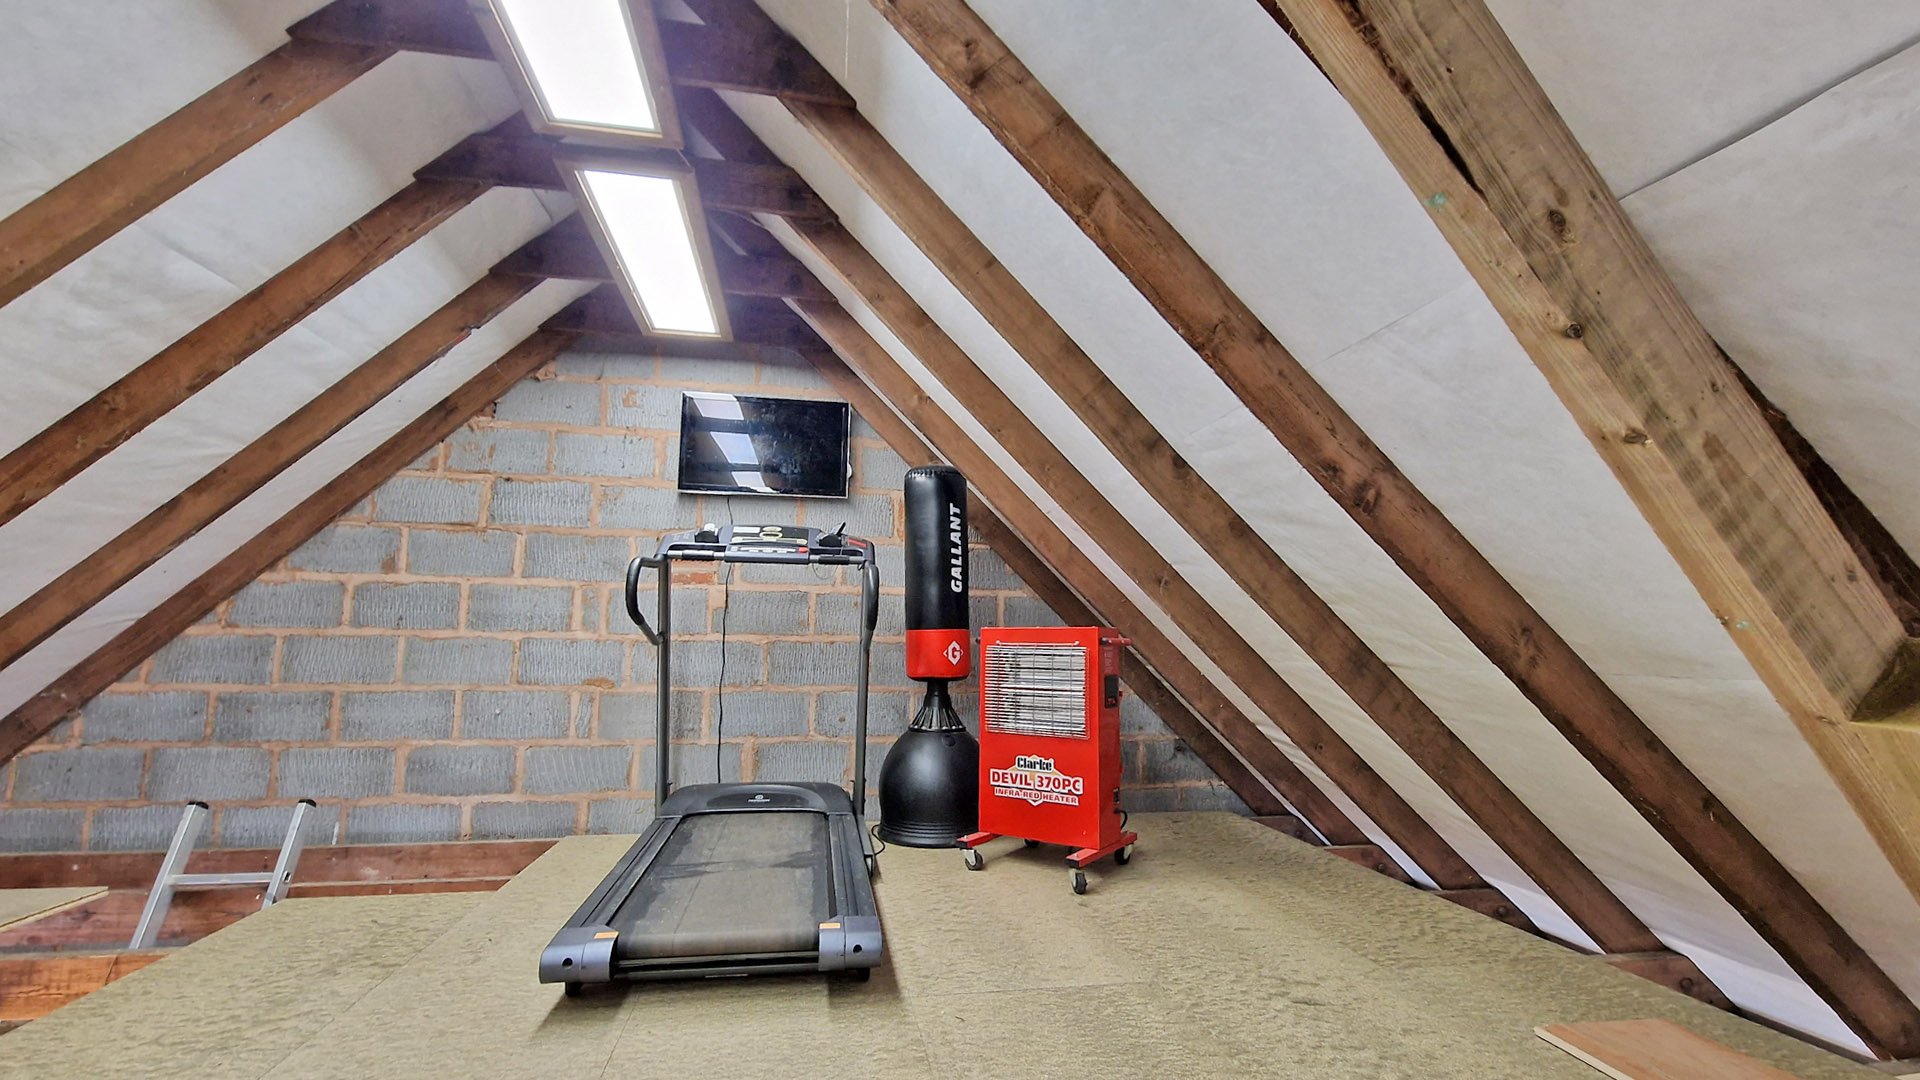
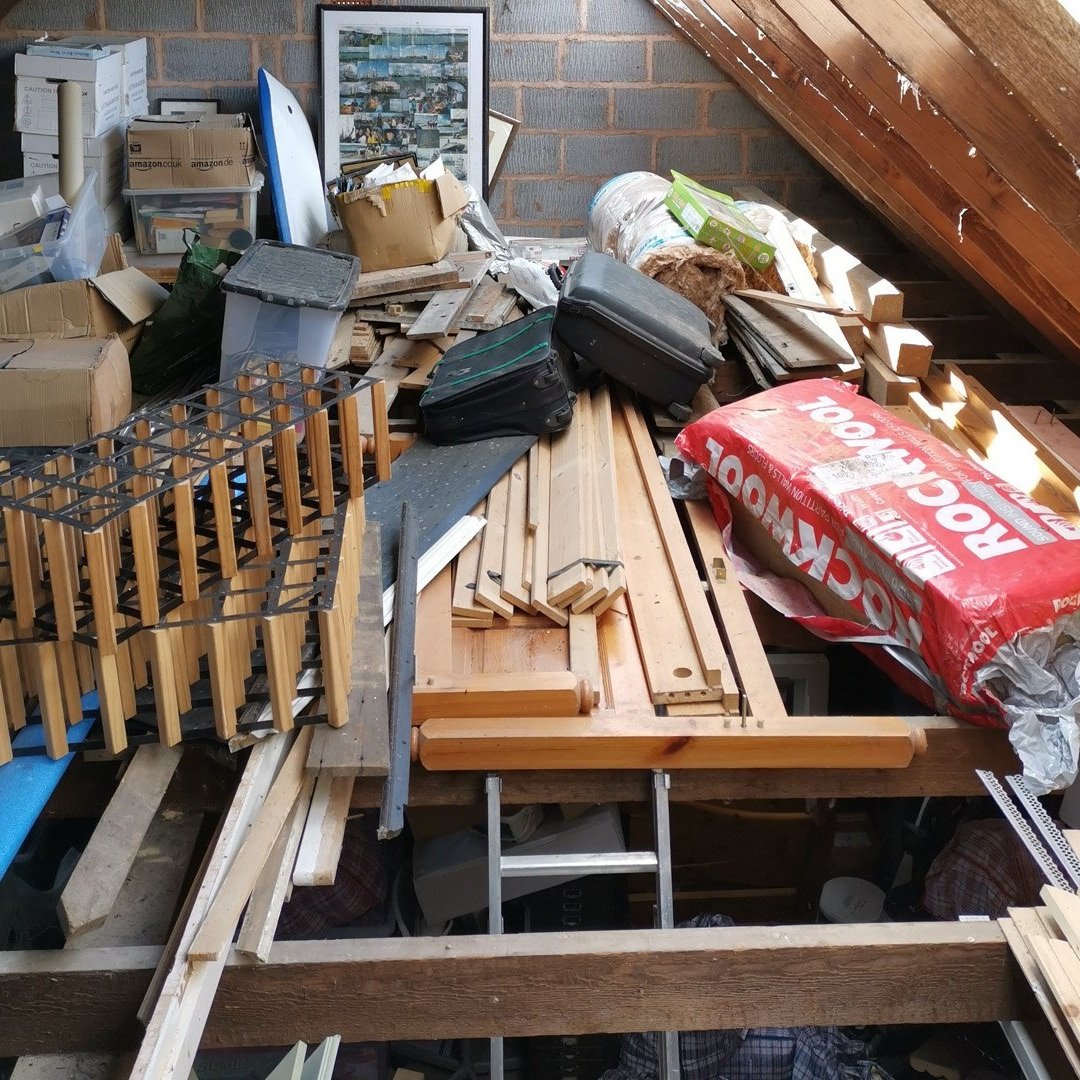
For years, this loft has been a dumping ground of stuff we should have got rid of, and it was with the light suddenly pouring in during the re-roofing last summer that I realised I needed to make more of this space. It’s become more urgent now with building works starting in a couple of weeks on the kitchen and my wife running the marathon this year and needing somewhere a bit more inspiring to set up our old treadmill.
Noggins
Before commencing the flooring, I applied Neutrarust 661 to the gently rusting RSJ. If you haven’t seen my video on how I de-rusted our 1970s guttering with this stuff in the summer, I massively recommend it, as it neutralises the rust and creates a hard, water insoluble hydrophobic film on top of the metal.
First thing I needed to think about was whether I needed any additional noggins to strengthen those joists. Well, if the span is less than 2.5m, noggins aren’t required. My span from the central RSJ to the wall plates is 2.6m, and my joists are a respectable 6x2 (150mm x 50mm), installed back in the 1970s. Adding to this, I’d be adding perimeter noggins along the edge, so on that basis I decided additional noggins wouldn’t be necessary. And the finished floor feels rock solid, particularly with the extra strengthening I’ve added for the access hatch - more on that in a minute.
Choosing your Flooring
So let’s have a look at the things you need to think about when installing flooring
Strengthening the existing floor?
With flooring ranging in thickness and quality, you need to choose a floorboard system according to the spacing of your joists. We’re going to using this room fairly often, and so with 600mm centres between joists, master carpenter Robin Clevett recommended I use 22mm P5 chipboard (tongue and groove, and moisture resistant).
So I bought this MR 22mm tongue and groove caber flooring online through Building Materials.co.uk back in May last year - the same company I used for my wardrobe build - it’s worth checking them out and I’m pretty sure Building Materials sourced it from Travis Perkins.
Caberfloor is a Norbord product - and Norbord have a very good advice sheet here. They recommend for joists up to 450mm centres to use 18mm board and for 600mm centres the board I’ve bought. I should point out I did buy my Caberfloor, although I did receive a discount for mentioning them in my video.

I also bought these Spax floorboard screws from Wickes through WeShop, which is like a cashback website but you get shares in Weshop (rather than cash).
Really pleased with them. I’m a big fan of TX bit screws and these screw in fantastically with no need for a pilot hole leaving a beautiful flush finish. I suppose I could have used tongue tite screws like I did with my engineered oak flooring in the house, but I decided that this being a garage, it wasn’t necessary to hide the screws and the Spax would provide more downward force on the boards.
Board Positioning
Now I’m going to talk about a few of the big mistakes I made on this job…
This is a bit of an obvious point to make, but it’s really important to plan the placement of your floorboards before you start putting them down. Sounds obvious, but I didn’t do that in my rush to get the flooring down for the solar inverter and battery install.
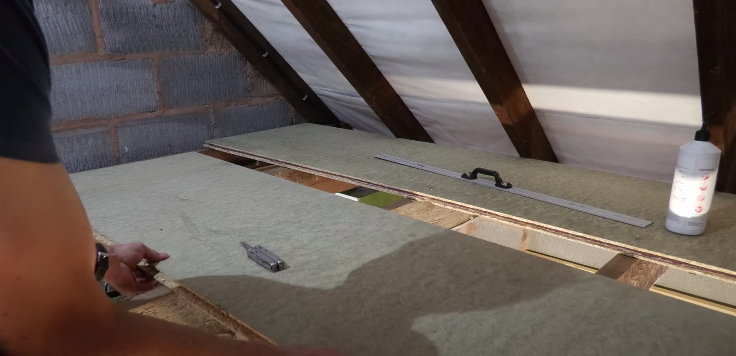
You need to measure the width of each sheet and the total span they’re covering to work out where to start. Now not only did I not do this, I also pushed my sheets of floor boarding right up against the rafters - meaning there was no expansion gap - and you’re meant to leave a 10mm gap, for expansion of the floor boarding all the way around.
So the first job was to get my chisel out and clear the 10mm expansion gap between the flooring and rafters. Had I planned this better I could have equalised the gap on both sides of the room. But instead, I’ve got no gap on the original side where I started (apart from the 10mm expansion gap), and too wide a gap where I end. I’ll either have to put in a fiddly little strip incorporating a tongue and groove, which will be a lot of wastage, or perhaps I’ll just live with it and move the perimeter noggins in a bit - more on them later.
Boards Wrong Way Up
I laid my flooring in a bit of a rush with the solar installers arriving any day, and, conscious we were going to use the space a lot, probably without carpeting at least initially, although I’ve found some old tiles to go under my son’s drum kit, I decided to put the print on the underside of the boards. However, if you look closely, it says “This Side Up”.
But, there’s a good reason for this…

The non-printed side has imperfections, and if you wanted to use hidden screws it wouldn’t be as easy to drive them in as the tongue and groove is designed to take screws the other way up.
Now the next point really makes me feel silly - these boards have been designed with an asymmetric tongue and groove - the point being, they are designed for the load to be exerted from above, and I think the specification is two kilo-newtons of pressure. So if you’ve done what I’ve done, and put your floorboards the wrong way up - DON’T!
The final point is, I suspect with the floorboards the right way up, had I decided to use tongue-tight hidden screws, the floorboarding is better set up with the screws on the top for you to screw through the tongue and groove.
Clearly, if I had my time again, I would have put the floorboards the right way up. Even with all that writing cluttering the floor.
Staggering the Boards
The third point to mention is staggering:
Tongue and groove chipboard flooring should be laid in a staggered formation, to spread the weight distribution across the joists below. The long edges should run across the joists, whilst the shorter edges should finish at the centre of the joists.
I couldn’t move the existing boards as they were glued together, so in order to stagger the boards going forward, I started cutting half sheets to end on a joist.

Now this was fine for the initial cut which went against the wall, giving me a nice tongue and groove joint on top of the joist. But my joists aren’t spaced at exactly 600mm centres meaning the other end of each sheet invariably missed the joist.
You could in this situation cut each sheet back to the nearest joist…

…meaning you support the two cut edges directly above the joist - as in fact I had to do to get the staggering started on those boards I hadn’t staggered to begin with.
But this would lead to a lot of wastage - I’ve got enough as it is.
So the obvious thing to do is not to cut the boards back, but instead to strengthen that unsupported tongue and groove end joint with 3 noggins in the shape of an H. Note: you have to do this even with 22mm sheets, and this was another bit of advice Robin gave me a few months ago.

Here’s an H section I did, just to demonstrate the point. And where my sheets ended just before the joist, I glued and screwed a noggin to the joist instead.
Perimeter Noggins
It’s a good idea to add noggins along the edge, to strengthen the joists and to support the long edge. So I set about adding noggins to the edge, but after the issue I mentioned earlier with starting the flooring too close to the rafters on the other side of the room, I’m going to have to either move the noggins, or waste the remaining few sheets, cutting off the tongue and grooved long edge so I can fill the gap.
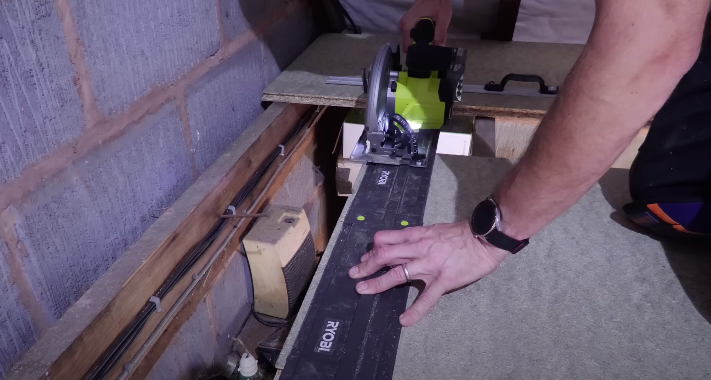
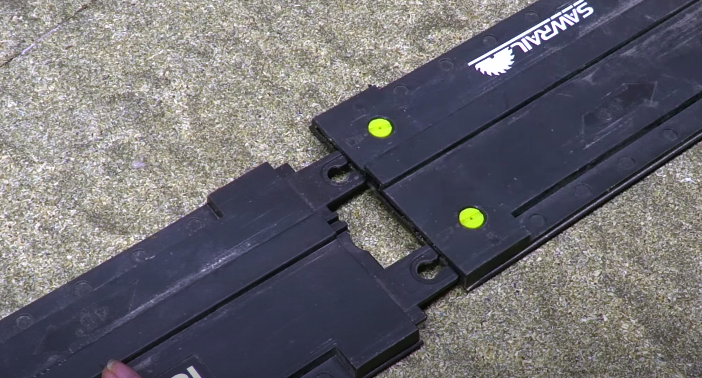
Ryobi Saw Review
Now you’ve probably seen that I have used my Ryobi HP circular saw that was gifted to me several months ago to cut the sheets. I was interested in this circular saw because they’ve made it track-compatible, but what’s really disappointing is that it only fits on Ryobi’s own plastic track, which is almost impossible to get hold of here in the UK - although I have found it here on eBay. But they’ve missed a trick here by not making the saw compatible with existing aluminium tracks, as DeWalt have with their circular saw.
Joint and Joist Glue
You’re meant to apply the glue to the floor boarding down to the joists as well as the tongue and grooving, but I just don’t know what we’ll be doing with this space, particularly if we try and convert the garage for our son who has special needs to live in when he’s older. So I decided to glue the joints only with an Egger expanding foam adhesive and rely on the considerable bite of those Spax screws to stop the floor from creaking on the joists.
I used a combination of brute force with a bit of wood and hammer, and these Irwin clamps pushing against a bit of wood screwed to the joists, to force each sheet of Caberfloor tighter together.
Access Panel
Now just a couple more things to deal with…
As I said, I will be putting in a staircase, but John (my professional carpenter mate) suggested I also install an access hatch as an easy way to bring up large items without damaging the staircase.
Initially this concerned me as my roof, constructed by the previous owner back in the 1970s, has no purlins, struts or props, and only a very small ridge collar.
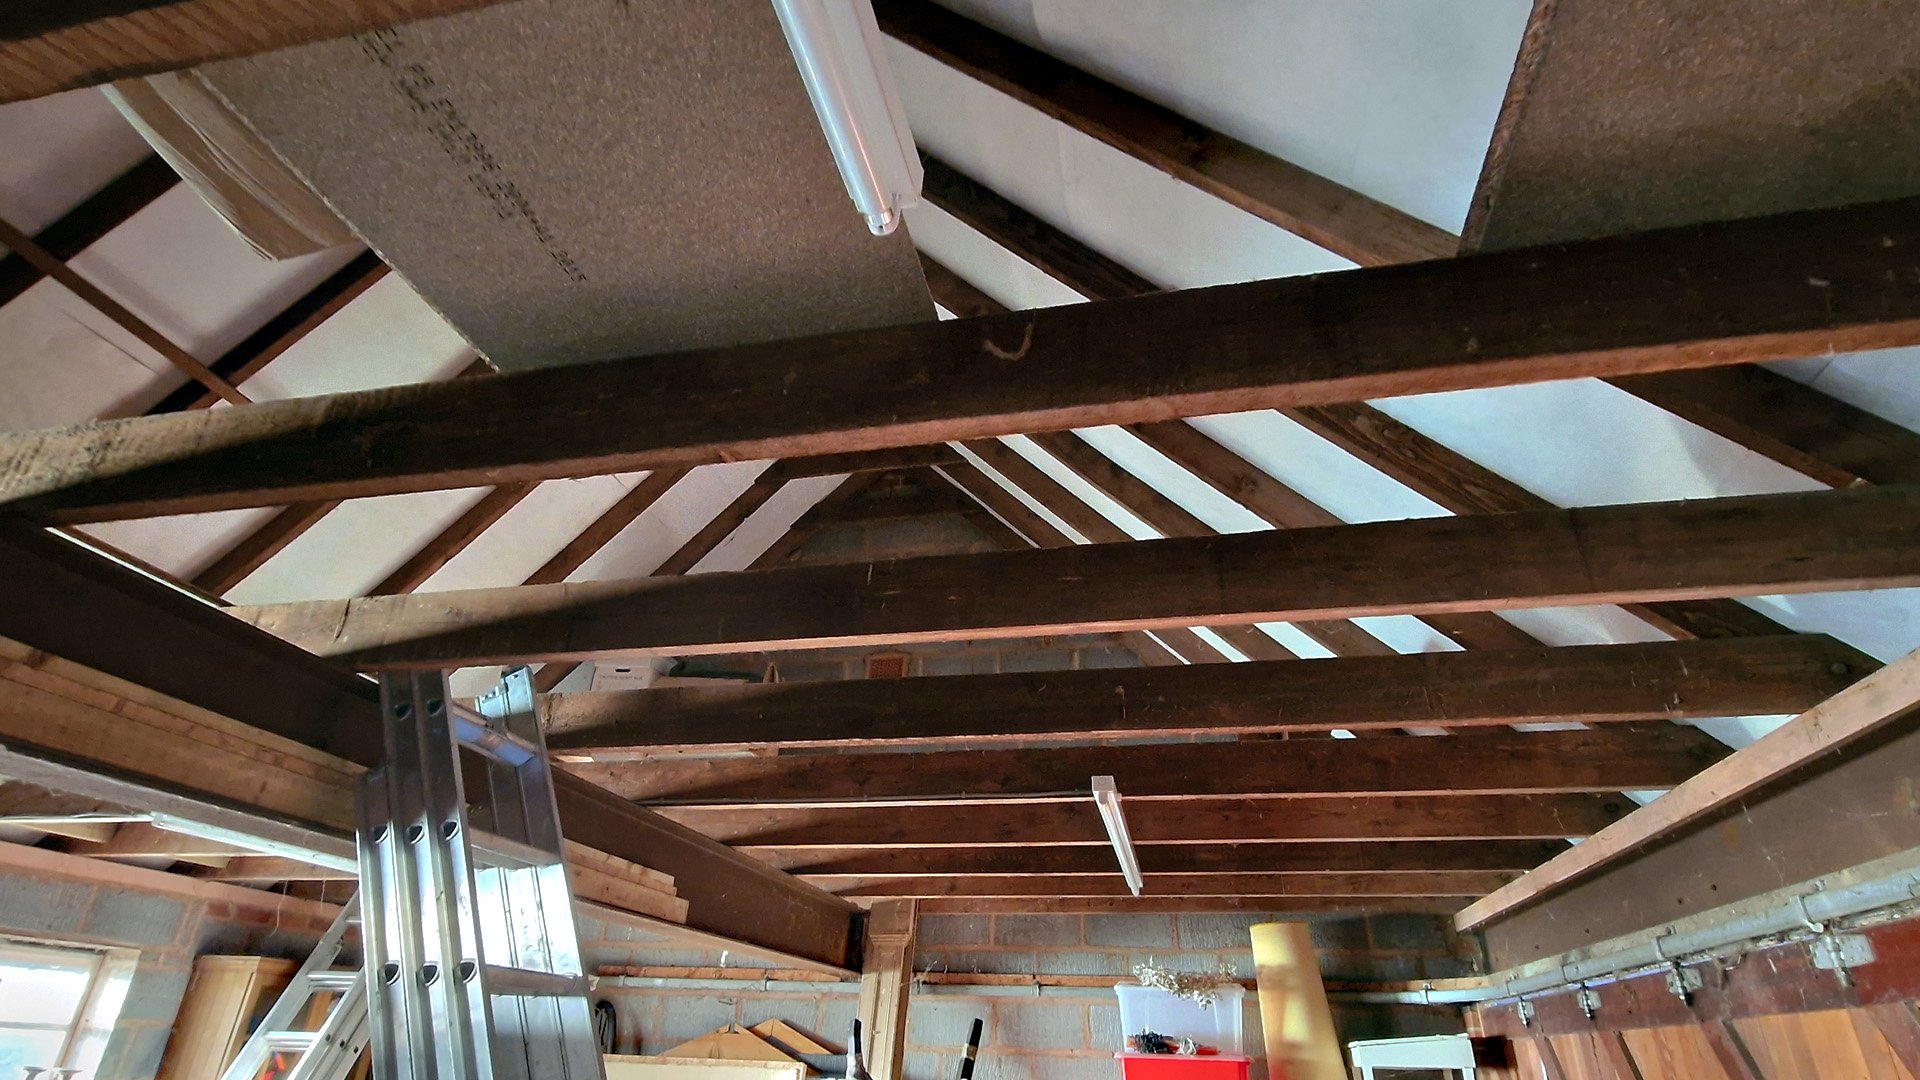
It derives all its support from the strength of those 6x2 rafters, and the rafters being bolted to each joist which itself runs the full width of the room. I was concerned that cutting into the joists might break this structure, but I consoled myself with the fact I was overengineering the hatch opening, and the cut joist would also be supported or kept in place by the screwed down floorboard.
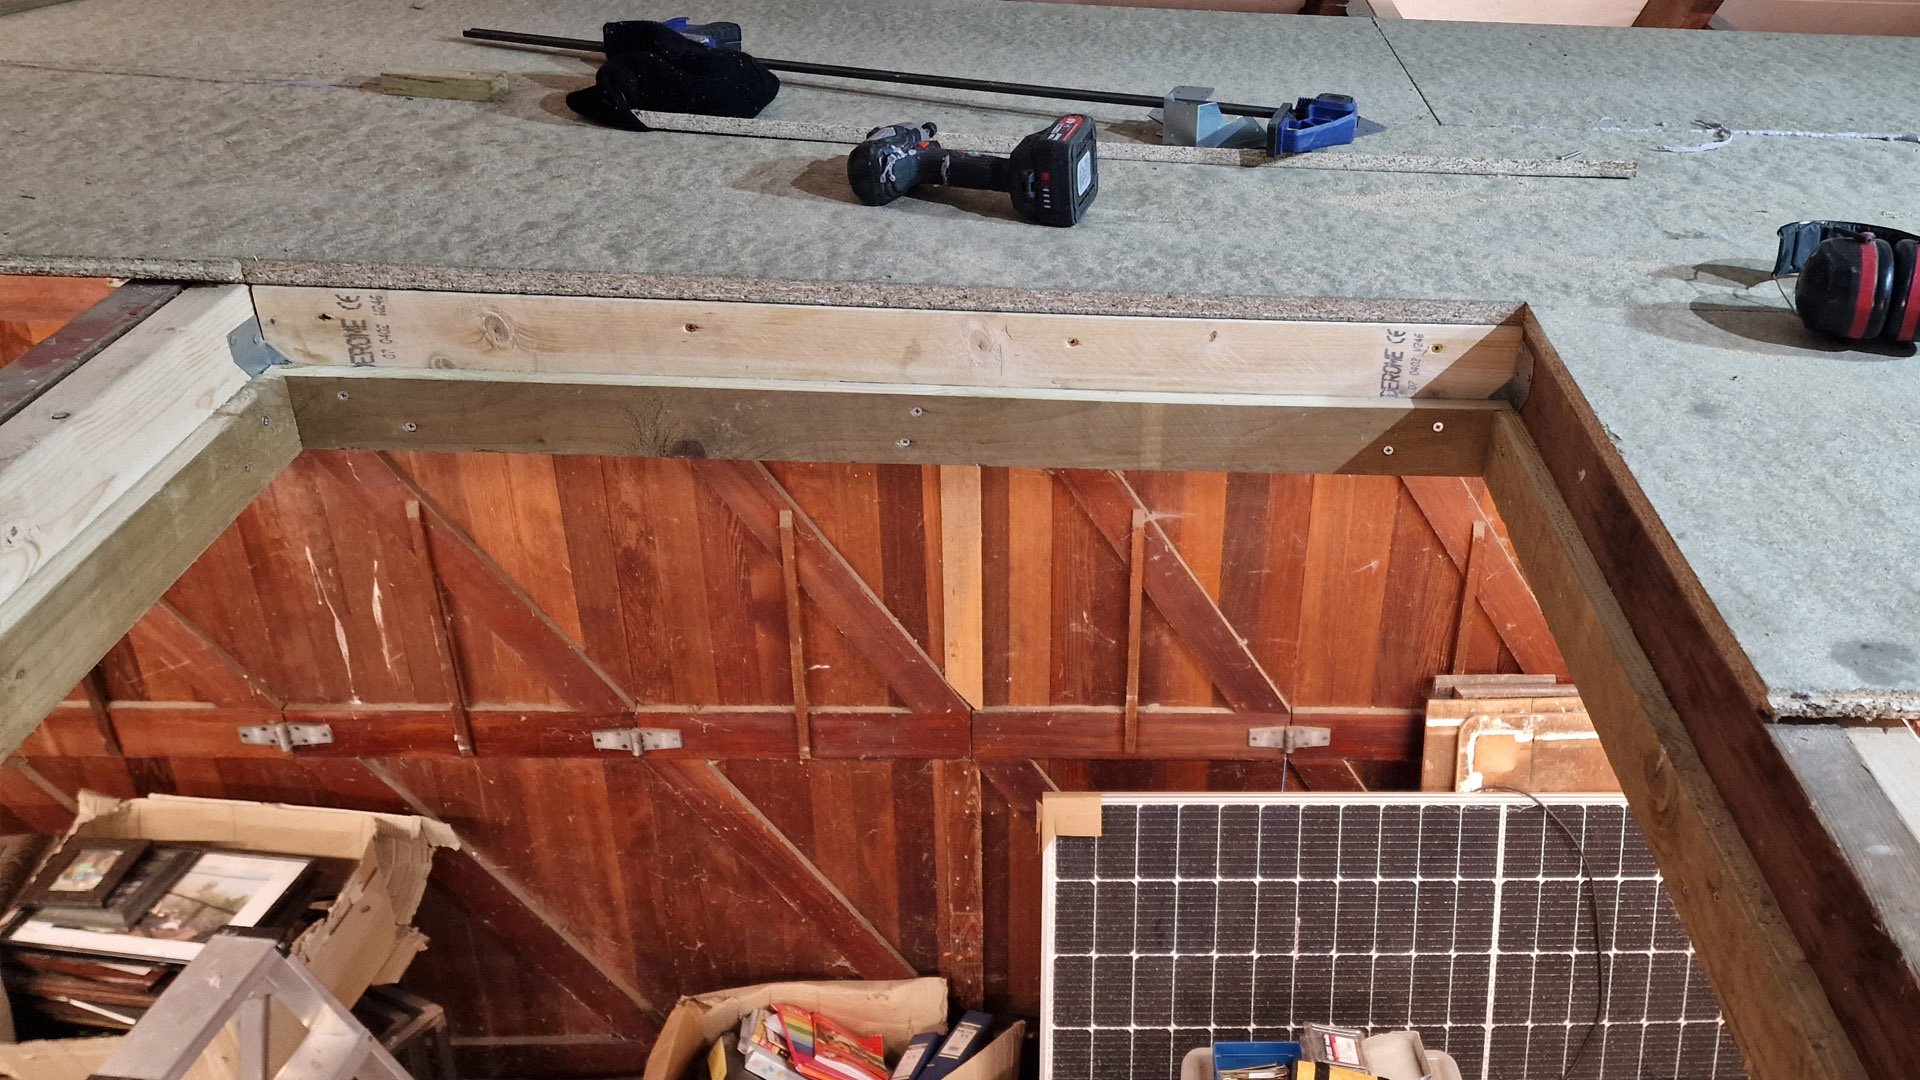
Here’s what I did:
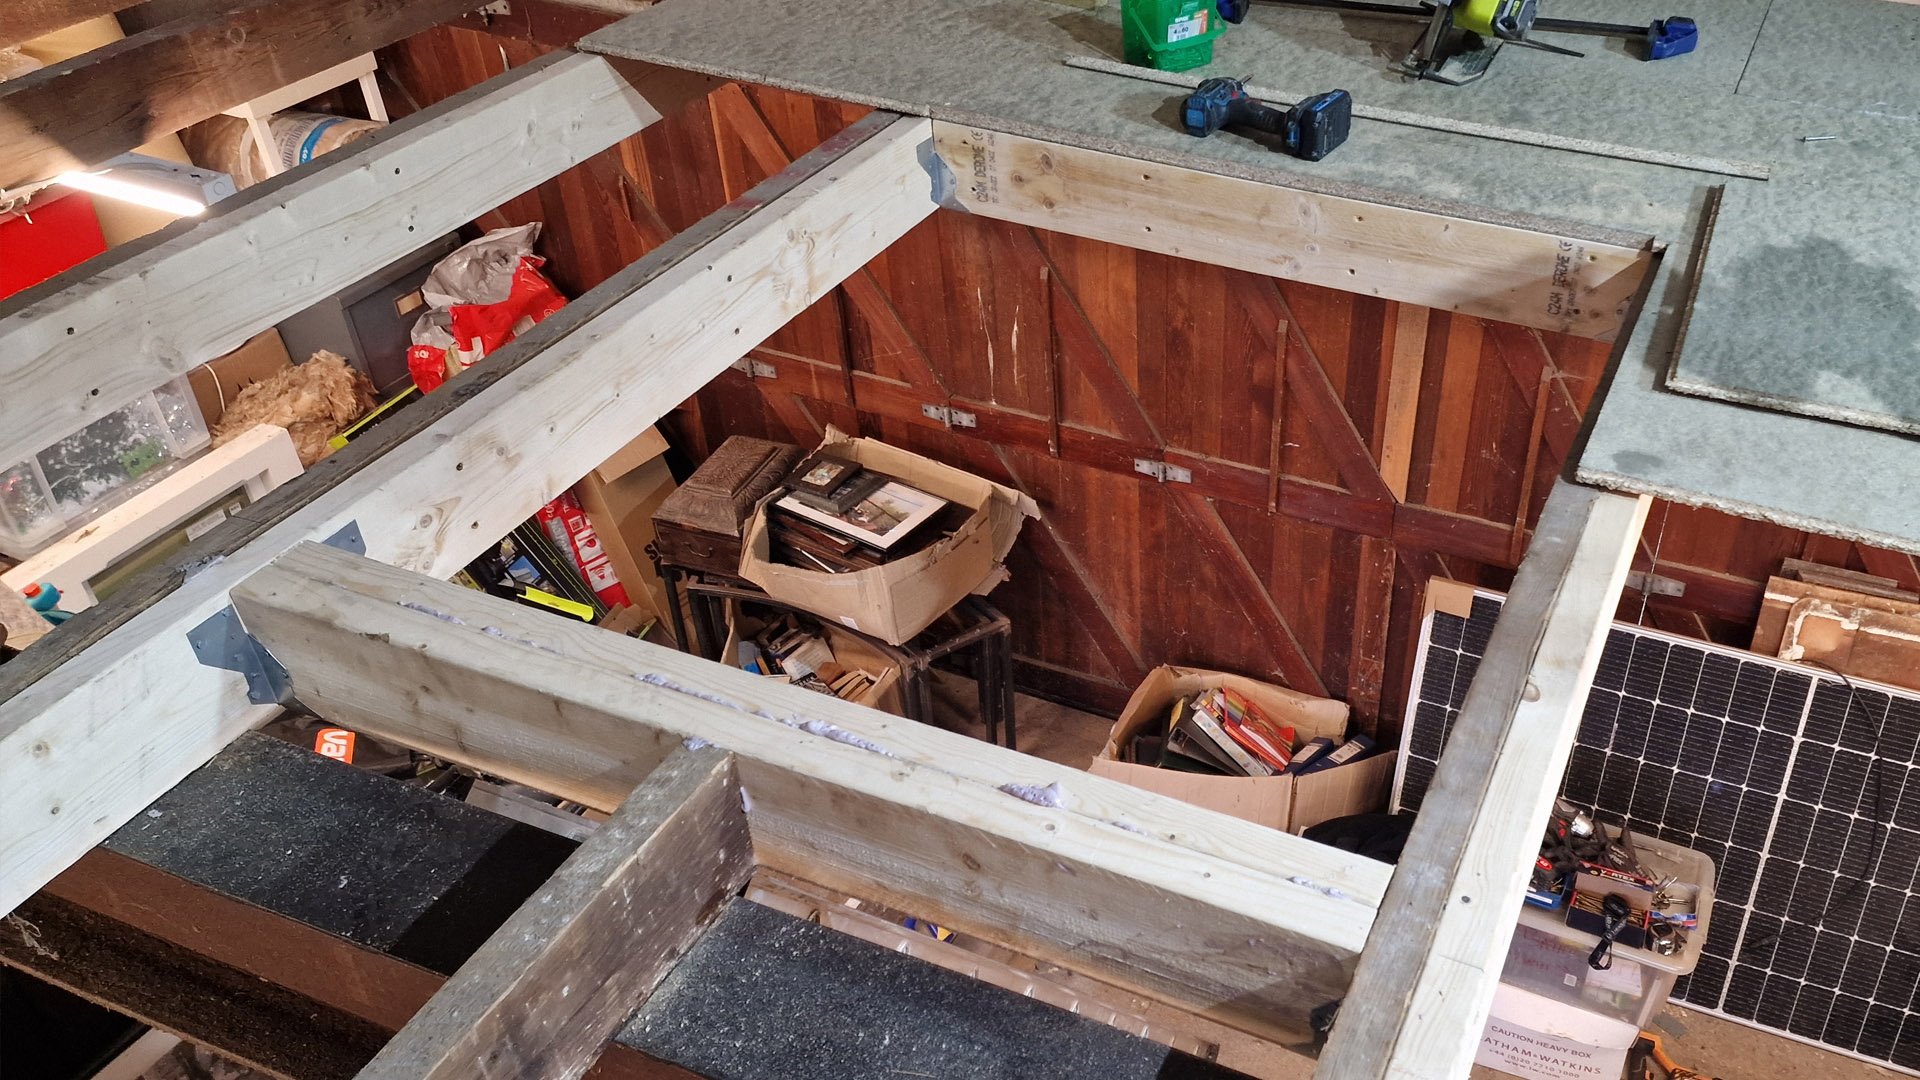
I strengthened the two joists either side of the one I was cutting out by gluing and screwing an additional 6x2 to each of them.
I originally planned to cut out two joists but given my worry about compromising the integrity of the roof structure I decided to just remove one, the second would also have led to an excessively large hatch.
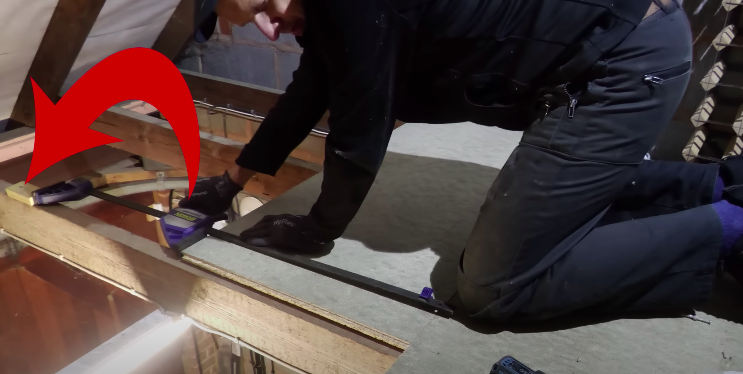
We’re told to brace the timbers before cutting them but mine were already braced by the floorboards above.
And then slightly annoyingly, I realised the newly glued down floorboard was on top of where I needed to cut the joist, so I had to cut it instead from below - which went surprisingly well, helped by using a brand new jack saw.
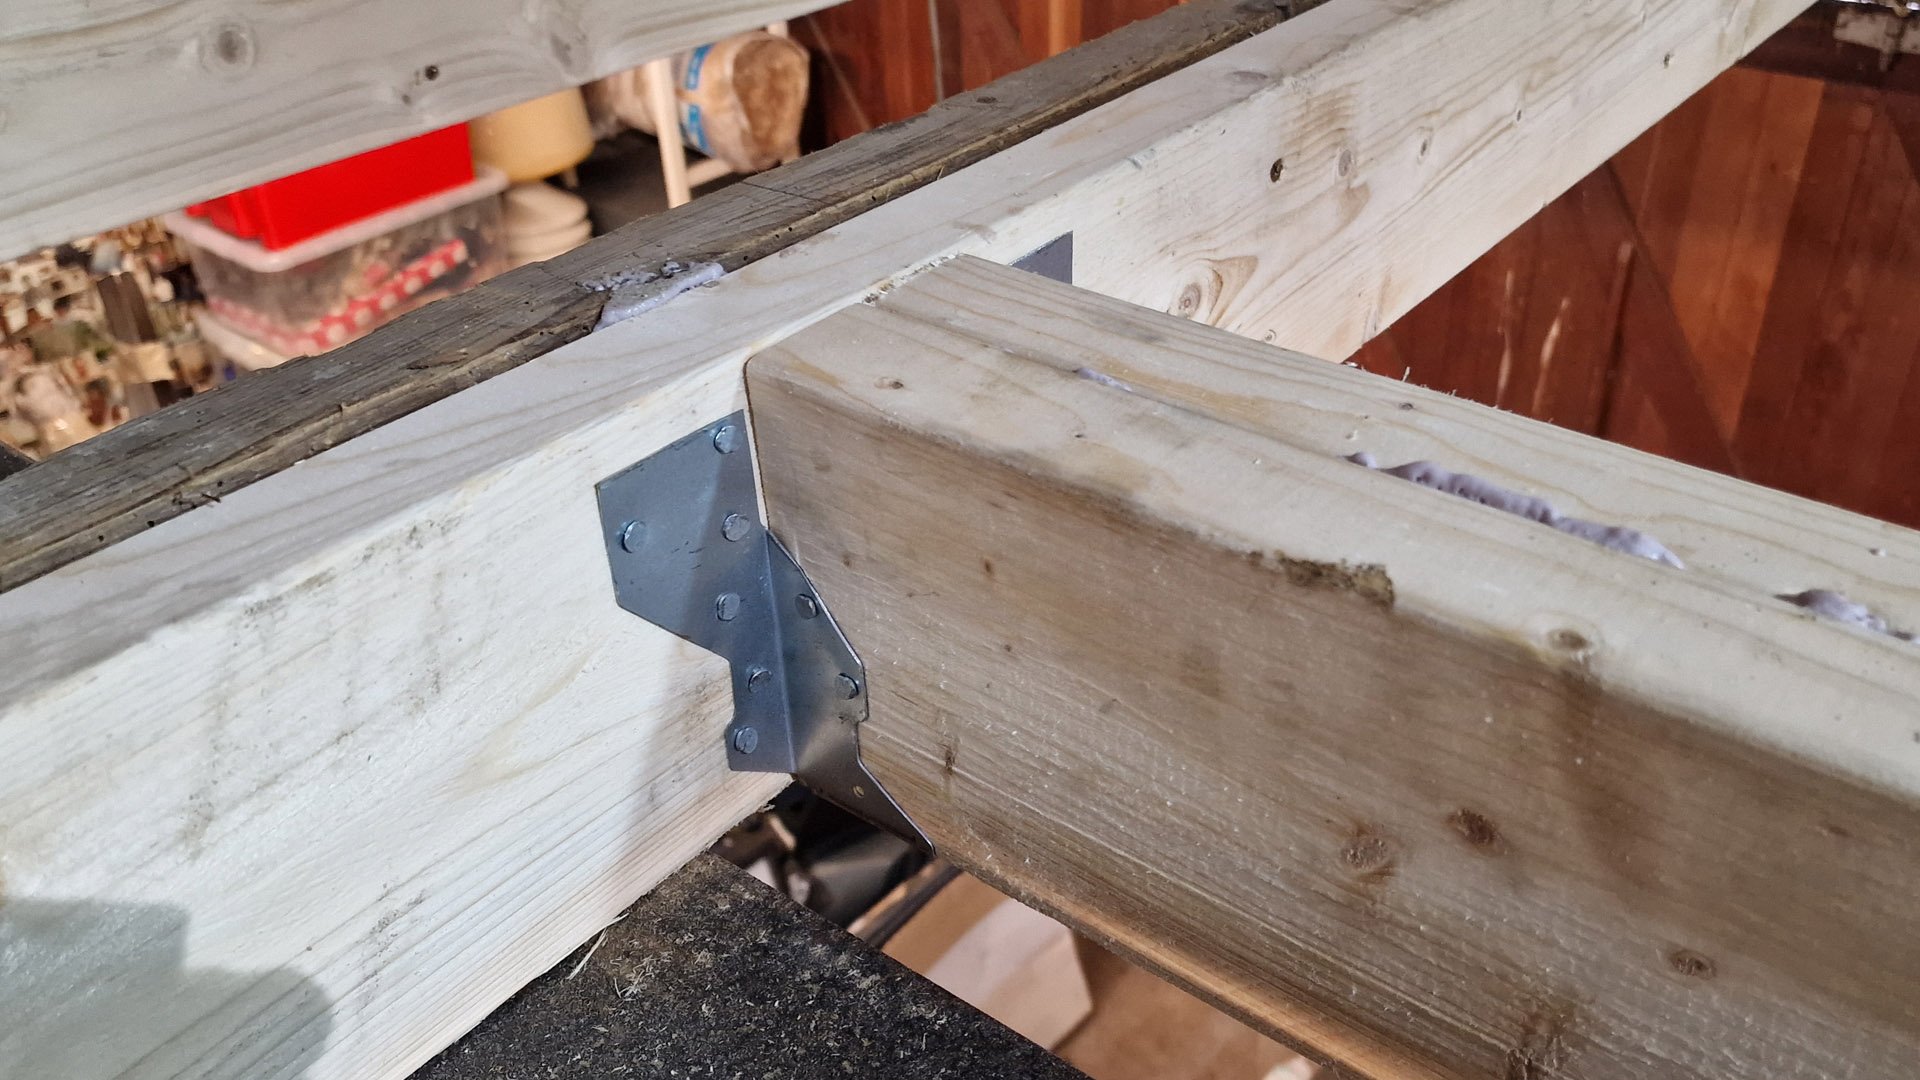
I then doubled up the end timbers, screwing the first directly into the joist I had cut, and gluing and screwing the second end timber into the first. Each end timber was then screwed securely to the doubled up joists.
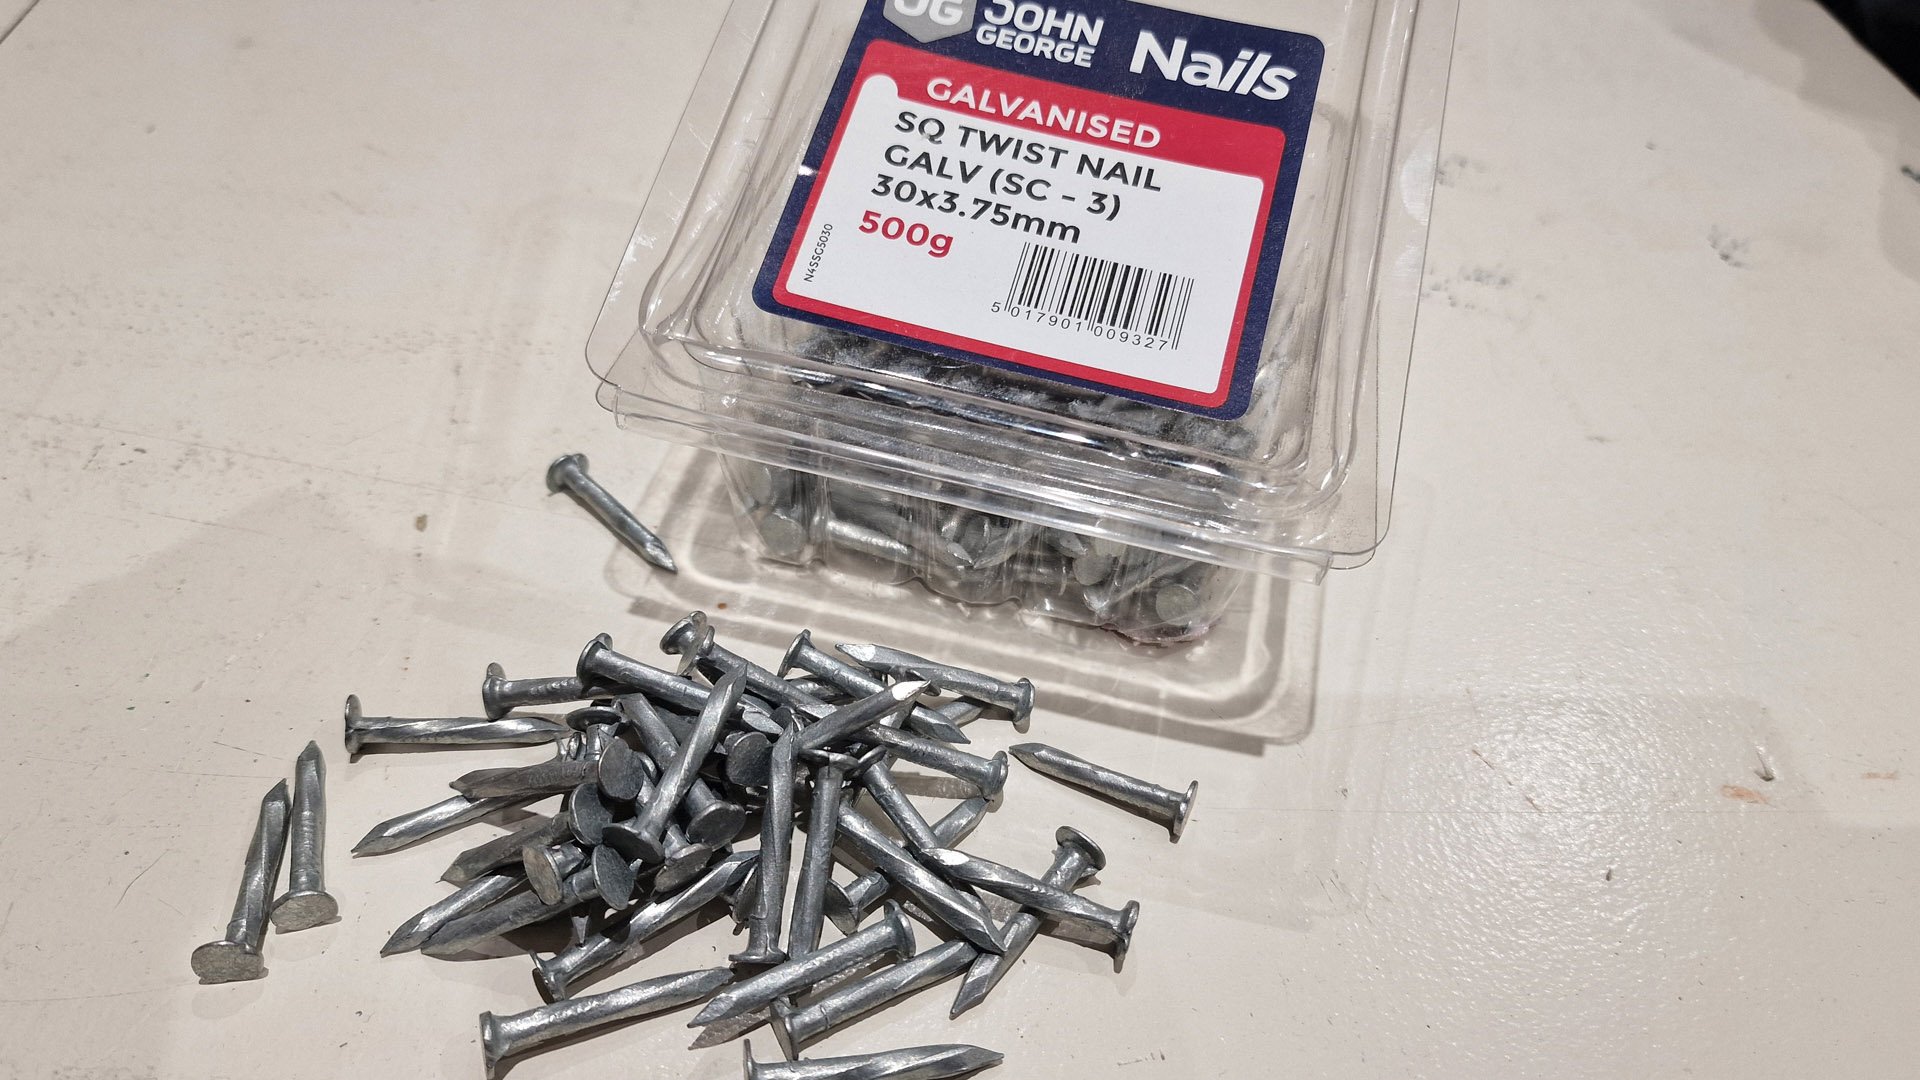
Next, I added joist hangers to both the end timbers and doubled up joists. I decided to cut them down, as bending the hanger over the top of the joist would have clashed with the floorboards. I used galvanised twist nails to securely nail the hangers into position.
Then, I cut in half an old gravel board, again with my circular saw, and used this to create an internal frame inside the opening.
Having done this, I constructed a new loft hatch out of the 6x2 timber and screwed the other half of the gravel board to this. There was a bit of inevitable fine tuning as I made it a bit too tight to lift in and out easily, but I now have an extremely strong but very heavy hatch that can be dropped into position.
I’ve thought about how to lift the hatch in and out. I could drill 4 finger holes or put some brass flush rings, but at £10 a pop I don’t really fancy spending £40 on this. It’d be great to hear what you’d do, in the comments section below. Maybe I just leave it as something I have to push up from below.
I would just say, again it’s an obvious point, but don’t be tempted to do what I did and board from both sides of the room as you can end up with a gap if you’re not careful when the two sides meet in the middle, quite apart from the issue of fitting the tongue and grooving together.
Sealing the Floor
I bought a 2.5L tin of varnish, which I had to use sparingly because it wasn’t quite enough. Luckily, I had a tiny bit to spare for the floor boards that were going around the staircase opening. It’s dried to a pretty respectable colour and finish.
Lighting
Two more things to talk about. Firstly, lighting.
Most of the boarding works were powered by my 18v site light - which casts a fantastic light and has been great for all manner of jobs over the years, but now the room was finished I needed some decent lighting. Dalton, an electrician on my Discord forum (which you can sign up to by becoming a patreon) recommended these LED panels. I bought 5 for £204 which I think was a pretty decent price. The mounting brackets were extra so I decided to make my own, making a frame from more recycled roof battens taken off the roof this summer, and routed out for the panels to be inlaid into. I lined them up with my DeWalt laser level, and screwed the panels to the ridge beam. As you can see, they cast a fantastic light across the room.
The Hoist
And so we’re onto the final part of the project - what I’m calling the mighty hoist. My carpenter mate John had suggested I construct the access hatch and it was time to put it to the test. I’ve got:
Our second-hand treadmill (a whopping 97kg)
Punch bag (50kg at least)
And a sofa
I needed something special to get these into the loft. So, I bought this Hilka 1000kg chain block from Toolstation through the WeShop app where you get shares for each purchase - there’s info on how you can sign up at the bottom of the blog.
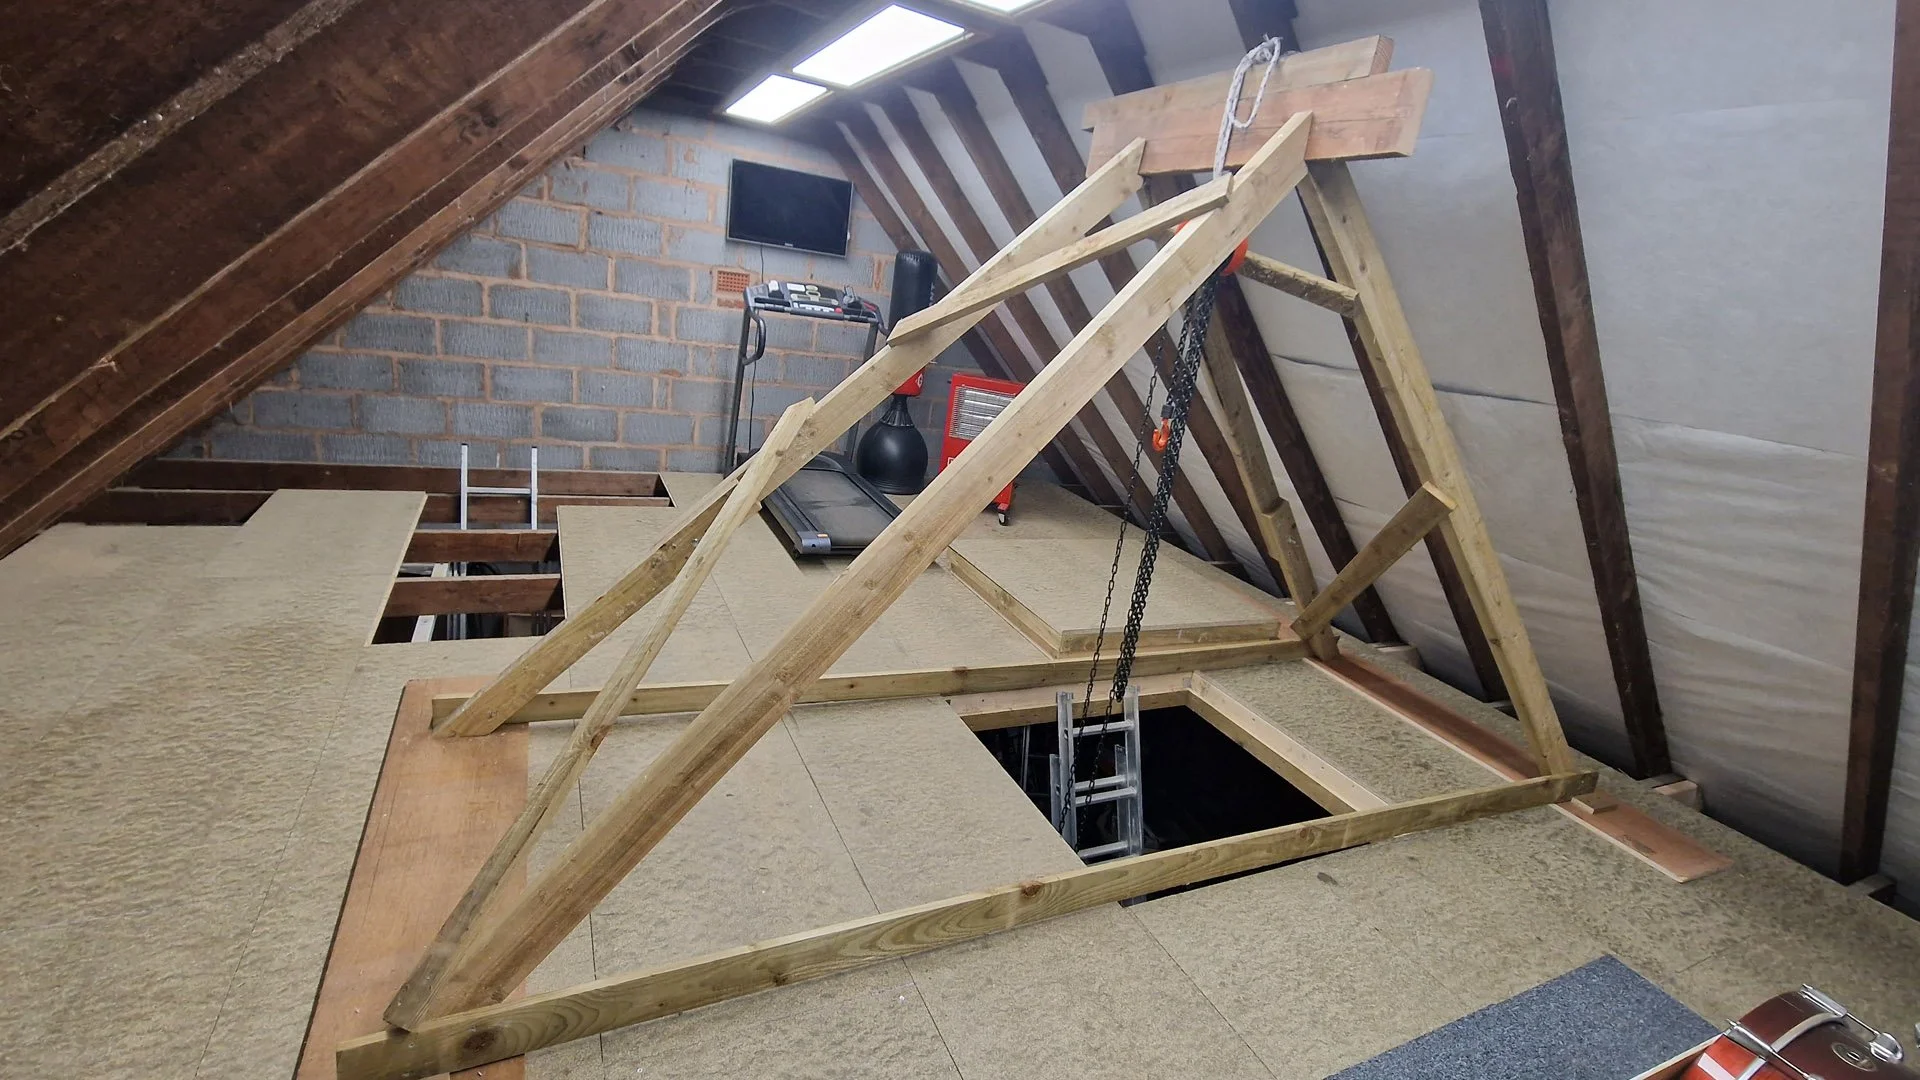
I didn’t want to risk putting all that weight on the rafters, so I decided I needed to construct some kind of self-supporting gantry, and so I set about creating one from 3x2 timber, slightly making it up as I went.

First up was the punch bag base, which was an absolute doddle to winch up.
Then came the treadmill, which initially I couldn’t get high enough, but by raising the hook and lowering the fixing point on the treadmill, I cracked it. I was able to winch it up, drop it down on the loft floor and then move the gantry over until it was totally sat inside the loft. Gantry mark 2 will have wheels!
So that’s it for today, I hope you’ve found this useful, in spite of all the mistakes … which I’m pointing out, in hope that you won’t make them yourself!
Today's Toolkit
Thank you so much for reading, and please leave comments below to let me know how your projects go.
Oh, and if you’re new to my YouTube channel, click on the link here to subscribe!
As usual, I’m always looking for ways to make this sustainable now I’m doing it full time, so if you like my content and to help me keep providing it here on this channel for free, I would be so grateful if you could visit my Patreon page, to support me - lots of exclusive content. For just £5 per month, you have daily contact with me through my Discord member forum behind the scenes videos and automatic entry to my free monthly giveaways.
I thought I’d also mention a new shopping platform that I’ve been using recently. WeShop is a new concept merging social media with shopping. You can get 20% of the value of each order you make through the platform in shares - they’re giving away 90% of the business to those who shop on it.
Over the last ten years, I’ve been a bit addicted to Amazon, so I’m trying to start helping and reconnecting with other UK retailers who are signed up to the site. I’ve bought anything and everything from dishwasher tablets to nail guns.
You also get access to an exclusive connection of my own videos because I post regularly about all of the things I like using. If you recommend friends, you get a small referral commission (as I do from you if you come onboard). You can download the app from Google Play or the Apple Store, and simply need to sign up using my name ‘charliewhite’ - all one word. Have a bit of fun and let me know what you think!
Now I don’t know quite how this will pan out, I don’t know what will happen to the WeShop platform or how well it will be taken up by the British public. But I’m buying things I would be buying anyway, I’m supporting British retailers, and getting a potential nest egg of shares. Have a play around with it and let me know what you think.
* The Amazon links (if any) above are affiliate links. It doesn't cost you anything to click on them but I do earn a small commission if you do.
* I'm not being paid anything for the WeShop mention here, but I do earn a small % of shares if you sign up through my link, but it doesn't cost you anthing to do so, and once you're in, you can start earning shares from referring friends too!