
How To Chop Logs
This is a practical run through of how I chop up my wood. I’m no lumberjack or tree surgeon - I’m just a DIYer with a lot of wood lying around. I’ll be running through the tools I’ve tried, and what I’ve found to be the best in tackling these various different sizes of log. (Click here or below to watch the YouTube video)
At the end of the log store video on my channel (watch here), when I explained how many logs I had lying around, loads of you commented to say that you would be really interested in seeing how I went about splitting up logs. I have a variety of logs to split - from rings from the main tree trunks to hundreds of branches.
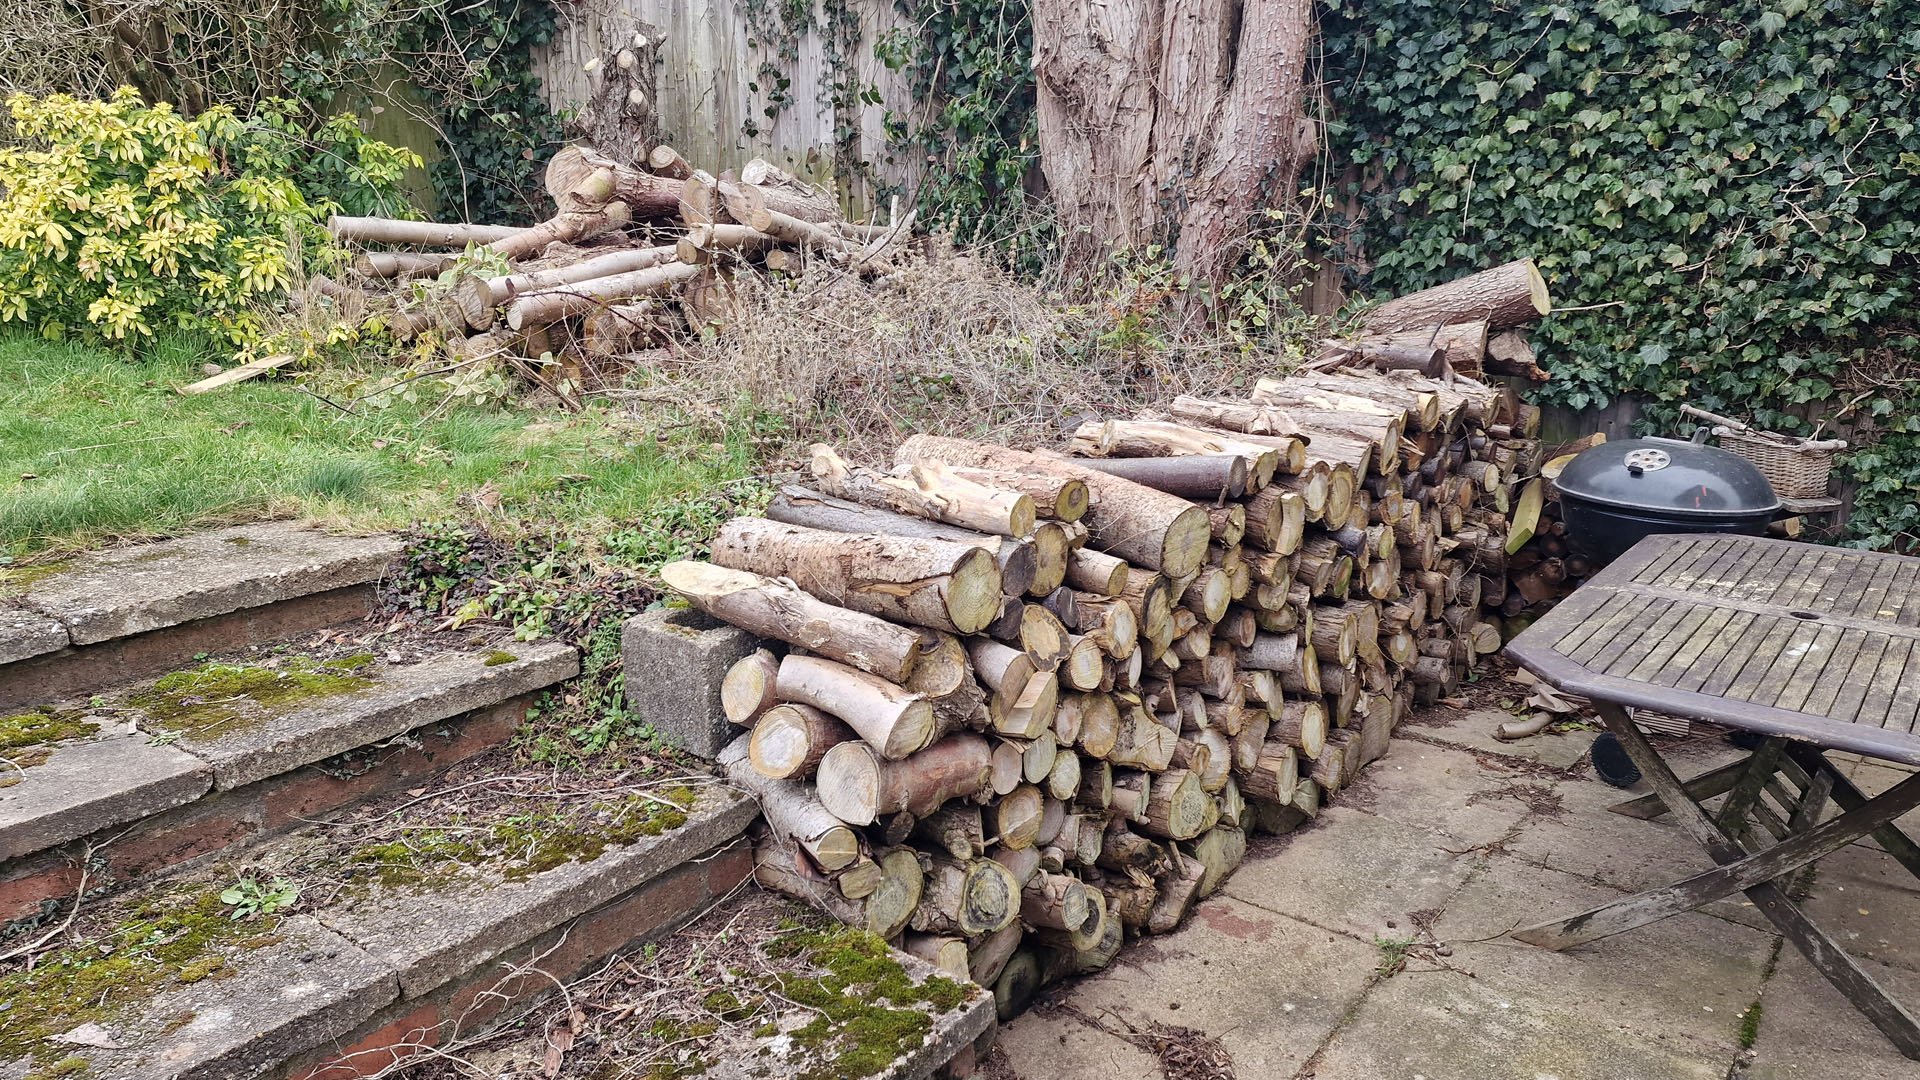
Now before you say anything, yes this is conifer wood - one of the worst wood to burn because of that high sap content - but most of the wood in my garden has been weathering for about 5 years. So it’s about as well-weathered and sap-free as possible.
the splitting axe
So, let’s start with the axe. I began with an old axe that my father-in-law had lent me, but this immediately got me off onto the wrong foot. Axes, with their sharp, thin profile, are designed to chop through fibres in the wood, or for example through tree trunks.
Yet, there are multiple problems with trying to split logs with an axe.

The first of them is that because of the long, thin design, the axe is going to sink really deep into the log. It probably won’t split it because it hasn’t been able to part it.
If you actually do get through the log you’re trying to split, it might blunt the blade on the surface below, but in my case I’m chopping everything on a tree stump - I’ll mention the benefits of this shortly.
But, this isn’t to say that all axes should be “axed”…

Fiskars, for example, have really turned the argument on its head by inventing this, Fiskars Log Splitting Axe, which I bought about two years ago.
They’ve designed against the blade getting stuck by giving it more of a maul like shape to it. And when it does get stuck, because it hasn’t sunk in too deep, it’s pretty easy to free.
At 2.6kg or 5.7lbs, it’s reasonably light. It’s got the longest shaft they do, is well balanced, and has a very comfortable FiberComp grip.
And so what do I think about this hybrid tool? Well, I’ve got to be honest, I love it. In spite of its weight, it has the power to get through large logs, and if I hadn’t started my usual research process for this video, I probably wouldn’t have bought anything else.
diamond shaped splitter
Now for the diamond shaped log splitter.
I’ve got to be honest, I was pretty sceptical about this. I couldn’t see much need for this in my existing armoury of log splitting tools. You have to buy yourself a sledgehammer if you haven’t already got one, and some of the YouTube videos online say that this is a two-person operation (but it’s not actually).
There was one particularly stubborn, knot-ridden log that I just couldn’t split with my axe, so I thought I’d put this to the challenge and see if it had any benefits.

Initial signs were promising, as it took off a chunk of log. But, I thought I would be in a bit of trouble if this got stuck. However, I needn’t have worried.
Even when heavily embedded, you simply turn the log on its side and bash the wedge out with a sledgehammer.
So the wedge is pretty impressive, in spite of the blunt tip that I thought would be rubbish. But before you run and buy one, check this next tool out…
log splitting maul

Mauls combine the weight of a sledge hammer with a wedge design, and the Roughneck Log Splitting Maul also has the ability to use a sledgehammer on the back, so it’s combining the benefit of a wedge and sledgehammer with a tool you can swing by hand.
Mauls also tend to have a heavier head than splitting axes. Typically, they have longer handles, although the Fiskars with its XXL handle is pretty similar.
The wedge shape design of the maul is even less inclined to stick in a log than an axe, but Fiskars would say their axe is similar in shape (also designed not to get stuck), so we’ll see which works best.
Crucially, mauls don’t tend to have a sharp blade. You hear a lot of reviews saying the blade wasn’t sharp - but this is missing the point, mauls aren’t meant to have a sharp blade. It’s the weight and velocity of the blow that cuts the wood, not the sharpness of the blade.
Fiskars have created an exception to this obviously with their sharp-bladed, maul-shaped axe, but there’s a downside to the blade being sharp as it can sometimes get properly stuck, requiring you to free it with a sledge hammer.
Now this particular maul from Roughneck comes in this 8lb version and also a lighter 6lb version. I went for the heavier version, on the basis that the weight would make it easier for me to split the wood. But you’ve got to remember that if you’re using one of these all day you could tire with this particular weight.
So whilst I love the precision you get from the sharp blade of the Fiskars, I absolutely LOVE the brutality and power you get from the maul. But I would advise to you to go with the 6lb, because you do feel the weight when you’ve used the 8lb for a while.
tips and tricks
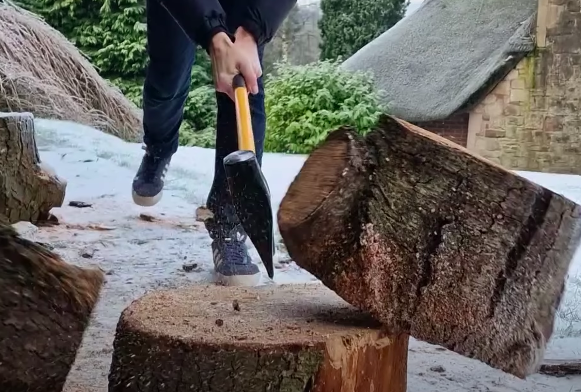
Place the log you’re going to chop onto a tree stump, or otherwise a hard ground. If you do it on a soft surface it decreases the energy delivered by the maul or axe into the log. You’re less likely to damage your axe or maul when it goes through the log. Also, by having it at a higher surface, you’re much less likely to swing through and hit your feet!
Wear gloves - they increase the grip that you’ve got on the shaft of the axe or maul.
Worth wearing a pair of safety specs too!
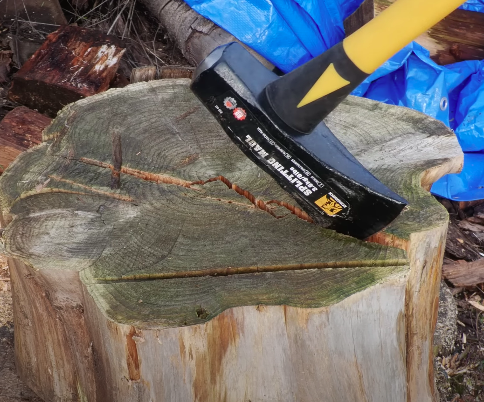
Plan where you’re going to aim. Look for splits in the log, as it’s going to be a lot easier to crack it by exploiting a line of weakness. This is particularly the case when you are splitting rings. It’s a good idea to start towards the edge, where the wood is weakest.
Stand with feet shoulder width apart. My technique’s not particularly good, as I’m unbalanced at the top, meaning the accuracy of the downstroke is a bit uncontrolled. I also realised I was leading with one leg, which also makes you less balanced on the downstroke. Most of the tutorials you see, the legs are pretty parallel to what you’re cutting.
Keep one hand on base of the axe/maul, and one on the neck. As you go up to the top, your hand slides down to the bottom to join the other hand for the downstroke.
As mentioned earlier, don’t be tempted to try and go with the heavier 8lb maul. Velocity is more important than mass - so a 6lb maul that you can deliver faster will generate greater splitting force.
Finally, avoid knots - because quite simply no amount of power or brute force will get through this type of log. You’ll just end up splitting the wood away from around the knot. Or if you have a knot, put it at the bottom of the log, as it’s much less likely to prevent you from splitting the log in two.
log buster
Now, I wouldn’t really be doing my job properly if I didn’t feature a log buster.
Clarke Machine Mart kindly gifted me this Clarke H5 Log Buster a few months ago. What can I say about this…. well, at 50kg, it’s just a bit of a lump to manoeuvre around, and the cage was quite fiddly to assemble.

In spite of what you hear (and a friend did lose a finger on his log splitter recently so you do have to be careful), it’s really safe to use with its two-handed operation. There’s no way you should be able to get your fingers in the way if you use it on your own.
It’s delivering 5000kg of splitting force and is 2.2kW.
But, do you really need a log splitter?
Benefits:
Ease of use compared to using an axe or maul
Splitting tough logs you can’t split in any other way (e.g. knotted logs)
Disadvantages:
The cage restricts you to logs with a 250mm diameter and 520mm length
If you’ve got a log with a steep angle, it’s going to slip on the mechanism
Slow - you have to wait for it to plunge each time - but if you had your logs all lined up, it probably won’t take you a great deal longer
If you don’t want to go to the exertion of using an axe or maul, this is a bit of a no-brainer.
chainsaws
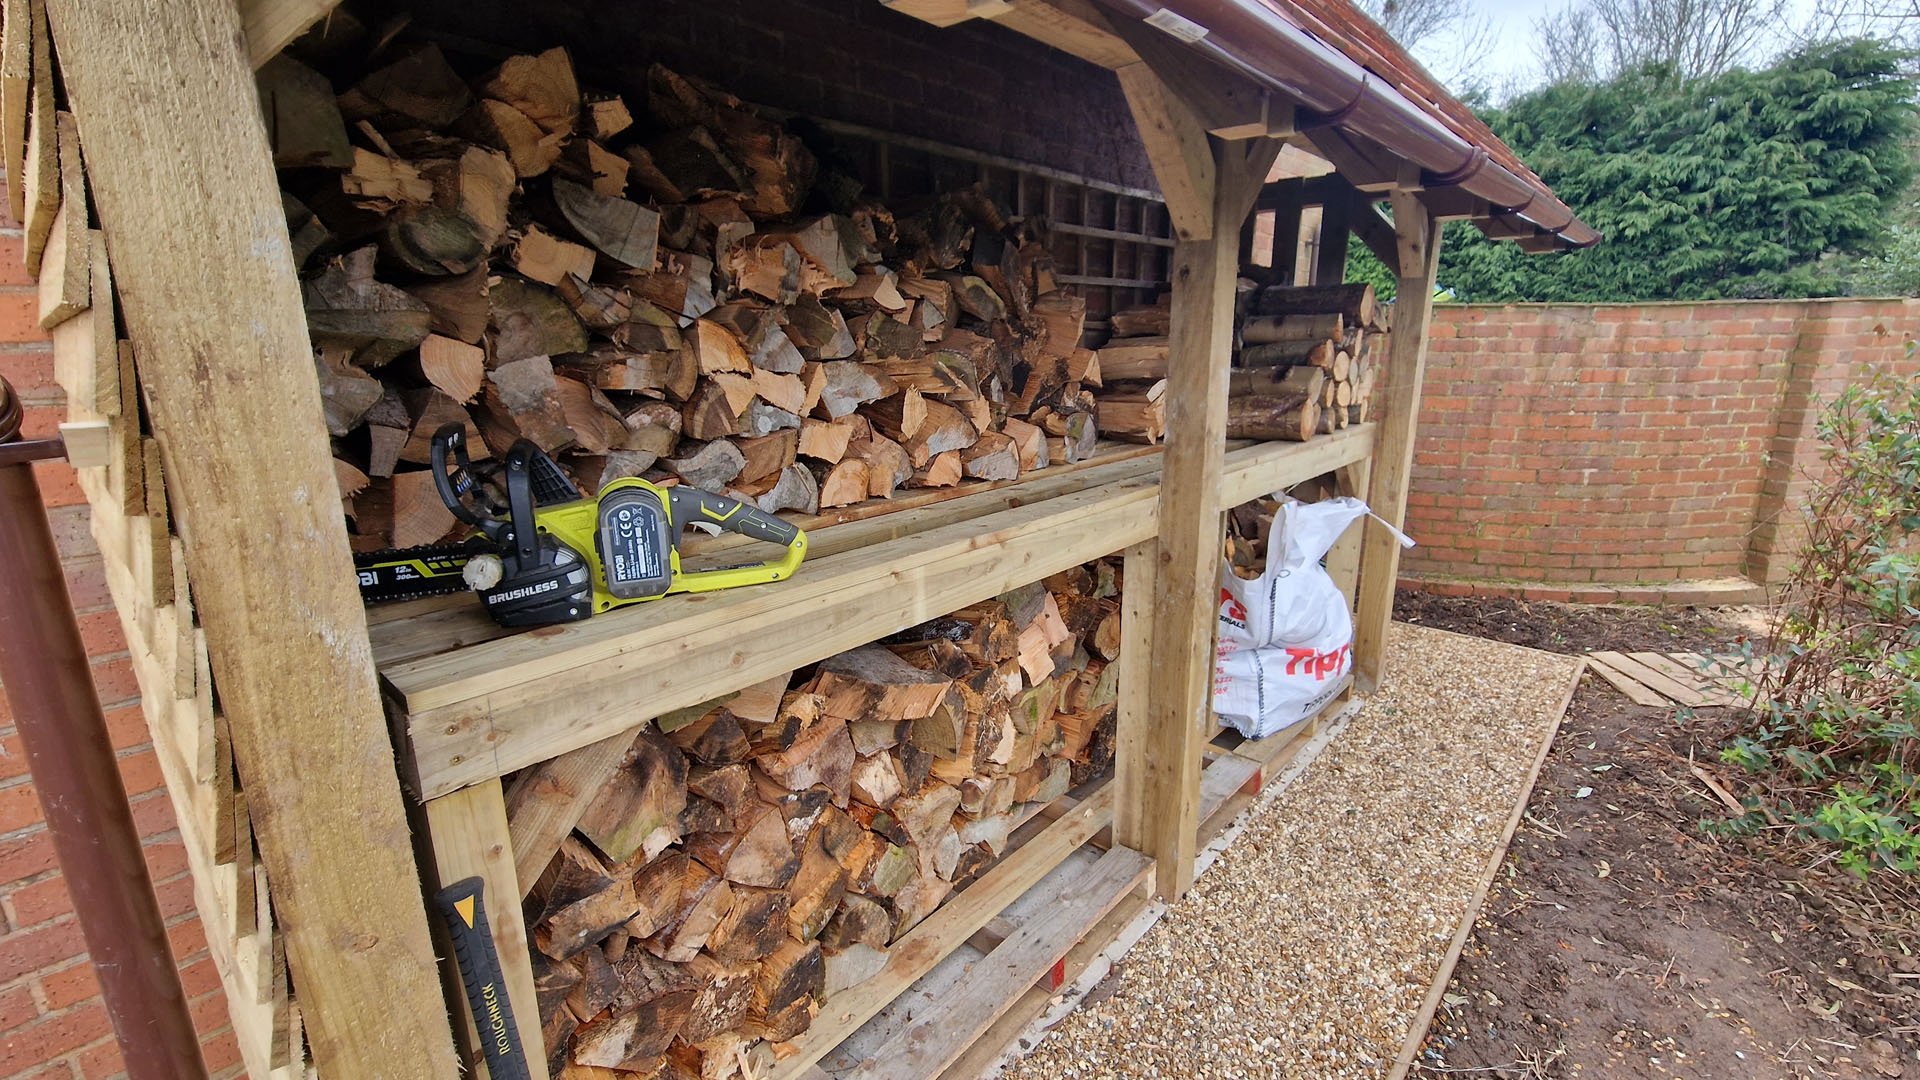
So we’ve got the maul and the log splitter, but in some situations (such as logs that are too long for the log splitter, or logs that need to be squared off), you really need a chainsaw.
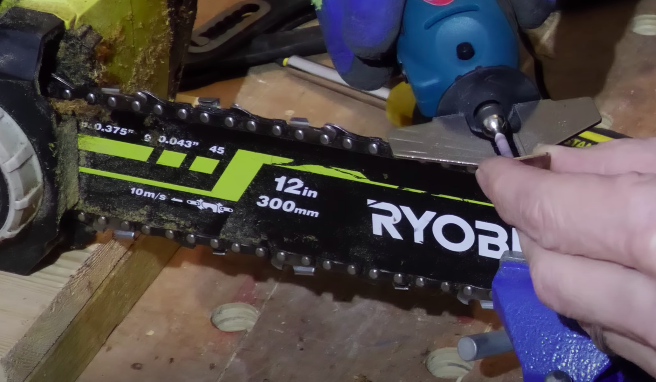
If you read a lot of my blogs, you’ll know that this Ryobi 18 volt chainsaw has been one of the genuinely game-changing tools that I’ve bought for my DIY: felling rotten trees, cutting through submerged roots, and now trimming all my logs down to size 350mm so I can fit them two deep in the log store (and also handily into the log burner).
I bought my Ryobi chainsaw probably about 4 or 5 years ago, and I have no allegiance to Ryobi as you all know. My issue with this one at the moment is that in spite of how hard I try to tighten it, the chain is rather slack - it’s probably seen better days.
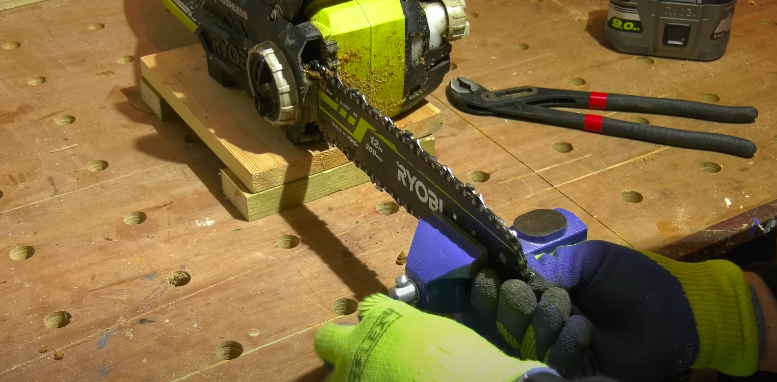
However, I want to leave you with a bit of a discovery I recently made, when I decided that it was about time to stop buying new chains every time my existing ones got blunt. It’s surprising just how easy it is to sharpen the cutters on your chainsaw chain.
First up, you’ve got to clamp your chainsaw securely. I use this bench vise that I bought for about £15 last year.
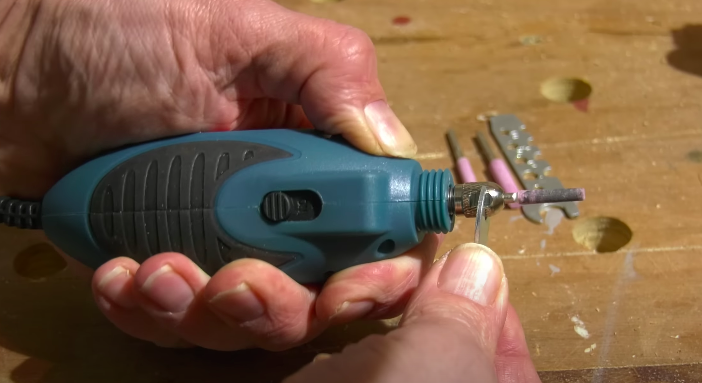
I’ve got two kits: the first from Portek is a 12v sharpener, so I’ve made a couple of connectors from some 2.5mm copper electrical wire to go in my Milwaukee drill battery. If you do this, just make sure the wires don’t touch, as you can get thermal run-down that could destroy the battery and cause a nasty fire.
You choose the right stone based on your chain, as directed in the instructions, and then use the multi-wrench to adjust the height of the stone. Two annoying design features - the notch for the stone I need doesn’t seem to fit, and then when you tighten the sharpening guide you have to be careful not to over-tighten the screws in the plastic base of the guide.
But from then on, it’s pretty straight forward. I mark the first cutter with a marker pen so I know where I started, and gradually work my way round the chain, which literally only takes a few minutes.
And finally, for the purists out there, you can sharpen your chain cutters by hand with this Oregon Field Sharpening kit.
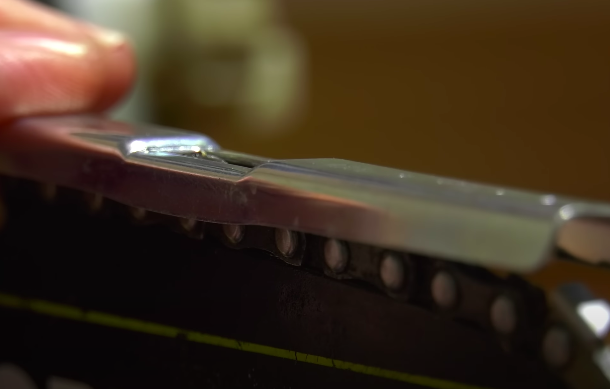
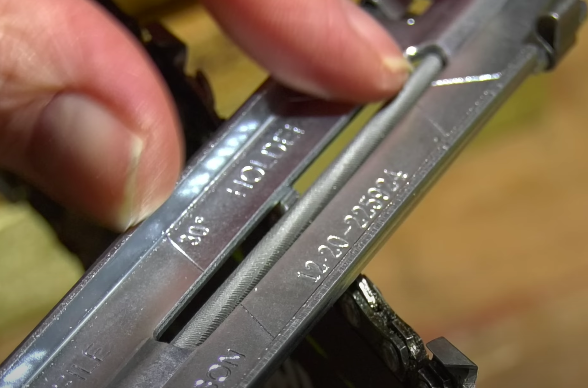
It’s a similar concept in the sense that you get a guide groove to clip over the file to maintain the correct filing angle and height. Although you only sharpen in one direction, and with this kit you also get a depth gauge tool to check the height of the saw chain depth gauges, which they recommend you check every fourth sharpening, using the file provided to file the depth gauge down level with the slot.
So that’s it for today! What can we say in conclusion to this project? Looking back on all the tools I’ve used today, which ones stand out?
Well, the obvious answer for me would firstly be the Roughneck Splitting Maul. And secondly, the chainsaw. This is based on the fact that I wouldn’t be able to manage without either of these tools. But to be honest, all of the tools are helpful - the diamond splitter came in really handy for those big knot-ridden logs, and the log buster is also brilliant when you can’t quite be bothered to swing an axe.
today's toolkit
- Fiskars XXL-X27 Splitting Axe
- Roughneck 8lb Log Splitting Maul (Amazon)
- Roughneck 6lb Log Splitting Maul (Amazon)
- Rolson Diamond Shaped Log Splitter (Amazon)
- Oregon Universal Field Sharpening Kit (Amazon)
- Ryobi RCS1830 chainsaw with 5Ah battery and charger (Amazon)
- 60mm bench vise (Amazon)
Thank you so much for reading, and please leave comments below to let me know how your projects go.
Oh, and if you’re new to my YouTube channel, click on the link here to subscribe!
As usual, I’m always looking for ways to make this sustainable now I’m doing it full time, so if you like my content and to help me keep providing it here on this channel for free, I would be so grateful if you could visit my Patreon page, to support me - lots of exclusive content. For just £5 per month, you have daily contact with me through my Discord member forum behind the scenes videos and automatic entry to my free monthly giveaways.
I thought I’d also mention a new shopping platform that I’ve been using recently. WeShop is a new concept merging social media with shopping. You can get 20% of the value of each order you make through the platform in shares - they’re giving away 90% of the business to those who shop on it.
Over the last ten years, I’ve been a bit addicted to Amazon, so I’m trying to start helping and reconnecting with other UK retailers who are signed up to the site. I’ve bought anything and everything from dishwasher tablets to nail guns.
You also get access to an exclusive connection of my own videos because I post regularly about all of the things I like using. If you recommend friends, you get a small referral commission (as I do from you if you come onboard). You can download the app from Google Play or the Apple Store, and simply need to sign up using my name ‘charliewhite’ - all one word. Have a bit of fun and let me know what you think!
Now I don’t know quite how this will pan out, I don’t know what will happen to the WeShop platform or how well it will be taken up by the British public. But I’m buying things I would be buying anyway, I’m supporting British retailers, and getting a potential nest egg of shares. Have a play around with it and let me know what you think.
* The Amazon links (if any) above are affiliate links. It doesn't cost you anything to click on them but I do earn a small commission if you do.
* I'm not being paid anything for the WeShop mention here, but I do earn a small % of shares if you sign up through my link, but it doesn't cost you anthing to do so, and once you're in, you can start earning shares from referring friends too!