
How to Install a Pressurised Hot Water Tank
Back at the end of June, I had this new unvented pressurised water tank installed in place of my old vent and unpressurised system. So I thought I’d explain to you why I decided to make the switch, how easy it was to install this new tank, and what I’ve learnt since the install (including whether I think it was worth it). I will also talk you through a couple of other little bits, like my new Tesla smart immersion heater.
reasons for new system
I suppose the first question to ask is why bother ripping out the old system in the first place. That system served us very well since we installed it in 2010. Particularly with the addition of the Stuart Turner 3 Bar Booster Pump which I installed at the time I refurbished the bathroom so it’s got some decent pressure. And it actually wasn’t that noisy.
But we have a few problems - the first being the capacity. I’m guessing our old system was about 115L, and if somebody wanted a bath immediately after someone else it was a problem.
Also, the practicalities of a system like this was an issue. I had a water storage tank in the loft, and if you’ve heard about my wasp nest problem then you’ll know the wasps ravaged the top of the tank, eating away the insulation cover and a lot of the insulation around the vent pipe.
You also have a problem with sealing tanks in the loft, particularly when you’ve got a loft like mine which doesn’t have underfelt and therefore it’s constantly at the mercy of wasps, flies, spiders etc. Mercifully, our tank was kept pretty pristine because of a perspex cover I put on top of it. Nevertheless, you have problems all year round - freezing in the winter, and pests getting in during the summer. This is admittedly less of a problem than the capacity issue, but with both the problems we decided to take the plunge and get a new system.
ease of installation
The one thing that’s been really vexing me over the years was whether it was practical and possible to install a system without a lot of major plumbing work. After a quick chat with a plumber I found, they revealed that it was possible to install a new tank into the space occupied by the old one, and with minimal plumbing for my S-plan system (I have a simple arrangement with my boiler either sending hot water through the central heating system or through the hot water tank via two zone valve actuators which do the diverting between the two).
Fundamentally, the plumbing hasn’t been altered. My mains water feed does ideally need to be 22mm to the tank apparently. You do however need a discharge pipe which meant pulling up the corridor floorboards and taking a pipe down the side of the house.
The other thing we needed was a pressure reducing valve on the main water feed coming into the house. We have an insanely high pressure of about 7 Bar, which needed to be 3 Bar, and so I set to it with my multi-tool the day the plumbers arrived to enlarge the hole under the kitchen cupboard to make way for the new valve. We also replaced the ageing, failing stopcock at the same time.
The main consideration and concern was what size tank to fit. The options that were available for our cupboard were the Slimline system at 210 litres with a 475mm diameter and height of 1963mm or the larger capacity Standard system at 440mm diameter and height of 1494mm for a 210litre capacity or 1744mm for a 250litre capacity.

The slimline tank was the safest option given my cupboard is only 550mm deep, but my plumber was concerned 210 litres wouldn’t sufficient enough for a family of four. We ended up going with the 250 litre tank - a bit wider than the cupboard but I decided to wing it.
Normally the install team would be responsible for removing the old tank, but I decided to do this myself the day before they arrived to problem solve any issues we might encounter with the cupboard being too small.

I set about carefully dismantling the cupboard I had painstakingly built when I renovated the bathroom back in 2014.
My Japanese Shokunin saw was so accurate at removing the front panel which itself had been biscuit jointed in place, that I was able to reassemble the cupboard a week later with no filling or repairing to these sections.
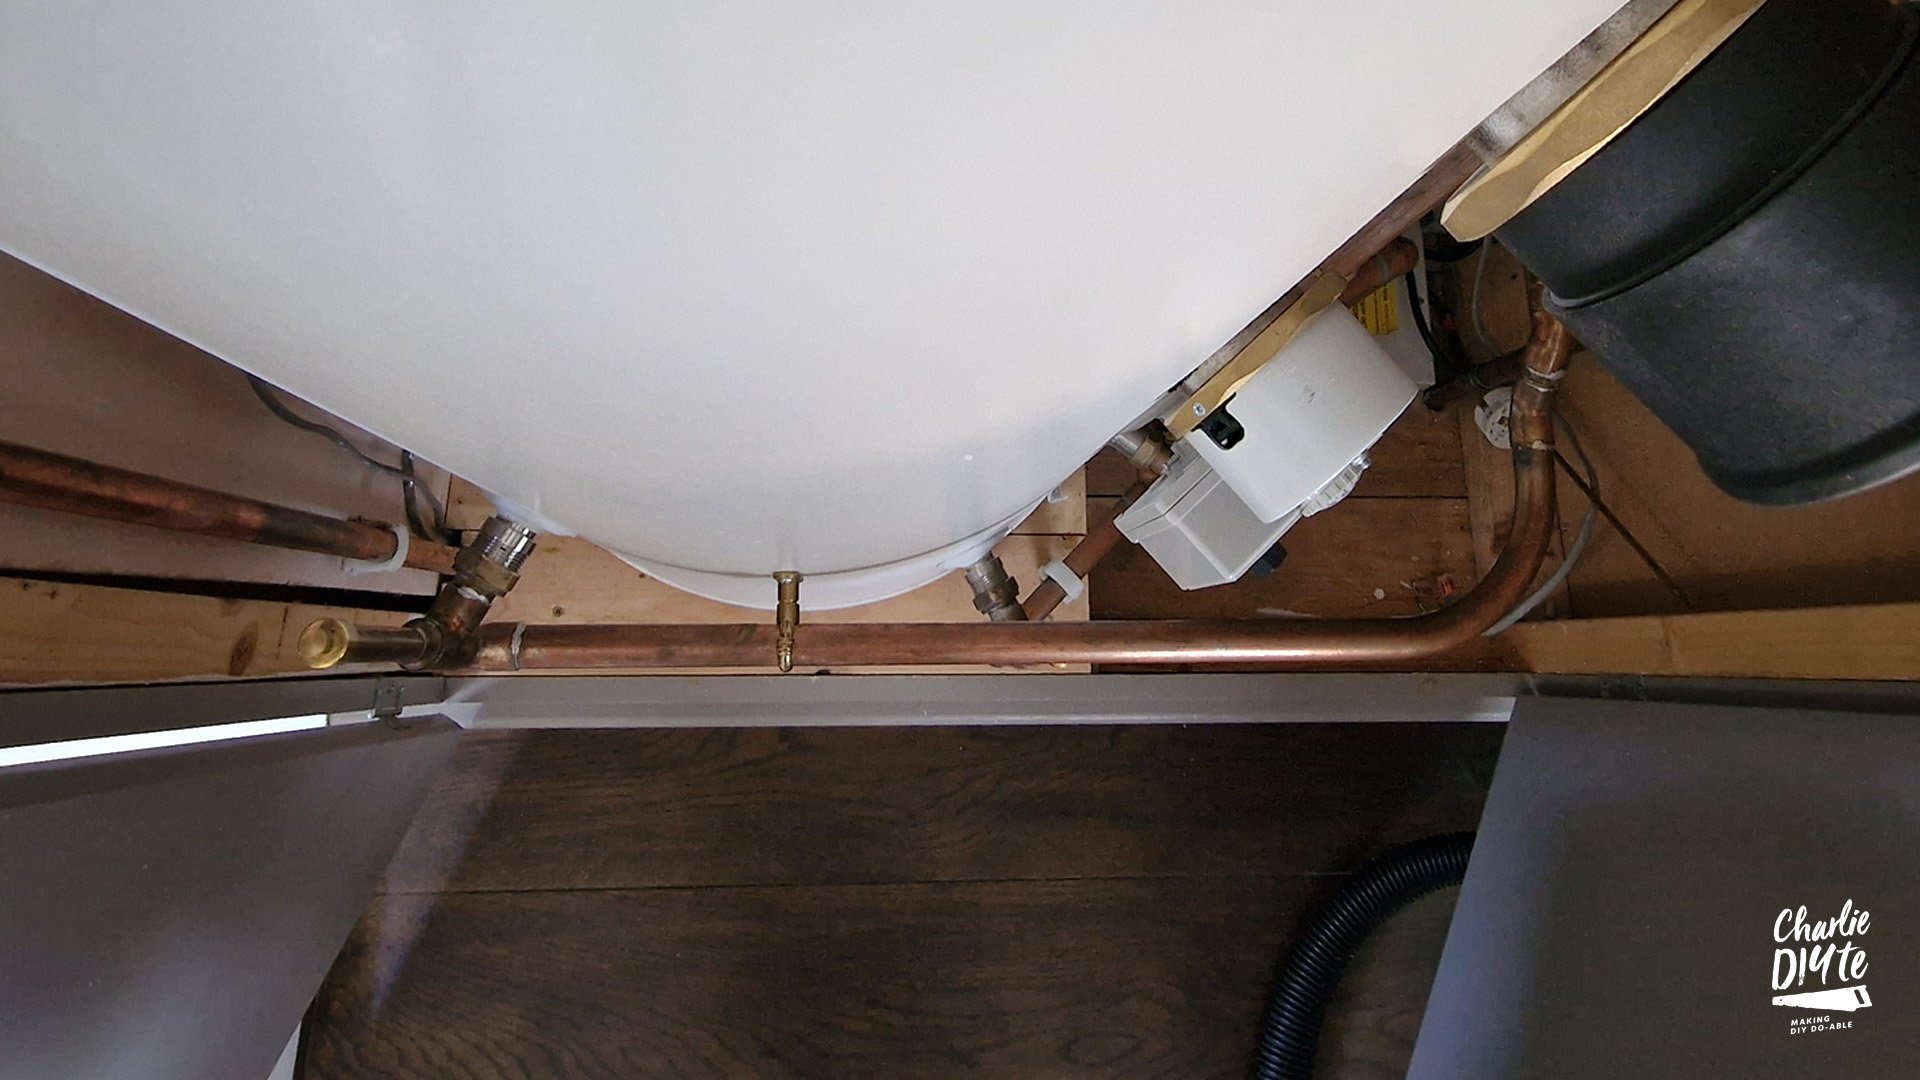
I then isolated the mains supply into the storage tank in the roof (and obviously switched off the boiler) and drained as much hot water from the hot water tank as possible, before then attaching a hose to the bleed pipe below the tank, draining the remainder into the shower tray.
However, I had a bit of an accident. Unable to get a spanner into the insulated jacket to remove the lower 22mm feed pipe into the heating coil in the tank, I decided to cut through it with my Bahco pipe cutter. Unfortunately there was still a fair amount of water (unexpectedly) in the tank. In my effort to stop this flowing onto the wiring centre that my electrician had unhelpfully located on the floor of the cupboard - happily the electrics were safely off at this point - I quite badly cut my thumb as I attempted to stem the flow of water from the tank. It turned out there wasn’t that much in there, and it could be safely drained into a towel, and with my thumb glued back together I could finally remove the tank.
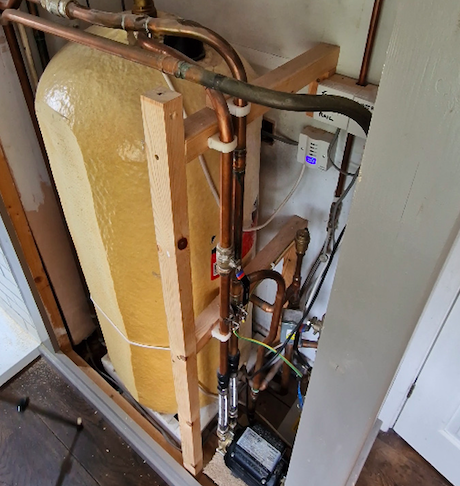
It was by now about 10pm - I hadn’t let this job get in the way of Tuesday night football and a couple of beers afterwards which explains my strange DIY gear in the video! And I still had to construct a new plinth for the new tank to sit on as there was no way with the existing pipework, not to mention the cupboard not being deep enough, to sit the new tank on the floor itself. So I cut a few 4 x 2 joists, notching them to go round the existing pipework, and trimming them down to ensure they were perfectly level, and then overlaid some redwood planks left over from the wardrobe build. I was now as ready as I would ever be, for the new tank.

The following morning Ant and Nigel arrived to carry out the install, and we fast fast-forward to the end of day 2 of the install.
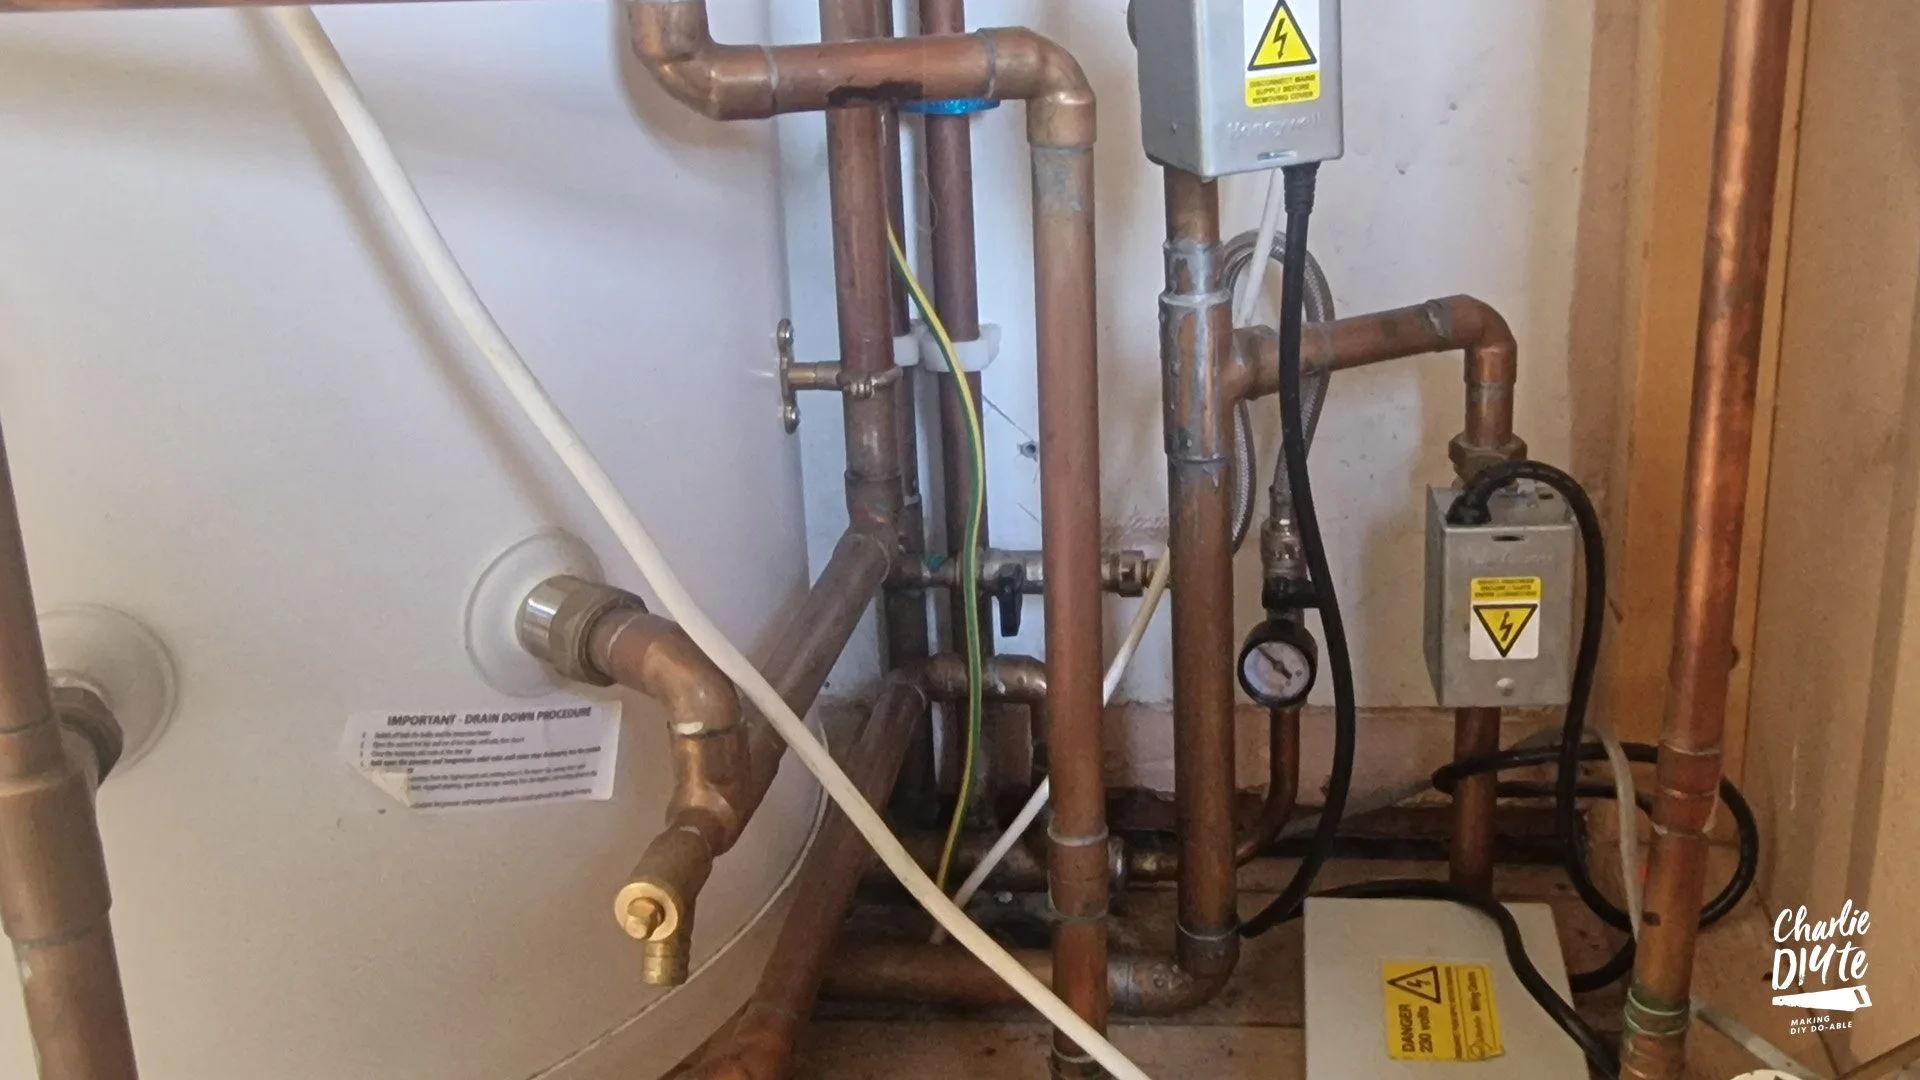
The new pressurised system has finally been installed, we’re pretty much at the end of 2 days of hard work, and Ant kindly agreed to stay back to explain to us all exactly how the system works.
“When we got here, Charlie had ripped out the old vented system, so I just had the pipework on display to know where to go and what was what. First, we put the new cold main in, 22ml upgraded. We then had to move pipes in order to get the cylinder in because it was such a tight space. Charlie had to cut back of the cupboard just to get it in!”
With my Multi-tool and reciprocating saw I had to remove the plasterboard and part of the studwork at the back of the cupboard because not only do you have to think about the diameter of the tank, but also the pipework feeding off it - and you can see here how tight the pipework is to the front of the inside of the cupboard.
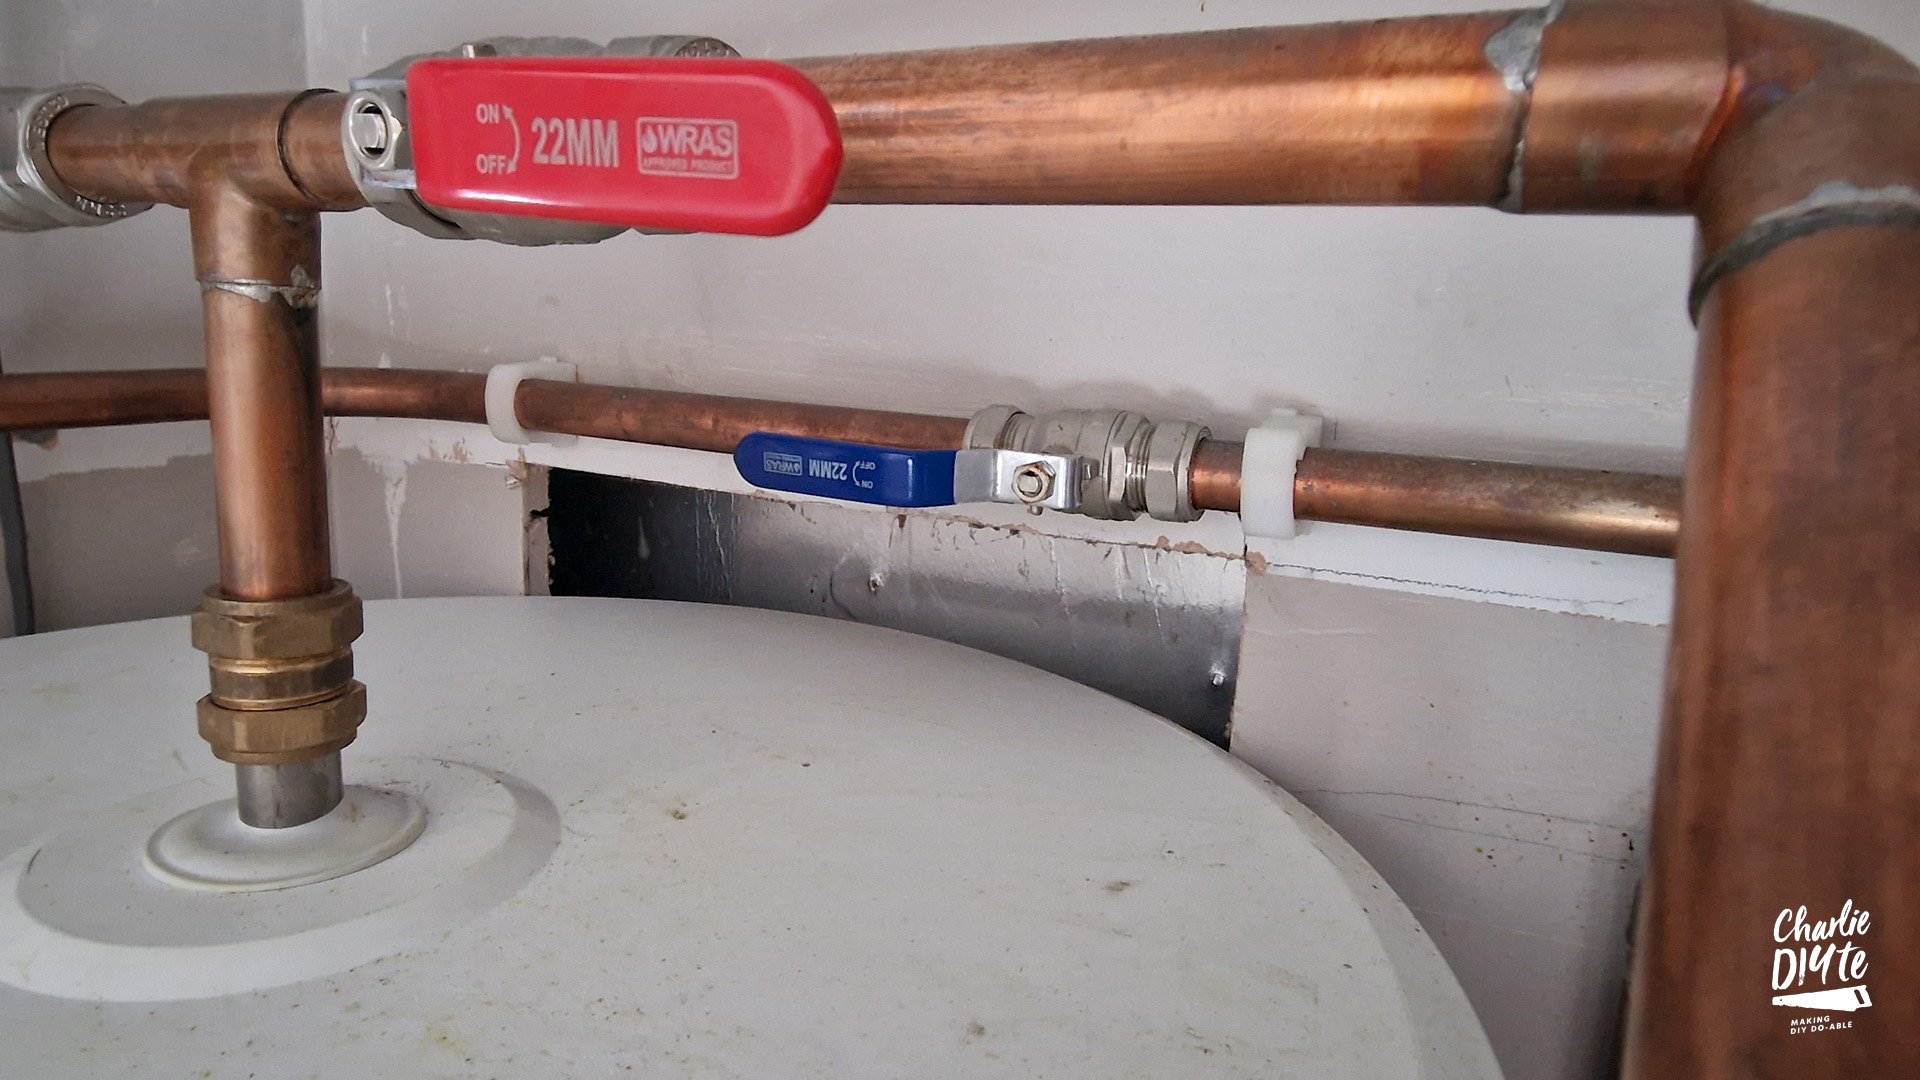
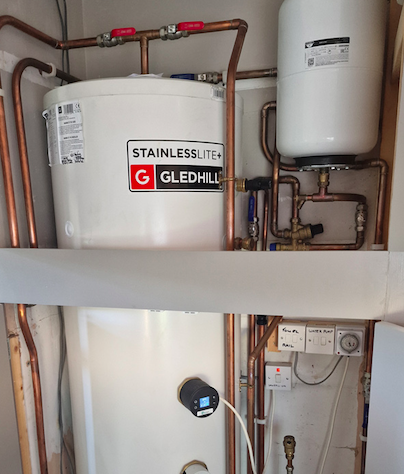
“So, basically what you’ve got is the cold coming in into the isolation point, and an inlet group here with your pressure reducing valve. This is for if you’re having a shower your hot and cold are the same pressure so one can’t overpower the other. There’s a balanced cold feed with it coming into the bottom of the cylinder. Cold water in, hot water out. Two isolation valves - one going to the bath, and one feeding the rest of the house and the shower. If you want to work on the bath you can close that off, and you don’t have to turn off the rest of the water for the house. Same with the balance cold feeds - two points of isolation.
There’s also the pressurised vessel, which kind of does the job of the old header tank. It takes the expansion of hot water from the cylinder so it has somewhere to go. You’ve got a ‘balloon’ inside, and a Schrader valve on the top which you put your air in, but they are preset as 3 Bar which matches the pressure reducing valve. When the water expands (by about 4% between 12/13 degrees and 60 degrees), so you need the water to go somewhere. If you need to work on the vessel you can shut it off, as these do fail. We can drain the water out of it and we don’t have to drain the whole system.
If the cold water pressure builds up and has nowhere to go, the water will go down your discharge pipe.
You’ve also got a temperature and pressure relief valve, which will go off if everything else fails. If the temperature goes to 95 degrees then it’s blowing that out, as you don’t want it to go any higher than that.
There’s also a flow returns from the boiler - the flow from the boiler comes up and splits at the zone valves - and there is a new gauge to see what you’re doing when you’re topping up. The manual air vent on the boiler allows you to let air out of the system. If you hear a banging, you’ve probably got air in your system.”

Couple of other things - so we’ve got the thermostat for the hot water tank, as well as two immersion heaters. The last thing I wanted to tell you about was a recent video I watched here on James the Plumberparts’s YouTube channel going on about this Tesla T-Smart Immersion heater.
It seemed to me to make perfect sense, particularly after installing those solar panels recently, to be thinking about heating my hot water from any surplus electricity I’ve been generating rather than through the boiler (which uses up valuable oil). So after watching James’s video I got the T-Smart installed. It replaces your existing immersion heater and has lots of settings. Manual mode to set daily plans, eco mode to keep the hot water at a regular 55 degrees, as well as smart mode to record daily usage to work out the optimum temperatures to keep the hot water tank at.
At this current time during the cost of living crisis, one thing I think you really want to know is what temperature your hot water tank is. Whilst I did have a basic thermostat on the old tank, it didn’t really give me any indication what the actual temperature was or how efficiently we were using our tank. Hopefully this will go some way to saving electricity and keeping the temperature at an optimum level.

I’ve installed my immersion heater on the higher of the two immersion heater inputs.
One other thing I just wanted to talk to Ant about was why I didn’t DIY install this. Whilst I did plumb my previous booster pump for my shower, I deliberately wanted to get the experts in to install this system. Firstly, you need a building reg certificate when it’s done and if you’ve self-installed you’re not going to get that. Secondly, Ant will explain why it’s potentially a dangerous bit of kit…
“If you don’t install it properly with all of the safety devices, you effectively have a bomb in your house. When you buy the package, it does come with everything, but you need to know what you’re doing. They’re dangerous things if not installed properly, and you have to go and get your qualification for it - only a one day course but you need it - as well as needing to be registered with OFTEC or Gas Safe to get your certificates. You can do it without, but you’ve got 5 days to register it. They may be a little more onto you as there isn’t any proof of your knowledge.
The danger of the potential bomb is that you’ve got 240L of water, and when water turns to steam it increases by 1600x. It’s not really the fact you’re going to get wet, but it’s the case of when it gets to a boiling point and you open up a tap it will become a flash point, and all of the water will turn into steam and it will blow through your ceiling. Just go onto Mythbusters on YouTube and type in “unvented cylinder explosions” and that’ll be enough to put you off self-installing.”
was it worth it?
The before and the after…
After living with the system for a few weeks, what are my thoughts?
For a start, you do get an eerie silence when you’ve been used to a booster pump all this time when you turn on the hot water. The pressure isn’t any better than it was because the Stuart Turner pump was 3 Bar, so if anything I suppose we’ve been slightly underwhelmed in this shower. We’ve got a decent pressure in the bath, which was also supplied by the Stuart Turner booster pump. Perhaps the most noticeable change is in the rest of the house, where previously we had gravity fed hot water, but now 3 Bar of pressure.
So I think that combined with the increased capacity we now have for more family members to have baths and shower, and the new functionality with the Tesla T-Smart, makes this feel like a bit of a no-brainer to me as a beneficial upgrade to the house.
Let me know in the comment sections your thoughts, systems you’ve put in, and if you have any questions.
weshop
Finally, anybody who’s read my latest blogs or watched my recent videos will know that I’ve jumped onboard as a founding influencer of WeShop. WeShop is a new concept merging social media with shopping. You can get 20% of the value of each order you make through the platform in shares - they’re giving away 90% of the business to those who shop on it.
Over the last ten years, I’ve been a bit addicted to Amazon, so I’m trying to start helping and reconnecting with other UK retailers who are signed up to the site. I’ve bought anything and everything from dishwasher tablets to nail guns.
You also get access to an exclusive connection of my own videos because I post regularly about all of the things I like using. If you recommend friends, you get a small referral commission (as I do from you if you come onboard). You can download the app from Google Play or the Apple Store, and simply need to sign up using my name ‘charliewhite’ - all one word. Have a bit of fun and let me know what you think!
Now I don’t know quite how this will pan out, I don’t know what will happen to the WeShop platform or how well it will be taken up by the British public. But I’m buying things I would be buying anyway, I’m supporting British retailers, and getting a potential nest of shares. Have a play around with it and let me know what you think.
Thank you so much for reading my blog, I really hope it was useful…
Oh, and if you’re new to my YouTube channel, click on the link here to subscribe!
As usual, I’m always looking for ways to make this sustainable now I’m doing it full time, so if you like my content and to help me keep providing it here on this channel for free, I would be so grateful if you could visit my Patreon page, to support me - lots of exclusive content. For just £5 per month, you have daily contact with me through my Discord member forum behind the scenes videos and automatic entry to my free monthly giveaways. Please click here.
* The Amazon links above (if any) are affiliate links. It doesn't cost you anything to click on them but I do earn a small commission if you do.
And here's the legal bit I have to state: As an Amazon Associate I earn from qualifying purchases.