
How To Fix Into Plasterboard
There are so many innovative plasterboard fixings on the market right now which can make it very confusing for us DIYers when trying to decide which one to use for a particular job.
So I want to show you some tricks I learnt from my old day job to work out what’s behind your wall, how to check what fixing you need for your wall, and then I’m going to run through some of the best and most innovative fixings currently available, and also the ones to avoid.
For the test, I’ve constructed a stud wall mock up using a full sheet of 12mm plasterboard, with studs positioned with 600mm centres.
What wall have you got?
Now, sounds obvious but your journey to the perfect fixing starts with you working out what sort of wall you’ve got.
A simple tap test can tell you a lot.

For example I stripped the lath and plaster off the stud wall above 2 years ago and replaced it with two layers of 12 mm plasterboard. It’s hollow to the tap everywhere except where you hit a stud.

On this wall, however, I dot and dabbed or glued plasterboard to the brickwork, and tapping it gives you a very different noise - solid where you hit all the adhesive dabs.
Although chances are you won’t have as many dabs as I did, as I did go overboard on this.
how to find studs
Plasterboard is inherently brittle which doesn’t make it an ideal surface to hang heavy things off. So where possible you should screw into the studwork or brickwork behind. So let’s start with studs.
There are a few ways to locate the stud:
The tap test (I’ve done this a lot in the old day job) possibly combined with…
Stud/Metal detector
Drilling pilot holes
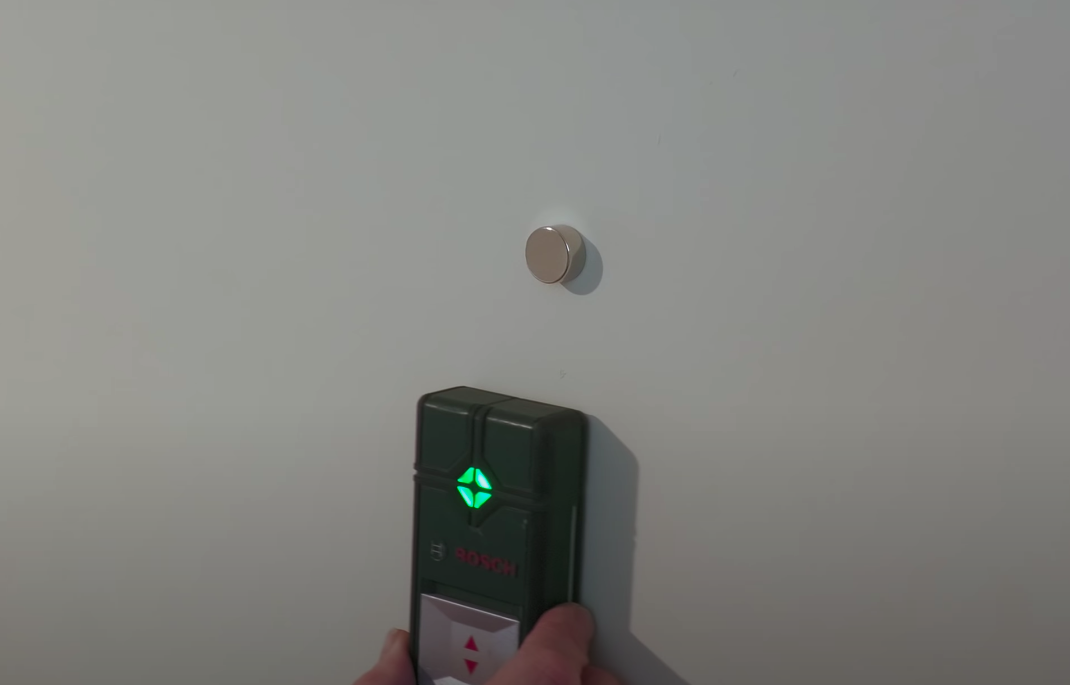
So, with a magnet, by trailing it across the wall it can find some metal behind - latching onto either a screw or perhaps nails.
Alternatively, you can try a stud or metal detector. Now, I’ve personally never used a stud finder, and reviews of stud and metal detectors - like this Bosch Multi Scanner - are at best mixed, and to be honest they have over the years in the day job thrown up a load of false negatives and positives. But one device that I have found reasonably reliable has been this PMD7 metal detector, again from Bosch. Sadly now discontinued - I think the Truvo is the updated device - which also has its fair share of good and bad reviews. Let me explain how it works.
We can use our magnet, which we think is detecting a stud, and then we can bring the metal detector across the wall. We can then take away the magnet, and the metal detector should have found that screw or nail.
Now we’ve had to attach a lot of heavy lath and fascias to the ceiling in the old soft furnishings day job, and if you know a particular part of wall is going to be hidden you can drill a series of pilot holes to pinpoint the position of any studs - which would typically have 16/24 inch apart 400/600mm. So if, for example, you’re fixing a shelf up, you could mark the centre line of the shelf and drill holes along the length that will be hidden to try and find the stud.
However it’s rare the studs will be in the right place and this is particularly so if you’re attaching brackets below a shelf for example, which themselves are part of the aeasthetic of the thing you’re attaching to the wall. So in this case you’re back to trying to find the best plasterboard fixing you can.
how to work out what fixing you need
To decide the right fixing for the job, you’ve got to weigh up how much space there is behind the plasterboard. Why? Because the best plasterboard fixings open up behind the plasterboard to anchor it in place, and some need more space than others to do this.
So, you’ve got to drill an exploratory hole in the wall at the exact point you’re fixing at. The general rule of thumb that we used over the years in soft furnishings is to start with the smallest hole you can get away with and gradually move up in diameter if you find the fixing you’re using isn’t adequate.
For decent, medium duty plasterboard fixings, the smallest diameter of drill is basically 6mm. You can either use an old HSS drill bit if you don’t mind it being bluntened if it accidentally hits brick behind the plasterboard, or a 6mm masonry bit is probably more sensible.
Dot and dab
When you’ve drilled the hole, if it hits something either immediately, or 20mm or so back, you’ve probably got a dot and dab wall. If you go straight through an adhesive patch then happy days, you’ve got a really strong fixing point and can use a typical brown plug like this or one of the universal fixings (I’ll come onto in a minute) to anchor into the adhesive dab itself. If, however, there’s a small gap, and you can test this with an electrical screwdriver or long piece of wire, whilst there are plasterboard fixings that can open up in a small gap, for the strongest possible fixing you want to anchor into the brickwork behind. For this, a Corefix fixing would be ideal. You can find a link to my video on ‘How to Fix into a Dot and Dab Wall’ here.
You could tap a plug through the plasterboard into the brickwork behind, and I have been known to do this. But the beauty of the Corefix is …

… it has a steel core which bridges the gap, stops the screw buckling the plasterboard into the gap when tightened, and enables you to hang really heavy stuff.
fixings run down
So that’s all the prepwork out of the way. It’s time to decide which fixing you need for the job, and this will largely depend on how heavy the object is that you are attaching. You want to have a number of fixings in your armoury, the cheaper ones tend to do a lot of your lighter duty work, and you keep the big expensive ones for the heavier applications, like kitchen cabinets, mirrors or TVs or those “get out of jail” situations as we used to call them in the trade, where you need something to save the day when everything else has failed.
I tell you this partly because I’ve had a lot of people in the past complaining about the cost of certain heavy duty fixings I’ve showcased, and my response is always, yes of course this is a couple of pounds per fixing, but you only need to use it for certain demanding jobs, and if you’re not prepared to spend a bit extra to hang something heavy on a plasterboard wall, you shouldn’t be hanging it there in the first place!
With the odd exception, there’s a correlation between price and the load a fixing will take, so I thought I’d start with the light weight and work up towards the heavy duty monsters.
Each of these fixings boast differing capacities under sheer, tensile, and cantilever force and some even further confuse things by referring to newtons rather than kg, so I’m going to conduct a simple cantilever force test at the end to see how these fixings compare.
Fischer UX6 - Universal

For a long time in my old job putting up curtains and blinds I was a big fan of the UX6 - as were a lot of people who watched my early videos. It’s universal so you can use it in brick walls and also plasterboard. It cleverly knots up behind the plasterboard so as to provide a good secure fixing for light to medium weight applications.
Or so it should, but I’ve just not been able to get it to knot up behind the plasterboard this time round - even after drilling lots of holes. Even using a 4 mm diameter screw - too wide a diameter and it won’t knot up at all, but when using it in plasterboard care needs to be taken to use the right screw - a 4 or 4.5mm diameter to ensure that the fixing nots up as intended. In brickwork you can use a wider (e.g 5mm) diameter screw. So unfortunately, the UX6 is not something I would recommend.
Fischer Duopower

Which is no bad thing really, because over 5 years ago Fischer made it almost redundant anyway with the Duopower - a more clever design that’s also universal, but opens up a wider anchor when used in plasterboard.
But Fischer decided to confuse the hell out of us by changing the dimensions. Whereas the UX6 was a sensible 6mm x 35mm, the Duopower starts at 6x30mm - which is in my experience too short for 12mm plasterboard - it pulls out too easily.
So if you’re buying this you’ll want to go for the 8 x 40mm. You need a wider 8mm diameter drill bit, and a 4.5mm or 5mm diameter screw. Like the UX6, the idea is you go through the back of the fixing. The screw keeps turning and sucks the fixing up to the plasterboard opening it up.

They also do longer fixings, but I don’t see the point of these. As you see here, when used in double thickness plasterboard, they don’t open up behind like the 8x40.
Why have I started with these? Because at around 6p per fixing they’re the cheapest fixing I’m showing you today. Their universal application in plasterboard and brick, price and availability - you can get them pretty much everywhere makes them very really easy for us DIYers to use, and also very popular.
TIMco Multi-Fix Stella
And finally we’ve got the Multi-fix Stella from TIMco. You need a wider 10mm diameter drill bit,and a void of about 38mm behind the plasterboard and at approx 0.64p per fixing the price is edging up, but what I love about this fixing is that it’s got a steel nut inside it, which makes its operation very efficient and eliminates the risk of overtightening that’s always there with the all plastic fixings. Available in two length: red 49mm, and for double plasterboard black 59mm, and also with different bolt lengths which means it can be used in brickwork too.

The manufacturers say you can support a TV, Kitchen Cabinet or even a Combi Boiler with this fixing. So pretty heavy duty, but let’s up the ante now and have a look at the real heavy players in the specialist plasterboard fixings.
Hollow Wall Anchors

Hollow wall anchors take the idea of opening up something behind the plasterboard a little further, and this time it’s metal and there are 4 of them. These were my go to fixing in the soft furnishing trade whenever I had something heavy to hang.
As you can see, you either need a setting tool to open up the fixing, or if you’re doing it by hand with a screwdriver it’s crucial you have a turning stop - best to use the hook you’re putting up - between the fixing and the bolt, otherwise the fixing will spin around ruining your wall.
They come in different lengths depending on how much space you’ve got behind the plasterboard and how thick the plasterboard is.
If you’re buying a setting tool, try and go good quality as the cheap ones tend to fail quite quickly (believe me, I’ve had a lot fail on me over the years), and make sure the bolt is properly seated in the tool before you pull the trigger as the little V lever, particularly in the cheaper tools, can get ripped apart by the pan headed bolt.
The beauty of the hollow wall anchor is you drill a reasonably small diameter hole - these are 9mm considering the size of the umbrella that opens up and you can take the bolt out once you’ve set the anchor in position, which you can’t do with the next fixing ….
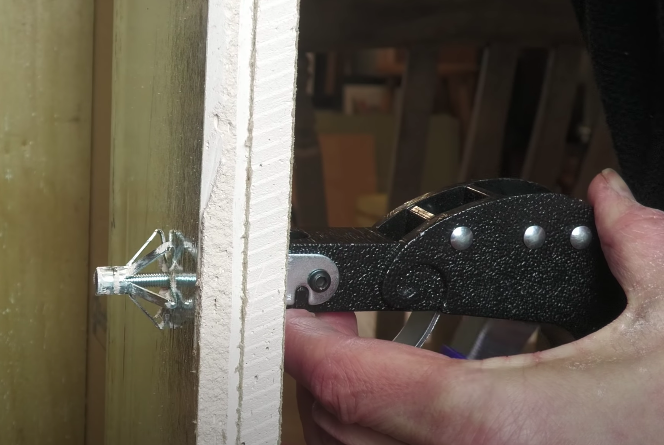
Spring Toggles
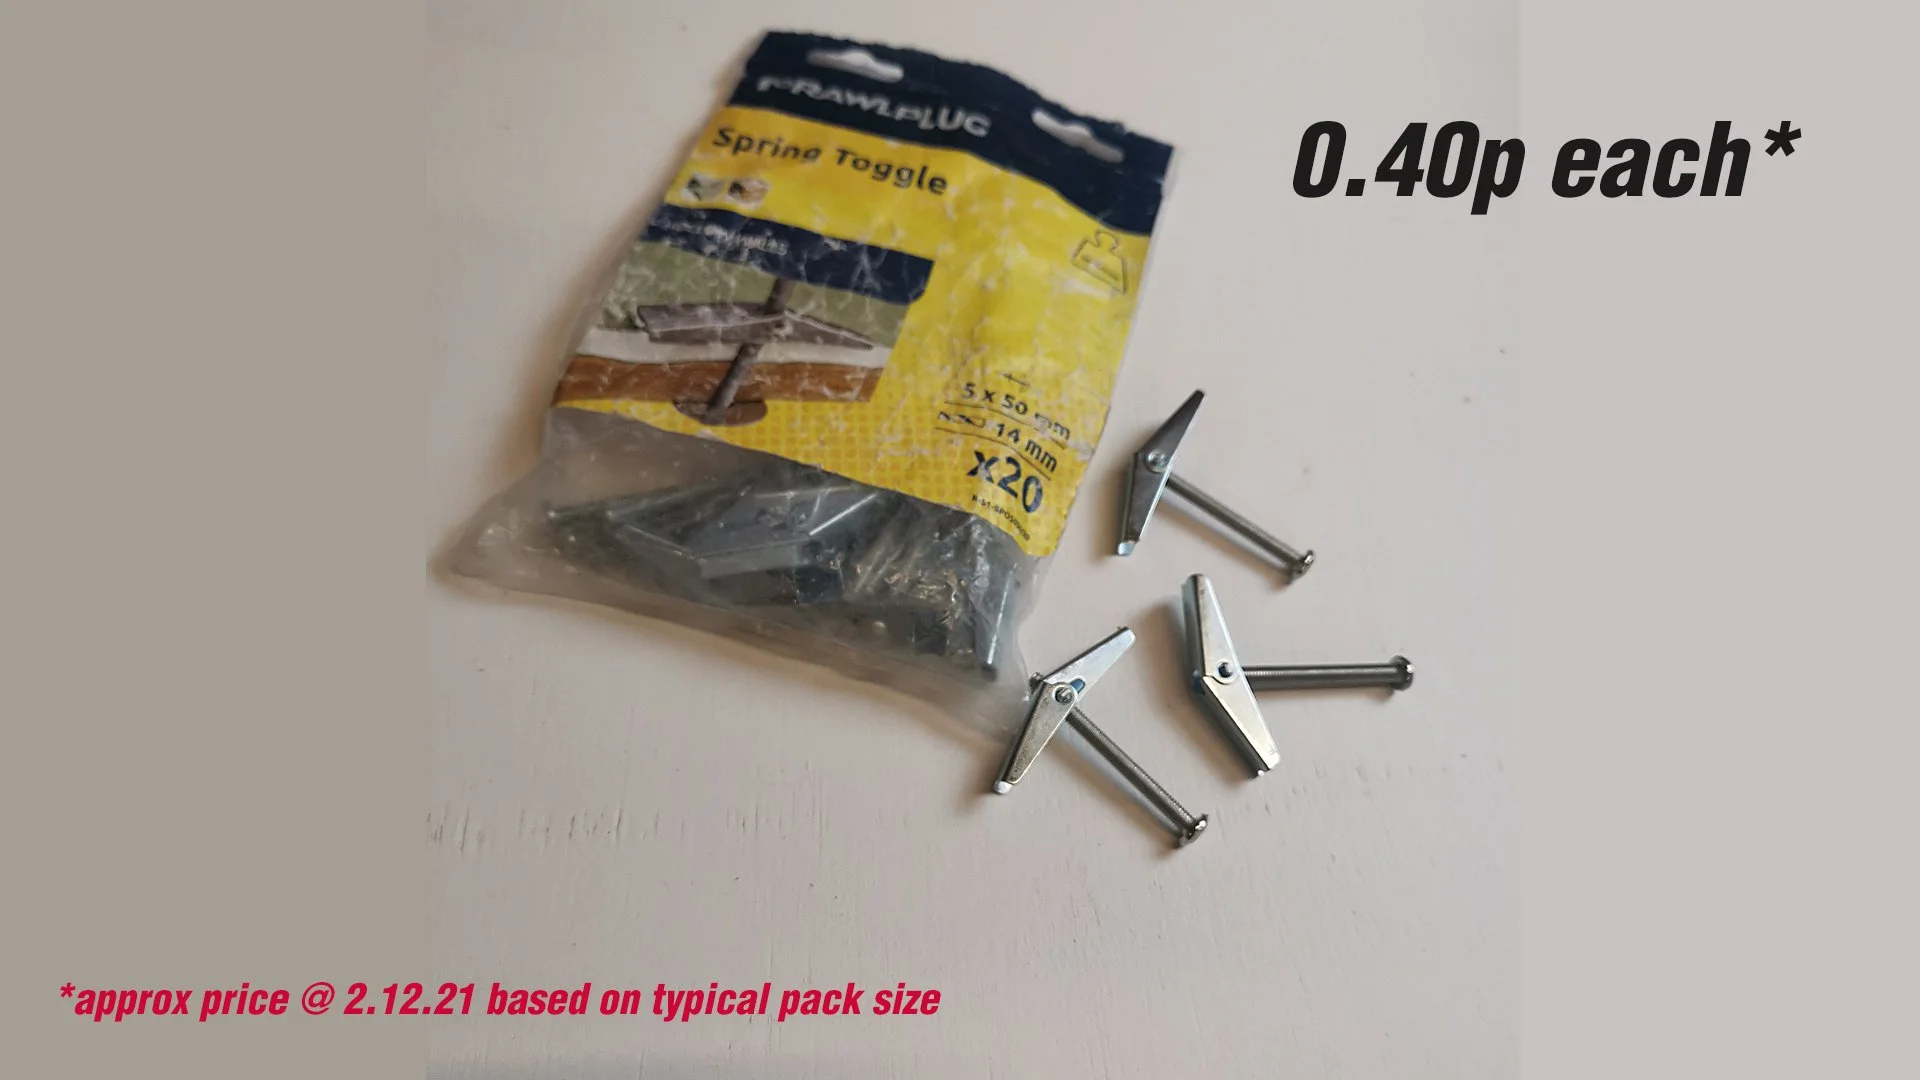
And so we move onto spring toggles. Another fantastic and even heavier duty fixing than the hollow wall anchor at about 75p each, but with a couple of issues. Firstly you have to drill a large 14mm diameter hole, - which leaves the bolt with a lot of play particularly on vertical surfaces, and once the fixing is inserted, you cannot remove the bolt without losing the anchor down the back of the wall. And there’s a third issue. If you’re using these for lath and plaster or otherwise where the space in the void is restricted, it can be difficult to get the toggle to open up in the wall. For this reason, in spite of the undoubted strength of these fixings I rarely used them in my curtain fitting days.
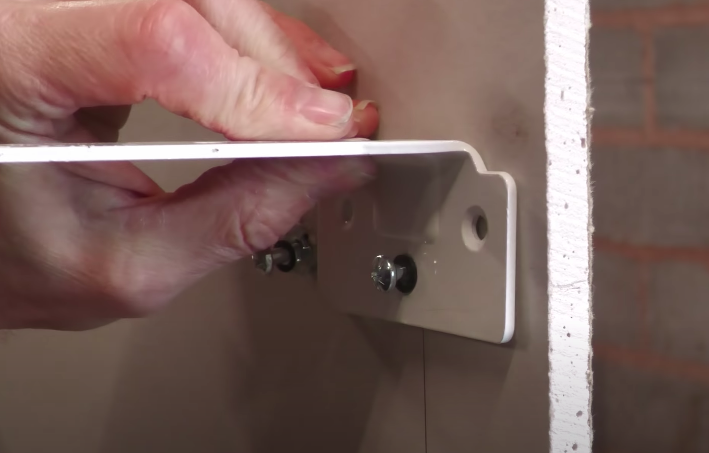
Snap Toggles

So for this reason snap toggles are a better option. With exactly the same size anchor opening up behind the plasterboard and therefore the same 14mm drill size, the anchor itself with no moving parts is stronger and simpler than the spring toggle and the design whereby you slide the fixing piece up what are effectively two zip ties and then snap it off when in position means you can remove the bolt without the fixing falling down the back of the wall.
Fischer DuoTec 10
Before we leave snap toggles, I thought I’d mention Fischer’s own snap toggle offering, in the form of the DuoTec10. Whilst we’re really in the realms of specialist plasterboard fixings now, this one is universal - designed to work in both plasterboard and brick, and I wonder if trying to make it work on both has led Fischer to compromise on what is admittedly quite a clever design.
A few reasons why I say this. Firstly the plug that opens is 40mm wide rather than the 50 of the snap toggle. You’ve got two metal clamps on the back to catch the screw rather than the metal thread in the snap toggle. It does tighten reassuringly well but could be overtightened, and when you use it in brick - which I’ve simulated here in the double layer plasterboard, the screw squews out the side as it can’t travel centrally all the way up the thread, so the compression in the brick won’t be as good as it would be in a traditional wall plug. A clever design but there’s no point buying this when the snap toggle is so much better.

T Bolt

Whilst we’re looking at metal based fixings, I thought I’d mention an ingenious product I came across a few years ago. The T bolt. There are a few things I like about this. Firstly, the all metal construction, apart from the plastic centering plug which lengthens to cater for different plasterboard thicknesses. Secondly, the design means it can be used in walls where the gap behind the plasterboard is less than 20mm, but when fully open - and just check out how it opens when you tighten the bolt - it’s 45mm wide, just marginally less than that snap toggle. We are drilling a slightly bigger hole - a 16mm bit comes in the pack, but that’s acceptable when the fixing opens up so wide behind the plasterboard.

It’s cleverly packaged in different kits to cater for TV mounting, there’s a multi pack with different bolt lengths and heads and brilliantly, a picture hanging kit - so if you’ve got a heavy picture or mirror on a wire, look no further. And the best part of it - this being a question that comes up a lot on my channel, it’s removable and reusable. All these benefits come at a slightly higher price - you’re looking at £1.25 per fixing if bought in a pack of 12.
Schneider Platti Plug
Before we leave this design of plug I just want to say a few sad words as an obituary for the Schnedier Platti Plug. I bought a box of these a couple of years back after an electrician told me how good they were. And they are just such a clever design. Sadly though when I was researching them for this video I found out they have been discontinued due to poor sales here in the UK. At around £2.16 each it could have been the price, or possibly just bad marketing. Either way don’t get excited about this because it is no more.
Bull fix

And so as we near the end of this fixings review, we’re back onto plastic fixings, but don’t let this put you off, because the next two are design and capacity wise amongst the most impressive I’ve reviewed to date.
The first is the Bullfix. It comes in two packs, the universal for cavity stud wall and dot and dab applications where only 7mm cavity is required and the Extra which is a little stronger and can be used for cavity stud walls where a minimum of 20mm cavity is required. You’re paying around 90p and 1.12 per fixing for the universal and Extra respectively if you buy one of these packs, and as with all the fixings shown today larger packs are available which pushes the cost per fixing down.
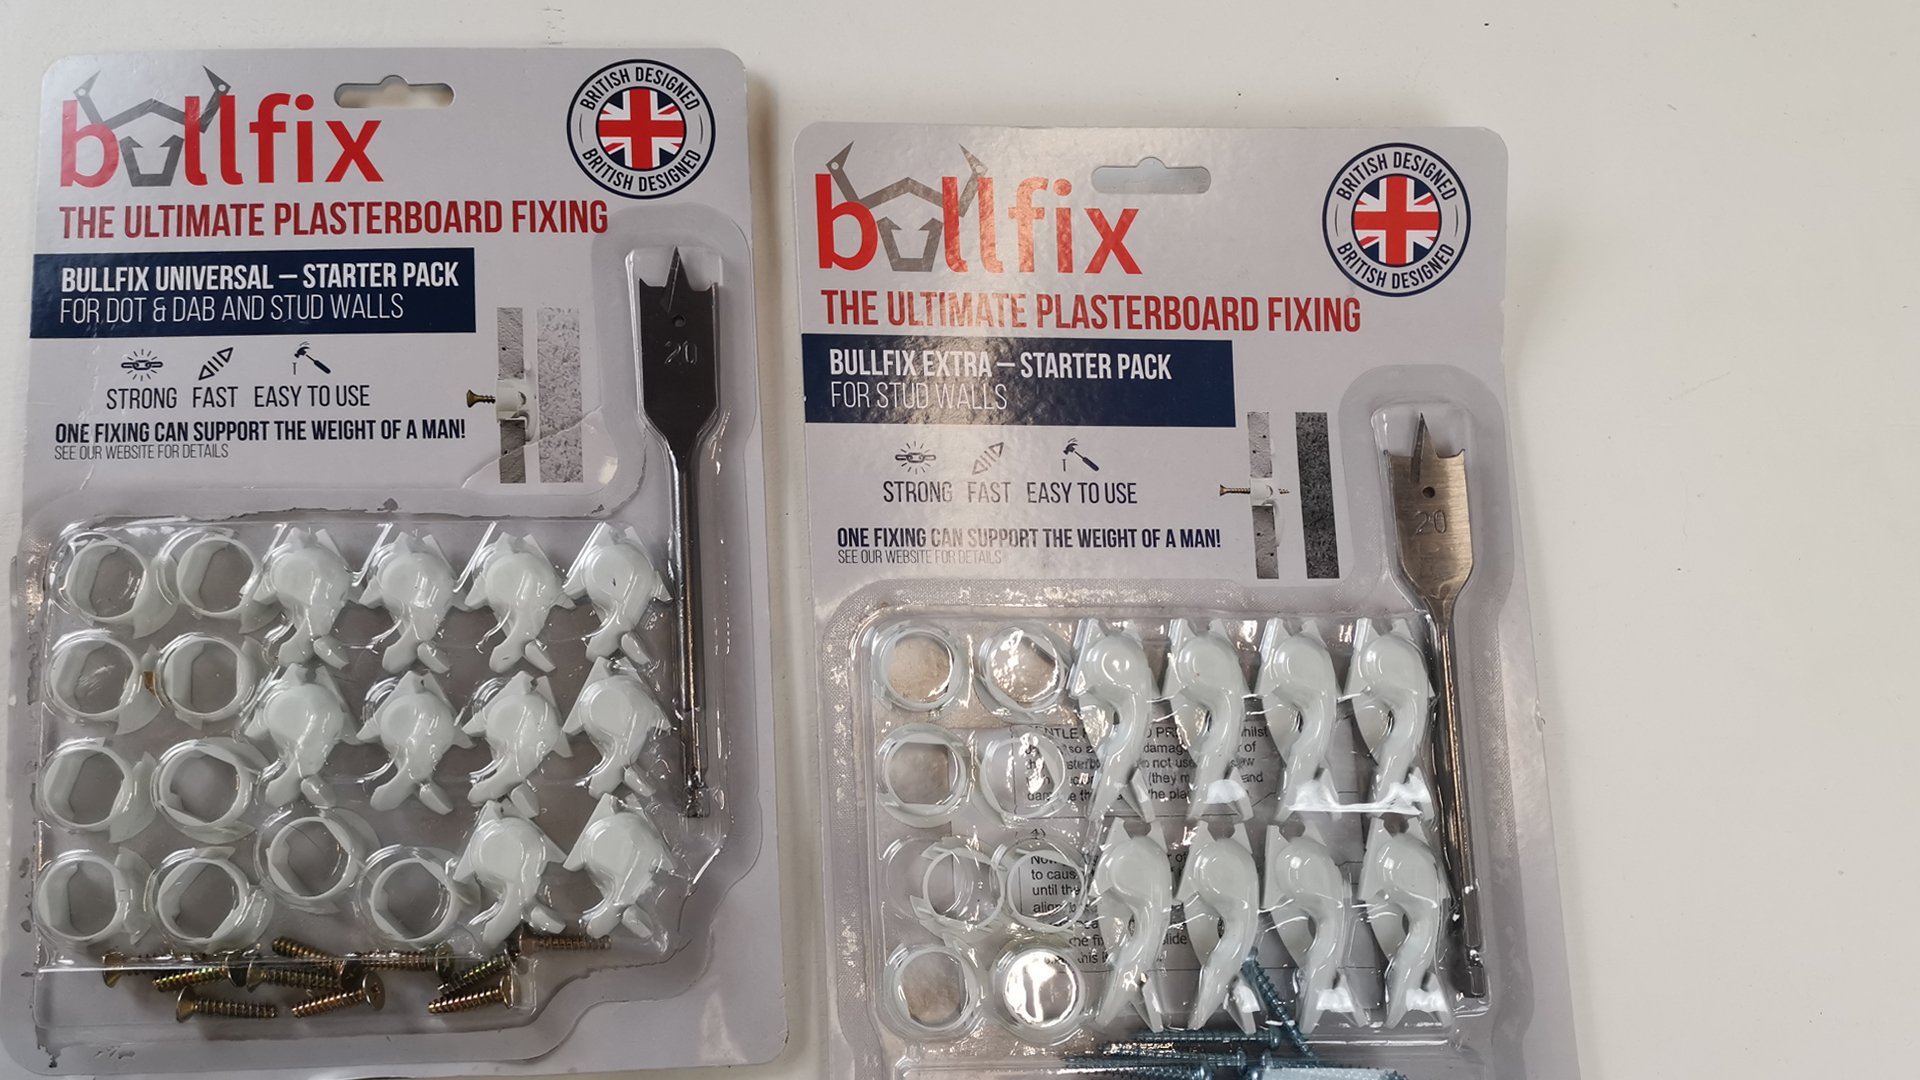
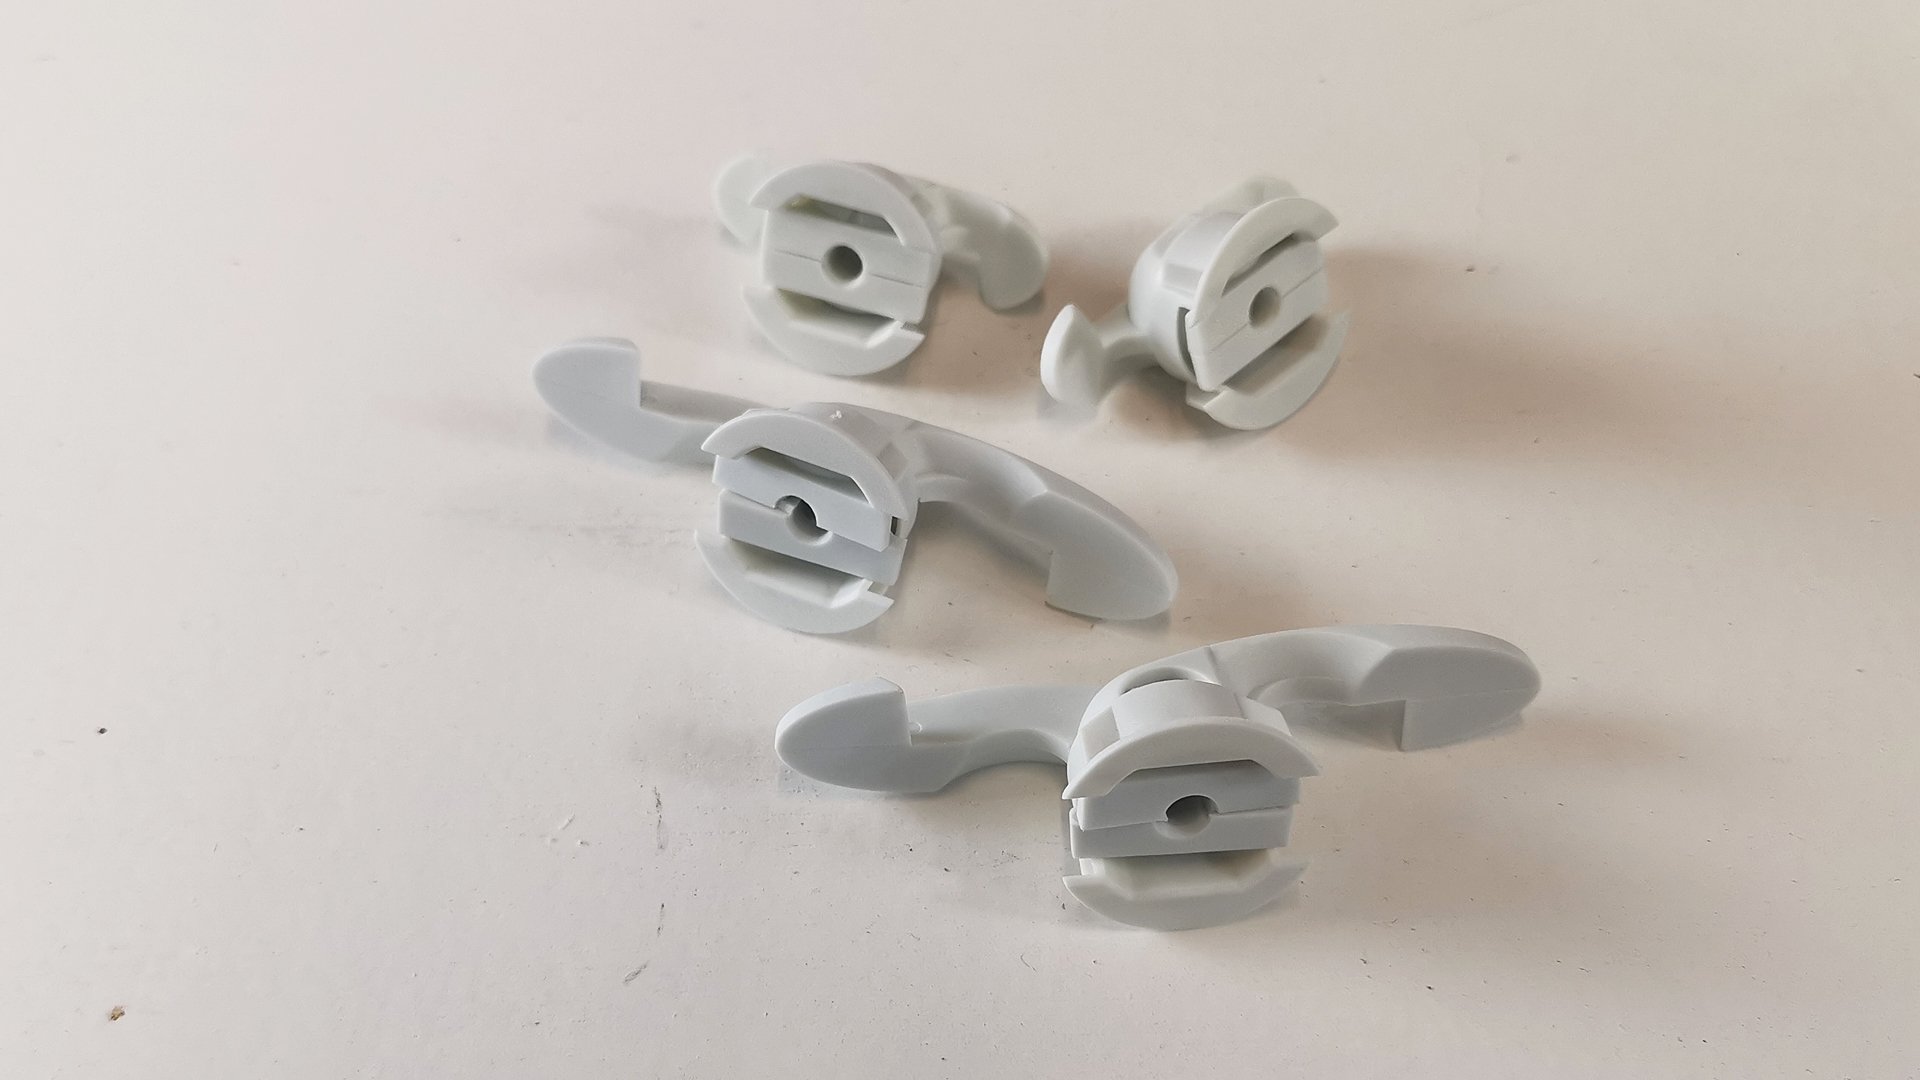
These come with a 20mm drill bit. Again a larger hole, but this isn’t going to compromise the integrity of the plasterboard - at least for the Extra fixing, given the design and length of the wings that open up behind.
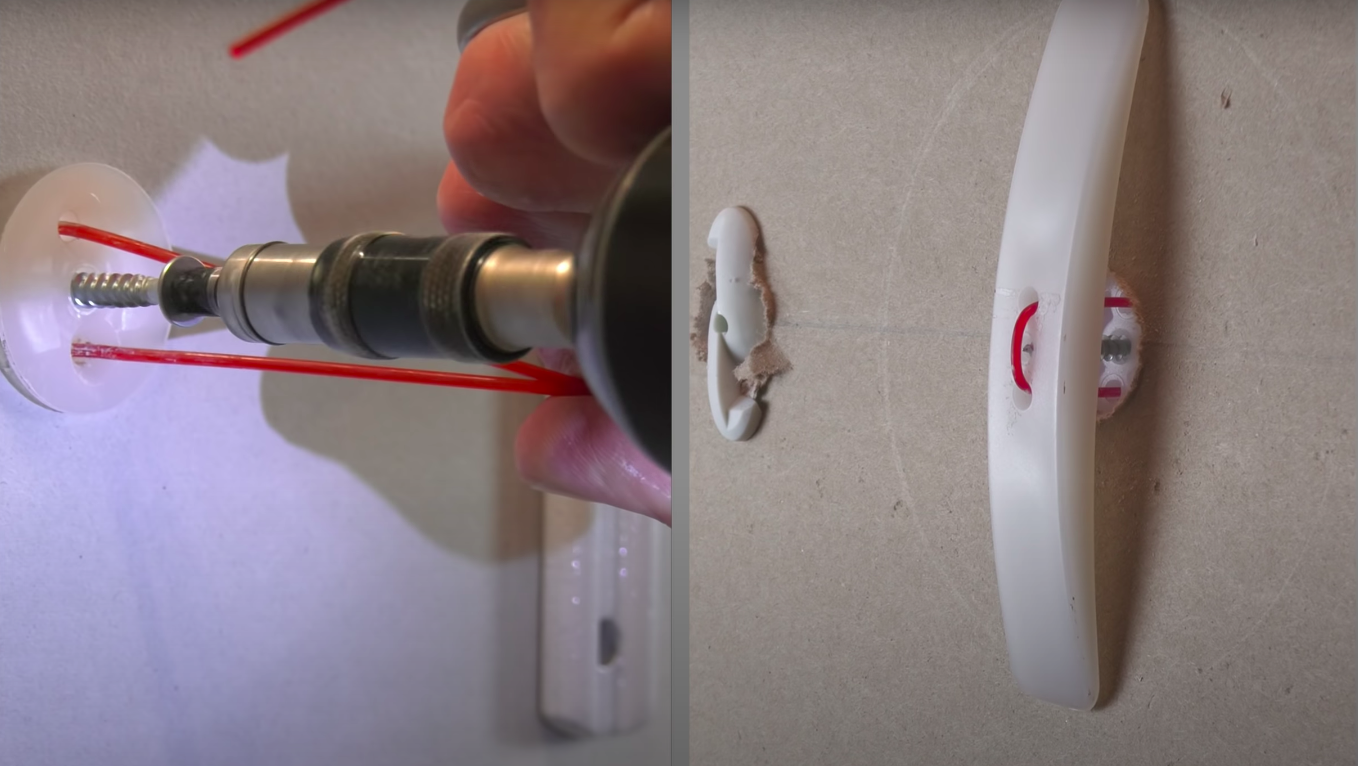
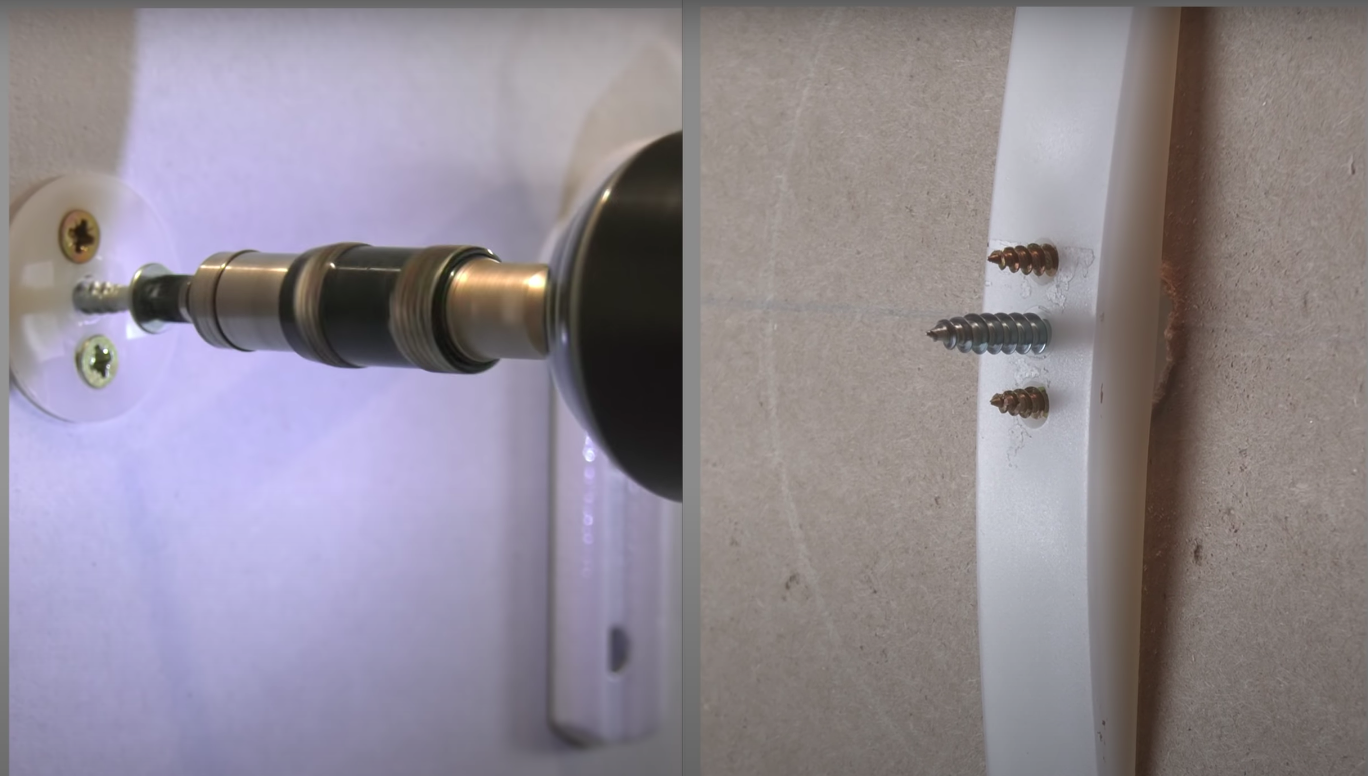
A centring collar fits securely on the front, and then it’s just a question of pushing the fixing into the collar and then inserting the fixing screw - that comes in the kit, but you can use any no.10 or 5mm screw.
For me, I would probably always use the Bullfix Extra, blown away as I was by the huge length of the wing - over 80mm that opens up behind the plasterboard, and also by the fact that it opens easily into a 20mm gap. It’s incredibly impressive that the universal can open up in gaps of 7mm, but in this scenario I would always prefer to use a Corefix to anchor into the brickwork behind. This is a true, heavy duty fixing that I’d use for radiators, TVs, kitchen cabinets - the list goes on. Overall, I’m seriously impressed with this fixing.
Geefix


The wing is so wide at a whopping 12cm, but it’s not compromising the strength of the plasterboard - this is as close as you’ll get to putting an actual pattress into the wall without taking the plasterboard off.
At £2.23 per fixing if buying a pack of 4, it’s the most expensive fixing featured today. But as I said at the start, this fixing is for those jobs where everything else has failed or you want complete peace of mind on the integrity of the fixing when hanging something heavy.
Installation is a little more involved than the others, but still straight forward, as you feed the wing into the hole you’ve drilled, then pull on the blue cord to pull it up tight against the back of the plasterboard, and then insert the circular plug and central screw so that you can pull the cord out. You then insert the 2 smaller screws, and then remove the central screw as this is your fixing screw, although you can also self tap screws elsewhere into the wing if your bracket or hook has screws close together - something none of the other fixings offer.
The other thing you can do with this fixing is use it to refix failed installations in the same position where it’s not practical to reposition the bracket, using a hand made jig to make a new hole. The wing is so wide it will bridge any damage enabling you to then repair the wall with filler once the job is done. We did something similar on a curtain install in the Hebrides. And finally, this fixing is also incredibly versatile for varying wall thicknesses - the thicker the wall, the longer the screw you use. It’s great in tricky lath and plaster substrates, and by trimming the central plug down you can even use it for thin hardboard walls and doors.
It’s a fantastic fixing, and my experience with it since writing this, and yours in the Comments section of my YouTube video, bear testament to this.
the rest
So that’s pretty much it on the fixings review. There may of course be a few of your favourites that I’ve missed, and let me know if there are, in the Comments. For example I used to be a big fan of Fischer’s PD8, which has a bullet that cleverly drives two wings open into the plasterboard. But again like the UX6 I found it pulled out far too easily when making this vid. I’ve been secretly impressed with the Cobra Driller Toggle. And whilst the Duck Foot has had pretty awful reviews, again it performed okay, except for swivelling around, so as you can’t guarantee the optimum vertical position, this is probably one to avoid.
Does it matter that these fixings have an unbalanced wing? Not really, as all the pressure is exerted in the section above the bolt, which is why you always want to align your anchor vertically as I’ve been doing.
Speaking of self drilling fixings and things to avoid, in every plasterboard fixings video I tell you just how dreadful the self drill speed plug fixing is, or ‘helter skelter’ as we called it in our trade. There’s nothing opening up behind, just the thread in a very brittle plasterboard. I encountered so many failed installs with these in the old day job, so please avoid unless you’re using them where there’s a sheer rather than cantilever force e.g. to hang a light weight picture.
Also on the avoid list are Tap It fixings. I mean, why would you bother with something that’s just so flawed. And DeWalt, I know they’re only light weight, but please don’t tell people your universal screws are good for plasterboard, because they just aren’t. And in case you wonder why I haven't featured Gripit, I've done videos on this in the past. I don't like it because I think the hole you have to drill is far too wide considering what a tiny wing opens up behind.
insulated plasterboard
I often get asked what fixings work well in insulated plasterboard. So I thought I’d hand pick the 4 that would have the best chance of forcing themselves open inside the foam insulation and put them to the test.
I picked the M5x52 hollow wall anchor, which I’ve always told people works well, so fingers crossed. I also thought the Tbolt would have a decent chance, the Timco Stella multi fix, and finally the Fischer Duopower 8x40mm.

It’s a good challenge this because I really am fixing totally blind. And carefully peeling off the insulation, you can see that each fixing has opened up absolutely beautifully.
loads
So everything I’ve told you today is just my opinion, and this video would lack its final bite if I didn’t pit most of these fixings against each other in a final load test. Two reasons this is important. Firstly, because if you try and study load figures given for each fixing they’re a confusing jumble of tension, sheer and cantilever forces with kilo newtons through in just to completely fry your brain.
Secondly, at the time of writing this it had been cold all week, as you can tell by how I’ve been wrapped up. It’s not damp in here but the outdoor weather and this unheated room is bound to have impacted on the strength of the plasterboard. However if I carry out an identical cantilever force test on each fixing, then that’s fair, right?

So I bought these heavy duty scales and constructed a basic load testing machine with a rope, scrap of birch ply for a foot pedal, and two basic bolts to hold the scales in position on the bracket. I accept this is a bit crude, but again, its consistent.
Finally I put a metal strap below each bracket, to prevent the bracket base simply cutting through the plasterboard - thereby ensuring all the force is instead pulling against the fixing. I forgot to do this at the start with the Geefix, which meant the bracket failed a whopping 18kg earlier than it should have.
To do the test, I focused my main camera on the scales and played the results back in slow motion to record the highest weight each fixing could take before it failed.
I chose most of the fixings, ignoring the spring toggle because we’ve got the superior snap, bringing in the Cobra driller toggle out of curiosity to see how it would perform, and also giving the red GripIt a chance, being conscious how unfair I’ve been about it. I should point out that I used their old design here - the new wings do look slightly larger possibly making the fixing stronger than the one I’ve got.

Coming out top was the Geefix, failing at 54kg, closely followed by the Snap toggle at 38. The Bullfix was closely behind in third, and my old favourite the hollow wall anchor came in at 4th. And the big surprise for me, the Cobra driller toggle handled an impressive 31kg. The T bolt was perhaps rather disappointingly 6th at a nevertheless still impressive 29 kg. Next came the Stella at 27kg, a still impressive load considering the design, with the Duopower just behind at 25kg and predictably, for me, the GripIt was bottom of the table at 22kg - but remember I’m using an old design of the fixing.
conclusions
I know this has been a long video but I wanted to keep everything under one roof rather than splitting it into separate videos, to give you as comprehensive a run down as possible, and also to give you an insight into how I think, when I’m fixing into plasterboard.
I guess you need to go away now, work out what kind of plasterboard wall you’ve got - stud or dot and dab, work out how much space you’ve got behind the plasterboard, and then choose the fixing you think would do the job best.
See you soon! Once again, massive thank you for reading and watching. Feel free to leave a comment below and let me know how you get on with your own project.
Oh, and if you’re new to my YouTube channel, click on the link here to subscribe!
I’m always looking for ways to make this sustainable now I’m doing it full time, so if you like my content and to help me keep providing it here on this channel for free, I would be so grateful if you could visit my Patreon page, to support me. For just £5 per month, you have daily contact with me through my Discord member forum behind the scenes videos and automatic entry to my free monthly giveaways. Please click here.
* The Amazon links above are affiliate links. It doesn't cost you anything to click on them but I do earn a small commission if you do.
And here's the legal bit I have to state: As an Amazon Associate I earn from qualifying purchases.