
How To Hang a TV On A Hollow Wall
I thought I’d talk you through everything I’ve been through putting up a new TV - because some interesting things have come out of it, in particular:
Stud detection
Hole cutting with multitool
Impact drivers compared with hammer drills
The benefits of hole saws
Making your own ethernet cables
Filling screw holes
And I should point out I had no clue how I was going to fix the TV up before I started this project - not knowing what I was going to be anchoring into. I have ended up screwing into studwork because that’s the strongest fixing you can get, but if you’re after a plasterboard fixing, you might like to look at my recent comprehensive run through of all the best fixings on the market here.
master plan
So, I started this off with a very rough plan. I’m replacing my old TV and installing a new 50" LED TV on a hollow wall - Samsung 50 Ich BU8000 UHD Crystal 4K Smart TV. I’m no expert on LED TVs but this is one of Samsung’s entry level models - I was trying to find something as cheap as possible in this size.
I’m putting it up as low as I possibly can on my fireplace. We’re actually hoping to demolish the fireplace so I don’t really care too much about what happens with it!
how to detect studs
So, some of you will know that I used to fit a lot of curtains and blinds in the past in our old business, and one of the things you try to do is work out where the noggins or beams are behind plasterboard. You can do that with a simple tap test. Another way to validate this is with a metal detector or stud detector. I’ve personally found metal detectors better, and whilst mine is discontinued, the Bosch Truvo is the replacement model.
I’m hoping to put my observation panel in and hopefully missing the stud I believe is behind the plasterboard.
Now the other option, which is possibly cheaper than getting a stud or metal detector, is to get a strong magnet. You can hover it around the ceiling until it hits the screw beneath.
using a multi-tool
To excavate, I used my old Ryobi Multi-Tool which I put a new blade on to make my life as easy as possible.

Goggles, check. Ear defenders, check.
Holding the tube of my Henry vacuum right up against the cut allowed me to collect pretty much all of the dust generated by the cutting process.
On two sides of the cut I hit something above the plasterboard, suggesting I was midway through a stud here, with the blade slipping right through to the void on the other two. This meant either no stud work at these points, or perhaps the blade was going in between the stud and the wall.
With a painter’s knife, I tried to lever out the box-shaped cut I made. I wasn’t sure what was holding it in at that moment!
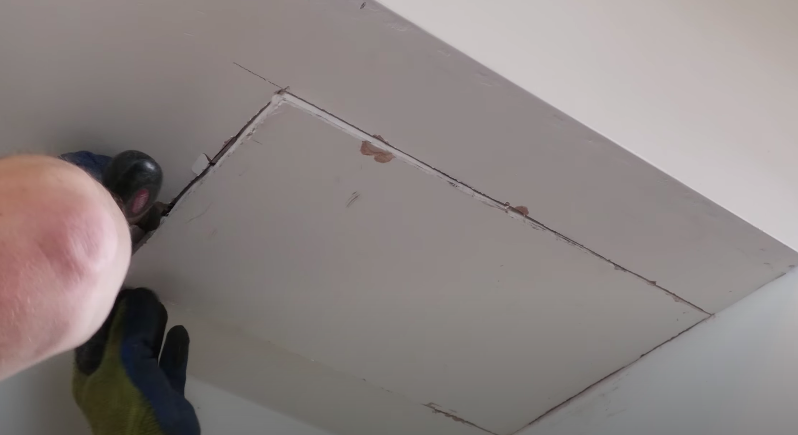
And happy days - here were the two dry wall screws we picked up with the metal detector!
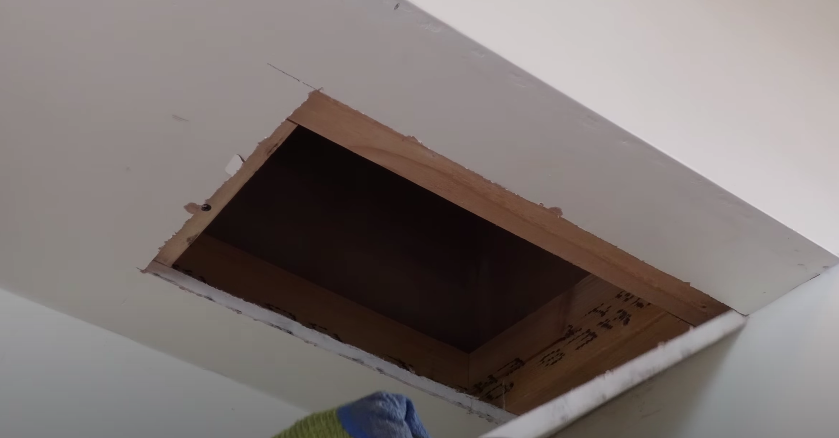
I had a lot to complain about on the build of the chimney breast back in 2010 when we moved into this house, but to give the carpenters their due they did a good job of supporting the fireplace!
The filled in arch was basically supported with 4 x 2 inch stud work. Some would say over-engineered. This suggests that the cracking around the front was more because the plasterers didn’t use scrim tape around the arch.
fixing points
So, I needed a plan for fixing the TV bracket to the wall…
With any luck, I could re-use the old TV wall mount - luckily I’d kept the old box which it came in, that had lots of different sizes of bolts and spaces for fixing the brackets to different TVs.
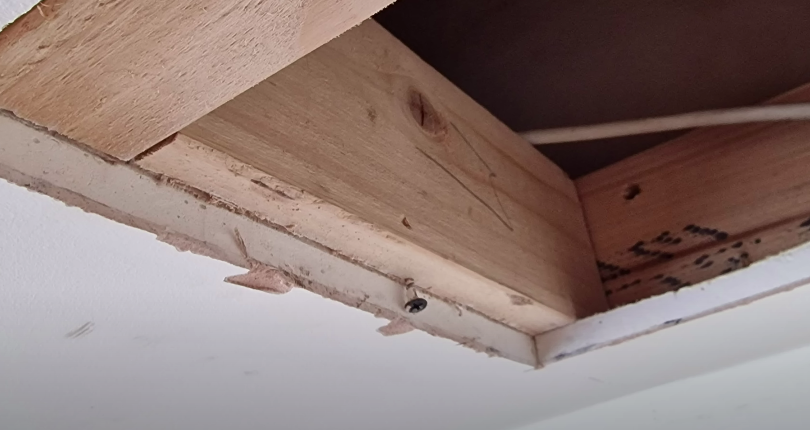
I knew from sticking my phone up into the void there was a 4 x 2 inch stud running the length of the bottom of the arch. I wanted to fit my screws right into the middle of this.

I could then work out where to put my screw holes. I decided to put some studs, or patch scissors as they are often called, behind the plasterboard to take those top two fixings which would be taking the majority of the weight of the TV.
Drilling those holes was an easy way to mark the positions of the studs.

I wanted to bang the joist into the vertical so I can screw into it, but it’s quite hard to bang a joist into position when it’s flush like this.
So what I did was take the corners off to see if it makes it any easier - a little idea I got when I was fitting the solar panel brackets in the summer! They had a similar design allowing you to twist the bolt lugs to the vertical once they’re located inside the aluminium rails. I sanded the opposite edges on each stud which enabled me to tap each one into position.
I’ve had a tiny little spirit level , for which I could just about see that the beam is as level as it needs to be. Couple of screws - one at an angle from the inside, and one from below outside. And now, the two studs were fixed in position. This left me with the easy job of attaching the wall brackets with 6 x 70mm screws.
impact vs hammer action
Now, I used my impact driver here, which I hardly ever use. The thing about impact drivers is that they have a hammer action which works radially, in a circular action, which makes driving in screws so much easier. A lot of people say that surely that’s just like putting a Combi-drill into hammer action mode - but no, it isn’t. If you put a Combi-drill into hammer action mode, the hammer action is working in and out in the line parallel with the drill bit. You’re definitely not achieving the same effect.
Whether you need one of these impact drivers is a different matter…
For jobs like this it’s rather useful, but to be honest I hardly ever use it, opting for my light drill driver instead:

I had to press reasonably hard, but it does the job just fine! Don’t forget, this is only a 12 volt drill driver.
Back to the impact again, and I had to put my ear defenders back on for this!

That was admittedly so much easier, you don’t have to put almost any pressure on the screw compared to the drill driver. But, will you be using an impact driver often to justify buying one?
hole saws
I was nearly done, and just had to drill a couple of holes in the plasterboard for the cables, to avoid a massive mess of cabling. I don’t use this hole saw set that often, but it’s an incredibly important thing to have in your tool box.
I also drilled a larger hole through the chimney breast with my 25mm SDS bit, in the hope this will be wide enough to remove all the cables. back to the plug socket, set top box, and ethernet sockets.
diy ethernet cables
Now, one thing I did back in 2010, on the advice of a friend, was route network cables from each room downstairs to a cupboard under the stairs where my Modem was. They were looking a bit dated now! As I ran out of cash, I never at the time installed a network switch to patch the cables into. But this does mean I’ve got an ethernet socket on the other side of this chimney breast.

I wanted to create a short network cable to connect the TV to that ethernet socket, rather than rely on the Wi-Fi connection.
I wanted to show you how I tend to do this, as I make all of my ethernet cables myself. It’s very easy to do, and very satisfying. All you need is an RJ45 crimping tool, connectors, and in my case here some old CAT5E cabling.

There’s an industry standard on what order the colour coding of the cables should be in at both ends of the cable, as shown here.
You just have to make sure you untangle the cables, get them in the right order, and slide them into the RJ45 connector, then crimping them off using the tool.
The only complexity to this is that in this situation, with a straight-through connection like I’ve done here, you’ve got the colour coding in the same order at each end of the cable. But for some connections, called crossover connections (e.g. where you’re connecting two computers or two Modems ), you have to slightly change the order of the cables so that the input at one end matches the output of the other device. Thought I’d just mention that quickly!
I asked everyone on my Discord forum about this, and I’m grateful as ever for them pointing out that crossover is a rarity these days with auto-crossover part of the gigabit standard. Sam also pointed out that with pass-through connectors the tools cut them flush, making it a lot less fiddly to wire them up.
But these components are cheap, and if you’re doing a lot of networking at your home it’s incredibly useful to be able to make up your own cabling.
tv install
So I was pretty much done, and all that remained was to connect the HDMI, ethernet, and power leads to the back of the TV, thread the cabling into the newly drilled hole, and hang the TV on the wall.
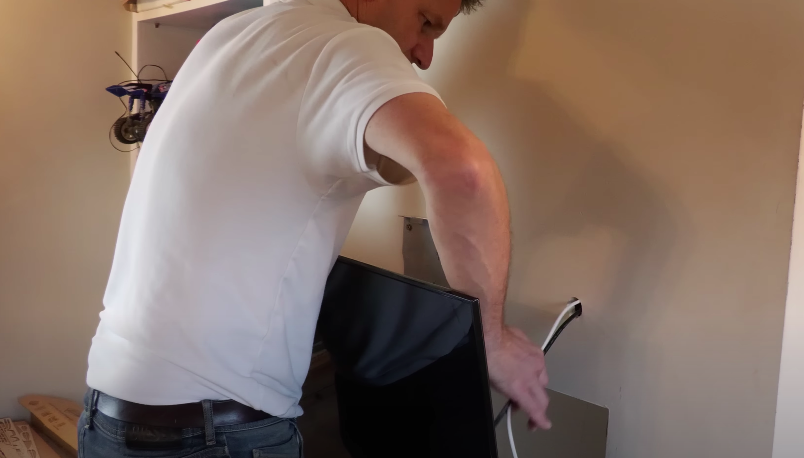
I quite like this bracket, it obviously doesn’t swing but I’ve built in a slight downward tilt with those spaces and longer bolts, and also you can adjust the level with the two fixing screws on the top.
With the cabling connected, the TV setup was pretty straight forward.

As the chimney situation is temporary, I didn’t worry too much, and for the time being I’ve just put a few dry wall screws here.
I had to pre-drill, because the plasterboard is a bit brittle, and quite near the edge. But that’s it, all done!
prep holes for filling
How do you prep the hole with the wall plug in for filling?
Well, if you’ve got screw holes left behind, there are a few ways you can deal with them.
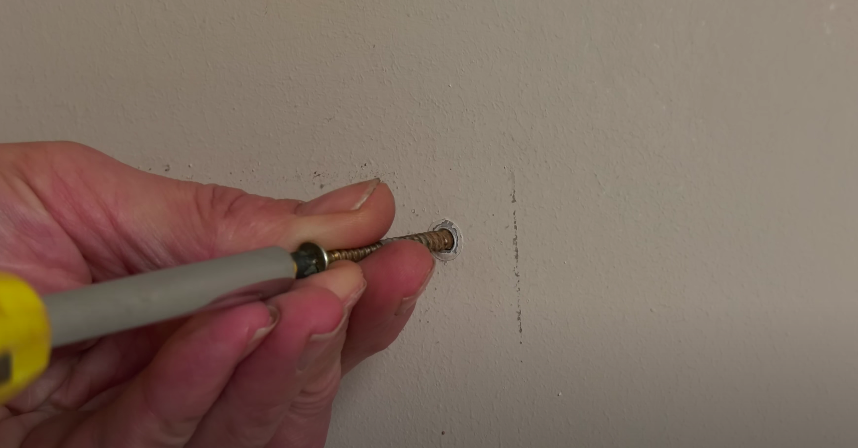
First thing you can do is try and lever out the plug before filling the hole. The way you want to do this is with a screw - you don’t want to go in too far, because you could risk pulling the plaster away when you leave the plug out, and this is always a risk anyway.
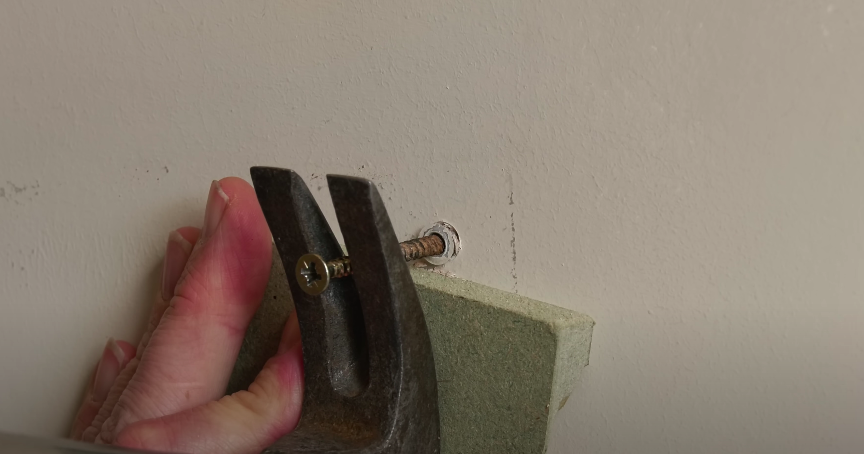
You then want a bit of wood or something to protect a wall when get your claw hammer out, and then you want to just gently try and pull the plug.
Option number two, you get a screw that’s much bigger than the screw you used, and you try and indent that plug into the wall a little bit. This will work if your plug wasn’t sent back the full depth. The benefit of that is you don’t have to put quite as much filler in. And you need a screw that’s much bigger, because if you try to use a smaller screw, chances are it’ll just push the screw into the plug.
Now option three, if for whatever reason neither of those options were available, is getting a razor blade and simply scoring around the outside of the hole, and taking off the front of the plug. You want to end up with none of the plug actually sticking out from the surface. Obviously with this option you do end up with more damage around the plug itself, and therefore a little bit more of a hole to fill.
filling the holes
So let’s end with a quick explanation about filling those holes where the TV bracket used to be. Now I always favour the filler that you have to mix with water - you’ve got this dec-patch, or I also use this Gyproc EasiFill as one of my favourites. It has far superior performance to the fillers you get in a pot - which often shrink.
In terms of filling that hole, you want to get yourself a continental filler knife - I absolutely rave about these, they’re fantastic for jobs like this.

Starting with the ready mix poly-filler, it has a mousse-like texture, and sort of has the consistency of expanding foam before it’s set.
I haven’t used this particular poly-filler at all, but it’s actually not a bad consistency. You push it into the hole as much as possible, trying to prevent shrinkage. It’s easy with the continental filler knives to tool the filler! Leave it very slightly raised from the surface so you can sand it when it’s set.
Next up it was a dec-patch, which I quite like using because it contains marble dust that gives it a very smooth consistency. Small quantities like this, I go against industry wisdom by adding water to the powder rather than the other way round. It gives you much more control over how much you’re making. You want to end up with a nice and smooth but reasonably firm mix.
Then it was into the hole, like the poly-filler, again leaving it slightly raised from the surface.
When it comes to sanding, I don’t use a 3M rubber sanding block anymore, I tend to wrap a 180-grip sandpaper around a wooden block, because you tend to get a much flatter end result when you’ve sanded the filler.
So that’s it! Hopefully some of these DIY processes will be useful for you on your projects. I’ll leave some links below for the items I used …

today's toolkit
- Samsung 50 Ich BU8000 UHD Crystal 4K Smart TV (Amazon)
- Bosch Truvo Detector (Amazon)
- Bosch 9pcs HSS Hole Saw Set (Amazon)
- RJ45 Crimping Tool, connectors and tester (Amazon)
- RJ45 Connectors (Amazon)
- Easi-Fill (4kg snagging pack)
- Milwaukee M12 BPD BPD percussion drill driver (Amazon)
- Trend Impact Driver (no battery) (Amazon)
- Trend 5AH battery (Amazon)
- Trend Fast Charger (Amazon)
Thank you so much for reading, and please leave comments below to let me know how your projects go.
Oh, and if you’re new to my YouTube channel, click on the link here to subscribe!
As usual, I’m always looking for ways to make this sustainable now I’m doing it full time, so if you like my content and to help me keep providing it here on this channel for free, I would be so grateful if you could visit my Patreon page, to support me - lots of exclusive content. For just £5 per month, you have daily contact with me through my Discord member forum behind the scenes videos and automatic entry to my free monthly giveaways.
I thought I’d also mention a new shopping platform that I’ve been using recently. WeShop is a new concept merging social media with shopping. You can get 20% of the value of each order you make through the platform in shares - they’re giving away 90% of the business to those who shop on it.
Over the last ten years, I’ve been a bit addicted to Amazon, so I’m trying to start helping and reconnecting with other UK retailers who are signed up to the site. I’ve bought anything and everything from dishwasher tablets to nail guns.
You also get access to an exclusive connection of my own videos because I post regularly about all of the things I like using. If you recommend friends, you get a small referral commission (as I do from you if you come onboard). You can download the app from Google Play or the Apple Store, and simply need to sign up using my name ‘charliewhite’ - all one word. Have a bit of fun and let me know what you think!
Now I don’t know quite how this will pan out, I don’t know what will happen to the WeShop platform or how well it will be taken up by the British public. But I’m buying things I would be buying anyway, I’m supporting British retailers, and getting a potential nest egg of shares. Have a play around with it and let me know what you think.
* The Amazon links (if any) above are affiliate links. It doesn't cost you anything to click on them but I do earn a small commission if you do.
* I'm not being paid anything for the WeShop mention here, but I do earn a small % of shares if you sign up through my link, but it doesn't cost you anthing to do so, and once you're in, you can start earning shares from referring friends too!